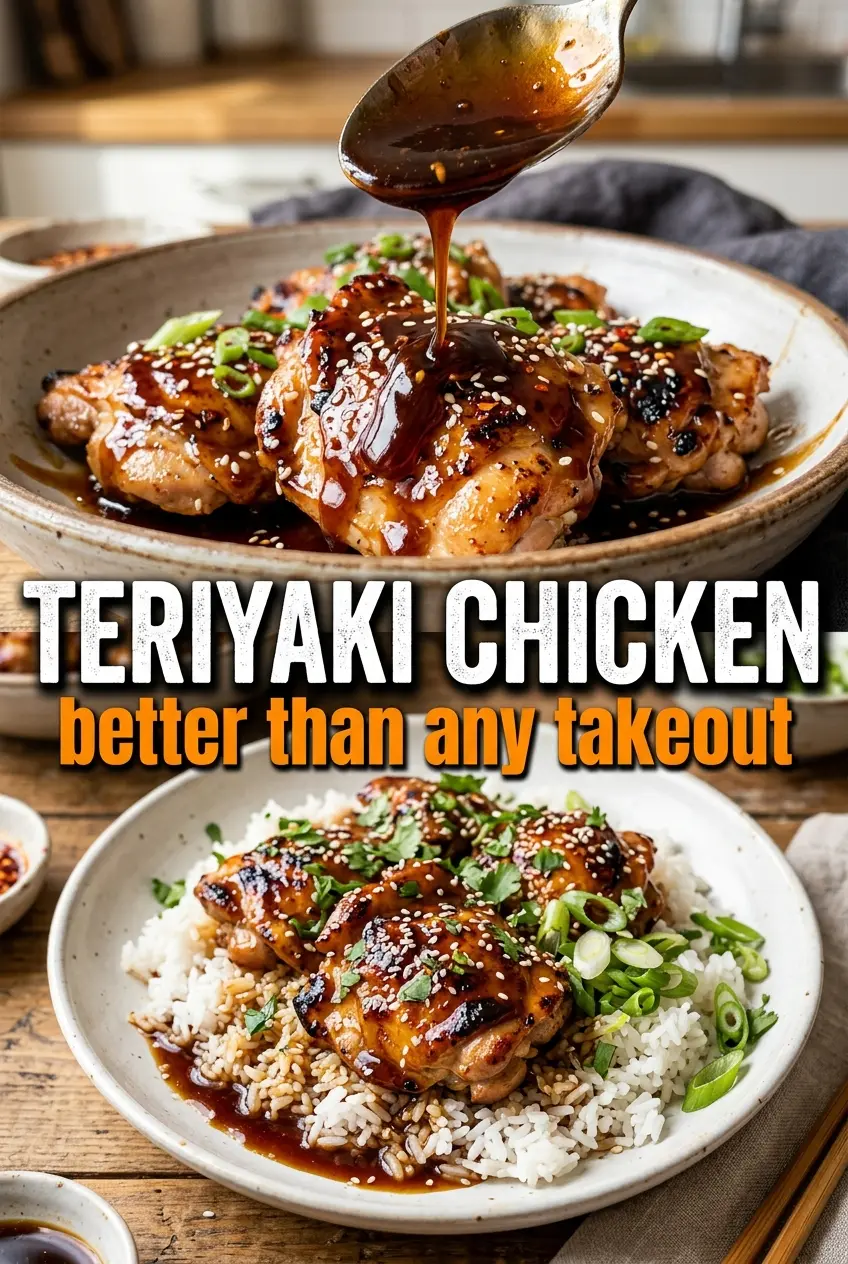
Sticky teriyaki chicken lands in that sweet spot between takeout comfort and weeknight practicality. The chicken thighs brown hard in the skillet, the sauce turns glossy and dark amber, and every bite gets that salty-sweet hit that clings to rice instead of sliding right off it. When it’s done well, the sauce looks lacquered and the edges of the chicken have those little caramelized blisters that tell you the pan did its job.
The trick here is splitting the sauce before the chicken goes in. Half becomes the marinade, and the other half stays clean so it can be boiled into a proper glaze later. That keeps the finished sauce from getting cloudy or thin, and it gives you enough body for the cornstarch slurry to work without turning the whole thing pasty. Chicken thighs are the right cut for this because they stay juicy through the high heat needed for good color.
Below, I’ve included the detail that matters most: how to get a sticky glaze without burning the sugar, plus the swaps that still give you a solid teriyaki dinner when you’re missing one of the ingredients.
The sauce thickened up into that glossy coating instead of staying watery, and the chicken stayed juicy even after tossing it back in the pan. My husband kept picking at the crispy caramelized edges before I could get it over the rice.
Save this teriyaki chicken for the nights when you want a sticky homemade glaze and fast skillet dinner without ordering out.
The Reason the Sauce Sticks Instead of Slipping Off
Teriyaki sauce only gets that clingy, glossy finish when it’s reduced in the pan after the chicken comes out. If you simmer the whole marinade with the chicken still in it from the start, the sauce tends to water down and the sugar can scorch before the cornstarch has a chance to thicken it properly. Keeping one half of the sauce clean gives you a better texture and a more balanced finish.
The other thing that matters is heat control. Medium-high heat is enough to brown the thighs and build those dark edges, but once the sauce goes in, the burner should come down to a steady simmer. That’s where the glaze tightens. Boiling it hard can make it taste harsh and can break the smooth sheen you’re after.
- Chicken thighs — These stay tender while the sugars in the sauce caramelize. Breasts can work, but they dry out faster and don’t give you the same juicy bite.
- Soy sauce — This is the backbone of the flavor. Use regular soy sauce for the right salt level; low-sodium works too, but the sauce will taste a little lighter and may need a pinch more salt at the end.
- Mirin — This adds sweetness and a clean, rounded finish that vinegar alone can’t match. If you need a swap, rice vinegar works, but the sauce will taste sharper, so keep the honey as written.
- Cornstarch slurry — Mix it with cold water before it hits the pan. If you dump dry cornstarch straight in, it clumps and you’ll chase lumps instead of getting a smooth glaze.
- Sake or dry sherry — Optional, but it adds depth and keeps the sauce from tasting flat. If you skip it, the recipe still works; just don’t replace it with plain water unless you need to loosen the sauce at the very end.
What Each Ingredient Is Actually Doing in This Recipe

- Primary ingredient (the star) — Quality matters most. Choose the best you can find.
- Cooking medium (oil, butter, or broth) — This carries flavors and prevents dryness.
- Seasonings (salt, pepper, spices, herbs) — Layer flavors so nothing overpowers. Build depth gradually.
- Aromatics (garlic, onion, herbs) — Cook with fat to bloom flavors. Become the foundation.
- Supporting ingredients — Complement the main ingredient without overpowering it.
- Sauce or liquid (if applicable) — Brings flavors together. Balance richness with acid.
- Acid (lemon, vinegar, wine, or other) — Brightens and prevents flat-tasting results.
- Final finish (garnish, glaze, or sauce) — Prevents one-dimensional taste and adds visual appeal.
Building the Glaze in the Right Order
Mix the Sauce Before the Chicken Touches It
Whisk the soy sauce, brown sugar, honey, mirin, sake, garlic, and ginger until the sugar starts dissolving and the mixture looks smooth. Then split it in half right away so one portion stays clean for the pan sauce. If you marinate the chicken in all of it, you won’t have enough reserved liquid to turn into a proper glaze later.
Marinate Just Long Enough to Season, Not Cure
Twenty minutes is enough for the chicken to pick up flavor without turning the surface mushy. Set it aside while you get the pan ready. A longer soak doesn’t help much here because the sauce is bold and the chicken is going into a hot skillet, where the real flavor builds.
Brown the Thighs Until the Edges Go Deep Amber
Cook the chicken in a thin layer of oil over medium-high heat and leave it alone long enough to form color. If you move it too soon, it will stick and tear instead of releasing cleanly. You’re looking for dark golden patches and cooked-through chicken with the center at 165°F. Pull it out once it’s done; overcooking it now means dry chicken later when it goes back into the sauce.
Turn the Reserved Marinade Into a Sticky Finish
Pour the reserved sauce into the hot pan and bring it to a simmer, scraping up the browned bits from the bottom. Stir in the cornstarch slurry and cook until the sauce turns glossy and coats the back of a spoon, usually 2 to 3 minutes. If it stays thin, it hasn’t simmered long enough. If it looks dull or grainy, the heat was too high and the sugar started to overcook.
Coat and Serve While the Glaze Is Still Fluid
Return the chicken to the pan and turn it in the sauce until every piece is lacquered. It should look shiny and cling in a thick layer, not pool at the bottom of the skillet. Serve it right away over rice with sesame seeds and green onions, because that glaze is at its best while it’s still warm and silky.
How to Change This Without Losing the Teriyaki Character
Make It Gluten-Free
Use tamari in place of soy sauce. The flavor stays close, but tamari usually tastes a little rounder and less sharp. Check the label if you’re cooking for someone with celiac disease, and keep the rest of the recipe the same.
Make It Dairy-Free and Weeknight-Friendly
This recipe is already dairy-free as written, which is part of why it works so well for fast dinners. Keep the sauce and chicken exactly the same, then serve with rice and steamed broccoli for a full meal without changing the texture of the glaze.
Swap the Protein
Boneless chicken breasts or thighs both work, but breasts need a shorter cook time and a little more attention so they don’t dry out. You can also use tofu if you press it first and brown it well before adding the sauce. The glaze still works, but tofu needs that crisp exterior to keep from going soft.
Use Rice Vinegar Instead of Mirin
Rice vinegar gives you the acid, but not the sweetness. If that’s your only option, keep the honey and brown sugar exactly as written so the sauce doesn’t turn sharp. The result is a little brighter and less polished, but still absolutely in teriyaki territory.
Storage and Reheating
- Refrigerator: Store in an airtight container for up to 4 days. The sauce thickens a bit more as it chills, which is normal.
- Freezer: Freeze for up to 2 months. The chicken freezes well, though the glaze may loosen slightly after thawing; stir it well when reheating.
- Reheating: Warm gently in a skillet over low heat with a splash of water if needed. The common mistake is blasting it in the microwave, which can make the chicken rubbery and push the sauce past glossy into sticky sludge.
Answers to the Questions Worth Asking
Teriyaki Chicken
Ingredients
Equipment
Method
- Whisk together soy sauce, brown sugar, honey, mirin, sake, garlic, and ginger, then reserve half for the sauce. Whisk until the brown sugar dissolves and the mixture looks smooth.
- Add the remaining half to the chicken thighs and turn to coat. Marinate for 20 minutes so the surface absorbs flavor.
- Heat vegetable oil in a large skillet over medium-high heat. Make sure the oil shimmers before adding the chicken.
- Place the marinated chicken in the skillet and cook for 5-6 minutes per side. Cook until caramelized with dark amber blistered edges and the internal temperature reaches 165°F.
- Remove the chicken from the pan and set aside. Keep the pan drippings for the sauce.
- Pour the reserved marinade into the pan and bring it to a simmer. Stir constantly until it bubbles.
- Stir in the cornstarch slurry and simmer for 2-3 minutes until thick and glossy. Watch for the sauce to coat the back of a spoon.
- Return the chicken to the pan and turn to coat in the teriyaki sauce. Keep turning until the glaze clings to the chicken evenly.
- Serve the teriyaki chicken over steamed rice. Drizzle with any extra sauce from the pan.
- Garnish with sesame seeds and sliced green onions. Scatter them over the top right before serving.