Patriotic mini ice cream sandwiches hit that sweet spot between nostalgic and party-ready: soft, fudgy cookies, cold vanilla ice cream, and a bright ring of red and blue sprinkles around the edges. They look festive on a platter, but what keeps people reaching for them is the contrast — just enough cookie to hold up in your hand, just enough ice cream to feel like a treat without turning into a mess.
The cake mix dough is doing a lot of the heavy lifting here. It bakes into tender cookies with a little chew, which matters because thin, crisp cookies crack when you press in the ice cream. Freezing the cookies before assembly helps them stay sturdy, and slightly softened ice cream spreads cleanly instead of tearing the cookies apart. The sprinkle border is more than decoration, too; it gives each sandwich a little texture at the first bite and makes the edges easy to see on a dessert table.
Below, I’ve included the timing that keeps the cookies from getting too hard, the trick for assembling these fast before the ice cream melts, and a few swaps if you want to change the cookie base or make them ahead for a crowd.
The cookies stayed soft after freezing and the ice cream didn’t squish out when I pressed them together. I wrapped each one right away and the sprinkles stayed put, even after a couple days in the freezer.
Love the red, white, and blue sprinkle border on these mini ice cream sandwiches? Save this patriotic dessert for your next July 4th party or backyard cookout.
The Trick to Soft Cookies That Still Freeze Cleanly
These sandwiches only work if the cookies stay tender enough to bite through after freezing. Cake mix cookies are perfect for that because they bake up soft and a little chewy instead of crisp, which means they don’t shatter the moment you add ice cream. The other key is stopping the bake when the centers look set but still soft; overbaked cookies turn dry in the freezer and make the whole sandwich feel hard instead of creamy.
Freezing the cookies before assembly matters more than people think. Warm or even room-temperature cookies start melting the ice cream on contact, which leads to sliding, cracked tops, and a messy edge that won’t hold sprinkles well. A short freeze gives you a firmer cookie surface and buys you enough time to work quickly.
- Cake mix — This is what keeps the cookies tender and uniform. Red velvet gives you the most festive color, but chocolate works just as well if that’s what you have.
- Eggs and oil — They turn the dry mix into a thick dough that bakes soft. Don’t swap in melted butter here; it changes the texture and the cookies spread more.
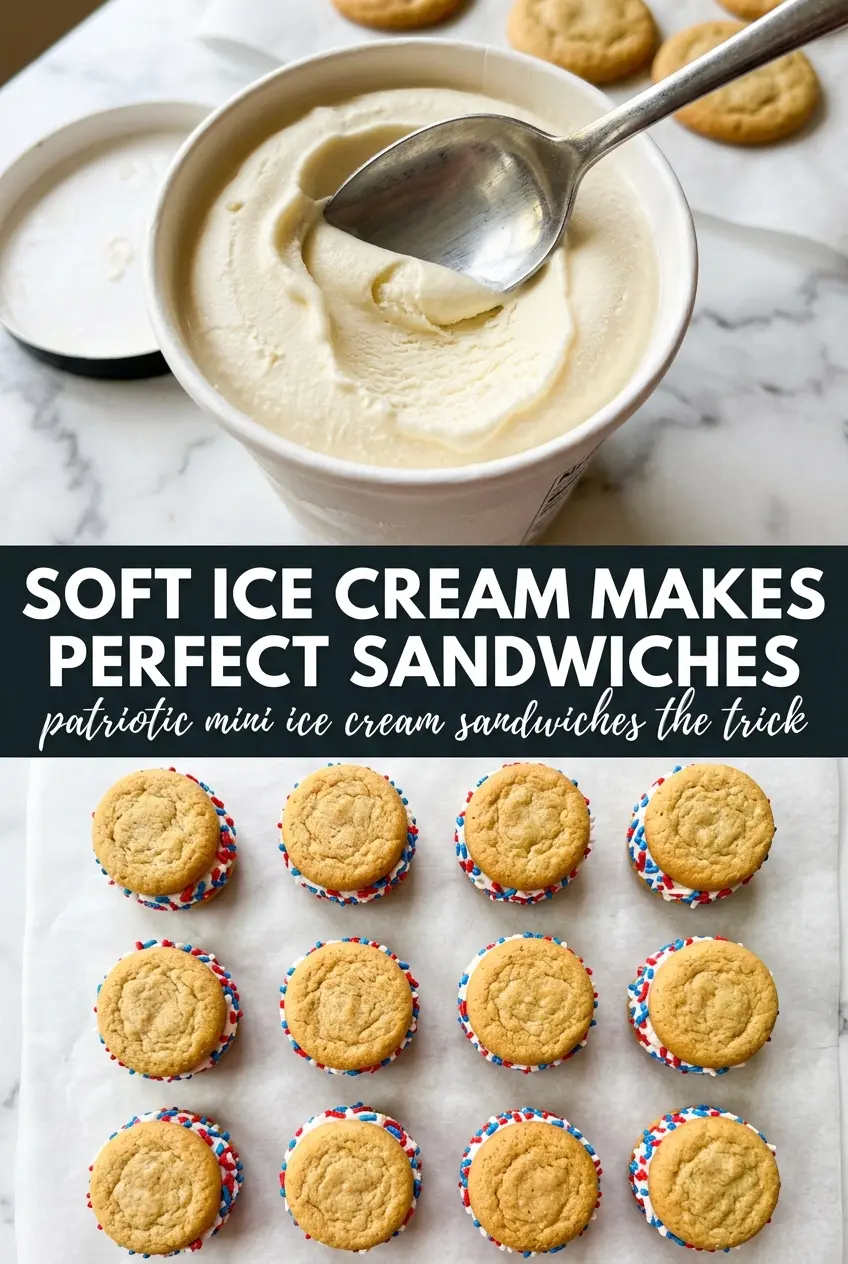
- Vanilla ice cream — Slightly softened is the sweet spot. If it’s too hard, it tears the cookies; if it’s too soft, it squeezes out when you press the top cookie on.
- Red and blue sprinkles — Use jimmies or another soft sprinkle, not coarse sanding sugar. Bigger crystals don’t cling as well to frozen ice cream edges and can fall off in the freezer.
What Each Ingredient Is Actually Doing in This Ice Cream
- Base ingredient (cream, milk, or custard) — This provides the foundation and richness. Quality matters.
- Sweetener (sugar, honey, or condensed milk) — This sweetens and prevents ice crystals. The ratio is critical.
- Flavor element (vanilla, fruit, chocolate, or other) — This defines the ice cream personality. Use quality ingredients.
- Egg yolks (if making custard base) — These create richness and silky texture. Optional but elevates ice cream.
- Churning (if using ice cream maker) — This incorporates air and prevents ice crystals. Critical for smooth texture.
- Freezing temperature and time — Proper freezing prevents rock-hard texture. Store at 0°F or below.
- Mix-ins (chocolate, cookies, fruit, or swirls) — These add texture and prevent one-dimensional flavor. Add near end of churning.
- Serving temperature (slightly soft, not rock hard) — This provides creamy mouthfeel. Remove from freezer 5 minutes before serving.
Assembling Them Fast Before the Ice Cream Wins
Mixing the Dough
Stir the cake mix, eggs, and oil until the dough looks thick and uniform. It will feel dense, almost like a soft play dough, and that’s exactly what you want. If you keep mixing after it comes together, the dough can get greasy and harder to scoop cleanly.
Baking for Soft Edges
Scoop tablespoon-sized portions onto parchment-lined sheets and flatten them into short rounds before baking. Pull them when the tops look set and the edges have just barely started to firm up. If the cookies brown too much, they’ll lose that soft bite after freezing.
Cooling and Chilling
Let the cookies cool completely on a wire rack, then freeze them for 30 minutes. That extra chill keeps the ice cream from melting on contact during assembly. If you skip this part, the filling starts slipping before you can even add the second cookie.
Filling, Rolling, and Freezing
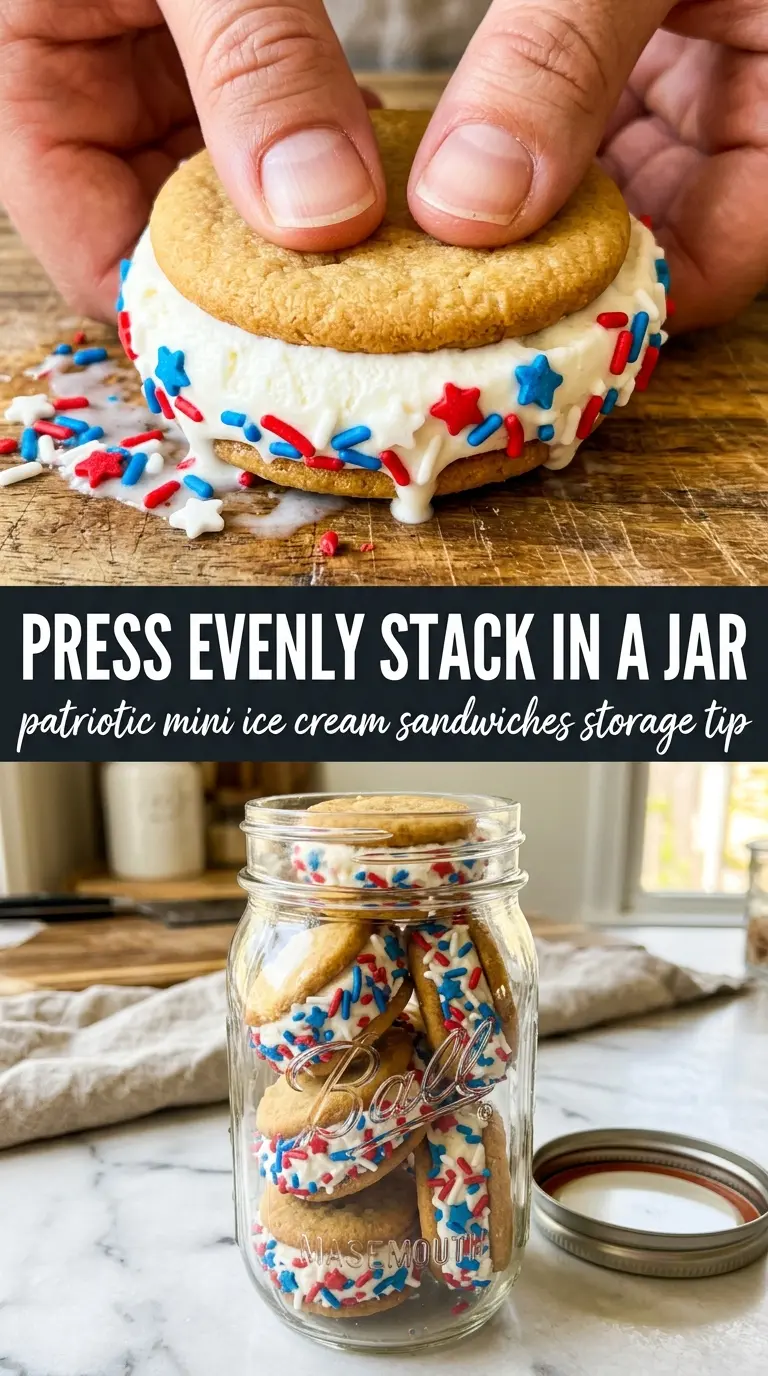
Work with one or two sandwiches at a time. Place the ice cream on the flat side of one cookie, press the second cookie on top, then roll the exposed ice cream edge in sprinkles right away before it softens. Wrap each sandwich tightly in plastic wrap and freeze until solid so they hold together cleanly when served.
Three Ways to Change the Cookie Base Without Losing the Look
Chocolate Cookie Version
Use chocolate cake mix if you want a darker, richer sandwich with the same soft texture. The result tastes a little less red-white-blue and a little more classic ice cream truck, but the assembly and freezing times stay exactly the same.
Gluten-Free Swap
Use a gluten-free chocolate or red velvet-style cake mix and keep the dough size small. Gluten-free cookies can crumble a little more at the edges, so freezing them before sandwiching is even more important.
Different Ice Cream Flavors
Vanilla keeps the color theme clean, but strawberry or cake batter ice cream adds a sweeter, party-style twist. Stronger flavors work best if you want more contrast, though they can make the sprinkle border feel more decorative than necessary.
Make-Ahead Freezer Prep
Assemble the sandwiches, wrap each one tightly, and freeze them on a flat tray before moving them to a freezer bag. That first firm freeze keeps them from sticking together and helps the sprinkle edges stay neat instead of getting smudged.
Storage and Reheating
- Refrigerator: Don’t store these in the fridge; the cookies go soggy and the ice cream melts unevenly.
- Freezer: Wrap each sandwich individually and freeze for up to 2 weeks for the best texture. After that, the cookies can start to pick up freezer flavor.
- Reheating: No reheating needed. Let them sit at room temperature for 2 to 3 minutes before serving so the cookie softens just enough to bite without the ice cream sliding out.
Answers to the Questions Worth Asking
Patriotic Mini Ice Cream Sandwiches
Ingredients
Equipment
Method
- Preheat oven to 350°F and line baking sheets with parchment paper to prevent sticking and ensure even browning.
- Mix cake mix, eggs, and oil together until a thick dough forms, scraping the bowl as needed so there are no dry pockets.
- Scoop tablespoon-sized balls onto prepared baking sheets, flatten to about 1/4-inch thick circles, and bake for 8–10 minutes until set—do not overbake.
- Let cookies cool completely on a wire rack, then freeze for 30 minutes to firm them up for clean sandwiching.
- Working quickly, place a scoop of slightly softened vanilla ice cream on the flat side of one cookie and press another cookie on top to sandwich.
- Roll the exposed ice cream edge in red and blue sprinkles so the border looks fully covered on the sides.
- Wrap each sandwich in plastic wrap to prevent freezer burn and place in the freezer for at least 2 hours until solid before serving.