Baked chicken breasts are at their best when the outside stays savory and bronzed while the inside turns tender enough to cut with a fork. That’s exactly what happens here. The Parmesan-mayonnaise topping melts into a puffed, golden crust that protects the chicken from drying out, and the result is the kind of weeknight main dish people go back for before they’ve even finished the first plate.
The trick is in the topping. Mayonnaise carries fat and moisture, Parmesan brings salt and structure, and the lemon juice keeps the whole thing from tasting heavy. You don’t need to marinate the chicken or fuss with a breading station. The oven does the work, and the topping bakes into the meat instead of sitting on top like an afterthought.
Below, I’ve included the one detail that keeps the chicken juicy instead of stringy, plus a few swaps if you want to adjust the seasoning or use what’s already in your fridge.
The topping baked up golden and stayed put, and the chicken was still juicy at 25 minutes. I served it with rice and green beans, and my husband asked if I could put it on the menu again next week.
Save this Parmesan-topped baked chicken for the nights when you want juicy chicken breast with almost no hands-on work.
The Reason the Topping Stays Creamy Instead of Greasy
The mistake most people make with this style of chicken is treating the topping like a crust that should dry out completely. It shouldn’t. The mayonnaise base needs enough oven heat to brown the Parmesan and set the surface, but not so much that the oil separates before the chicken is cooked through. That’s why this works best at a moderate 375°F instead of a hotter blast.
Another thing worth knowing: the chicken breasts need to be fairly even in thickness. If one side is much thicker, the topping will darken before the center is done. Light pounding or slicing extra-thick breasts in half horizontally gives you a more reliable result and keeps the finished chicken moist all the way through.
- Chicken breasts — Boneless, skinless breasts are the cleanest fit here because the topping can cover the whole surface. If yours are huge, split them into cutlets or pound them to an even thickness so the cooking time lines up with the browning.
- Mayonnaise — This is what keeps the topping creamy and helps it cling to the chicken instead of sliding off. Sour cream can work in a pinch, but the crust won’t brown the same way and the flavor will be tangier and a little less rich.
- Parmesan — Freshly grated Parmesan melts better and gives you a tighter, more savory crust. Pre-grated cheese can be used, but it often contains anti-caking agents, so the topping may bake up drier and less cohesive.
- Lemon juice — A small amount brightens the topping and keeps the finished dish from tasting heavy. Bottled juice works if that’s what you have, but fresh lemon gives the cleanest finish.
- Smoked paprika, garlic powder, and onion powder — These season the topping all the way through, so the chicken doesn’t taste flat under the crust. If you want more herb flavor, add a pinch of dried thyme or Italian seasoning without changing the structure of the recipe.
What Each Ingredient Is Actually Doing in This Recipe

- Primary ingredient (the star) — Quality matters most. Choose the best you can find.
- Cooking medium (oil, butter, or broth) — This carries flavors and prevents dryness.
- Seasonings (salt, pepper, spices, herbs) — Layer flavors so nothing overpowers. Build depth gradually.
- Aromatics (garlic, onion, herbs) — Cook with fat to bloom flavors. Become the foundation.
- Supporting ingredients — Complement the main ingredient without overpowering it.
- Sauce or liquid (if applicable) — Brings flavors together. Balance richness with acid.
- Acid (lemon, vinegar, wine, or other) — Brightens and prevents flat-tasting results.
- Final finish (garnish, glaze, or sauce) — Prevents one-dimensional taste and adds visual appeal.
Building the Topping So It Bakes, Not Slides
Season the Chicken First
Lay the chicken breasts in a greased baking dish and season them lightly with salt and black pepper before anything else. That first layer of seasoning matters because the topping can only do so much on the surface. If the chicken is swimming in liquid in the pan, pat it dry first; moisture on the bottom can keep the chicken from settling into the pan and make the juices look cloudy instead of clean.
Mix the Topping Until It Looks Uniform
Stir the mayonnaise, Parmesan, garlic powder, onion powder, smoked paprika, and lemon juice until the mixture is smooth and evenly speckled. You want it thick enough to mound on a spoon, not runny. If the mixture feels loose, add another tablespoon of Parmesan rather than more mayo, because extra mayo can make the top greasy before it has a chance to brown.
Cover the Chicken Completely
Spoon the topping over each breast and spread it all the way to the edges. A bare spot at the edge can dry out before the center finishes cooking. The layer should look generous; it will melt and settle as it bakes, and a thin smear won’t give you that signature crusty top.
Bake Until the Top Is Golden and the Center Is Done
Bake at 375°F for 25 to 30 minutes, watching for a golden, bubbly surface and an internal temperature of 165°F in the thickest part. If the topping browns too quickly, tent the dish loosely with foil for the last few minutes. Pulling the chicken too early leaves the center underdone, but leaving it in until the topping is dark brown can dry out the edges and make the crust taste bitter.
How to Adapt It for Different Kitchens and Different Nights
Dairy-Free Version
Use a dairy-free mayonnaise and swap the Parmesan for a dairy-free hard cheese alternative that grates finely. The result will still be creamy and savory, but the top won’t have quite the same nutty bite as real Parmesan, so add a little extra garlic powder or a pinch of nutritional yeast if you want more depth.
Lower-Carb Serving Style
This recipe is already naturally low in carbs, so the main adjustment is what you serve with it. Pair it with roasted broccoli, cauliflower mash, or a crisp salad, and you’ve got a full plate without changing the chicken itself.
If You Want a Little More Crunch
Add a handful of finely crushed pork rinds or plain panko to the Parmesan mixture before spreading it on the chicken. Pork rinds keep it gluten-free and add a crisper, more brittle top; panko gives a lighter crunch but introduces gluten and won’t stay as firmly attached to the creamy base.
For Meal Prep
You can season the chicken and mix the topping up to a day ahead, then assemble right before baking. If you spread the mayo mixture on too early and let it sit too long, it can loosen slightly and slide during baking.
Storage and Reheating
- Refrigerator: Store leftovers in an airtight container for up to 3 days. The topping will soften, but the chicken stays moist.
- Freezer: It freezes, but the mayonnaise topping can separate a bit after thawing, so the texture is not as good as fresh. Freeze in slices with parchment between portions and thaw overnight in the fridge.
- Reheating: Warm in a 325°F oven, covered loosely with foil, until heated through. The microwave works in a pinch, but it can turn the topping oily and the chicken rubbery, especially if you blast it too long.
Questions I Get Asked About This Recipe
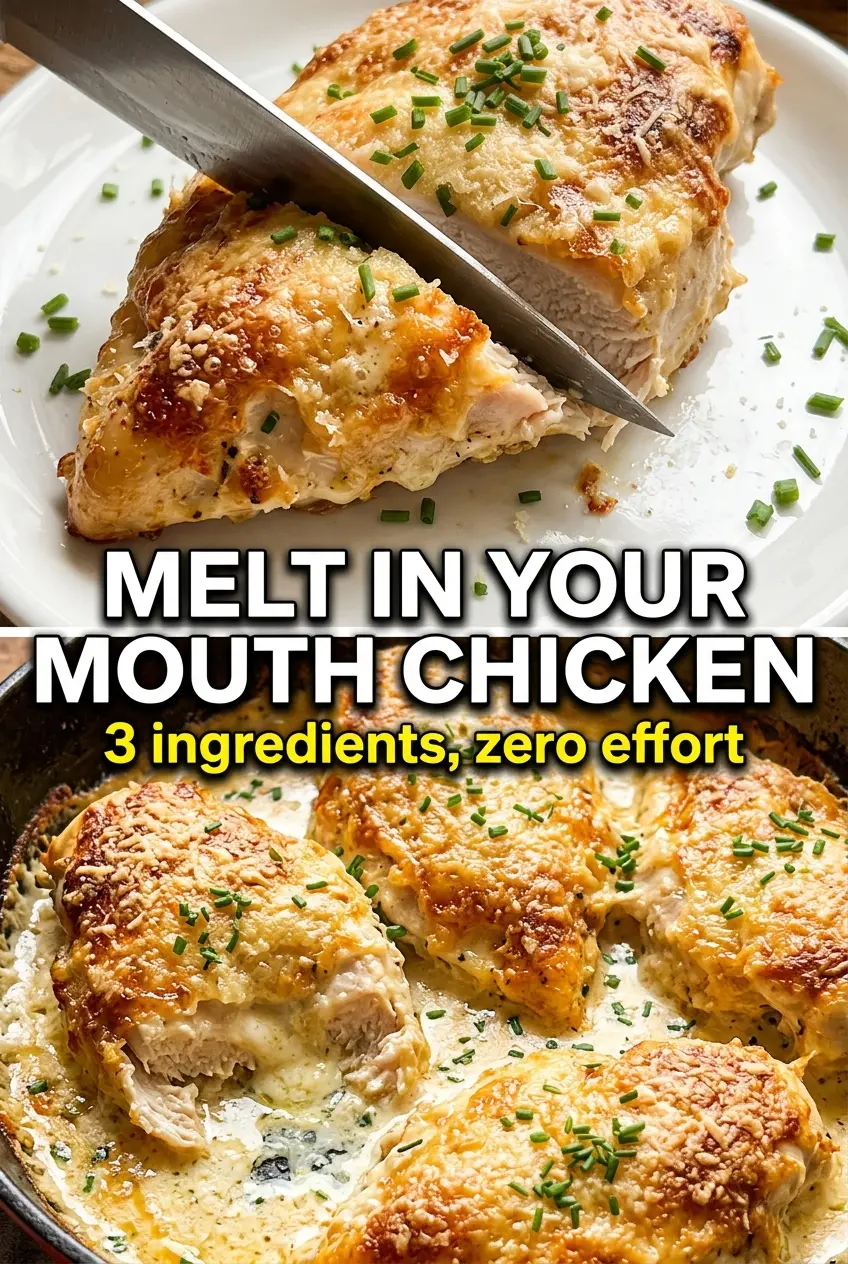
Melt In Your Mouth Baked Parmesan Mayonnaise Chicken
Ingredients
Equipment
Method
- Preheat the oven to 375°F and grease a 9x13 baking dish.
- Lightly season the chicken breasts with salt and cracked black pepper, then place them in the prepared dish.
- Mix mayonnaise, Parmesan cheese, garlic powder, onion powder, smoked paprika, and fresh lemon juice until smooth.
- Spread the Parmesan mayonnaise mixture generously over the top of each chicken breast, covering completely, with a thick even layer.
- Bake at 375°F for 25 to 30 minutes, until the topping is golden and bubbly.
- Continue baking if needed until the internal temperature reaches 165°F when checked in the thickest part.
- Garnish with fresh parsley and serve immediately, so the crust stays puffed and crackly.