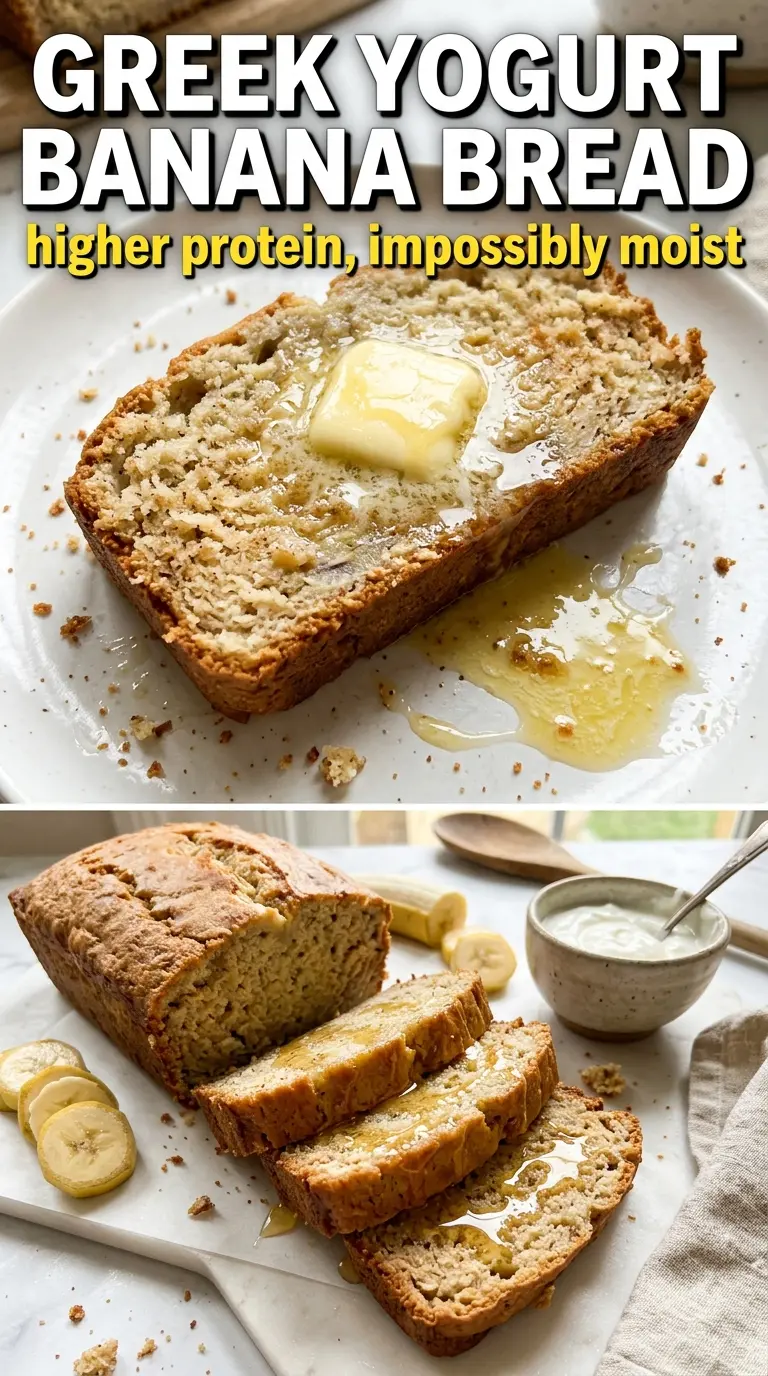
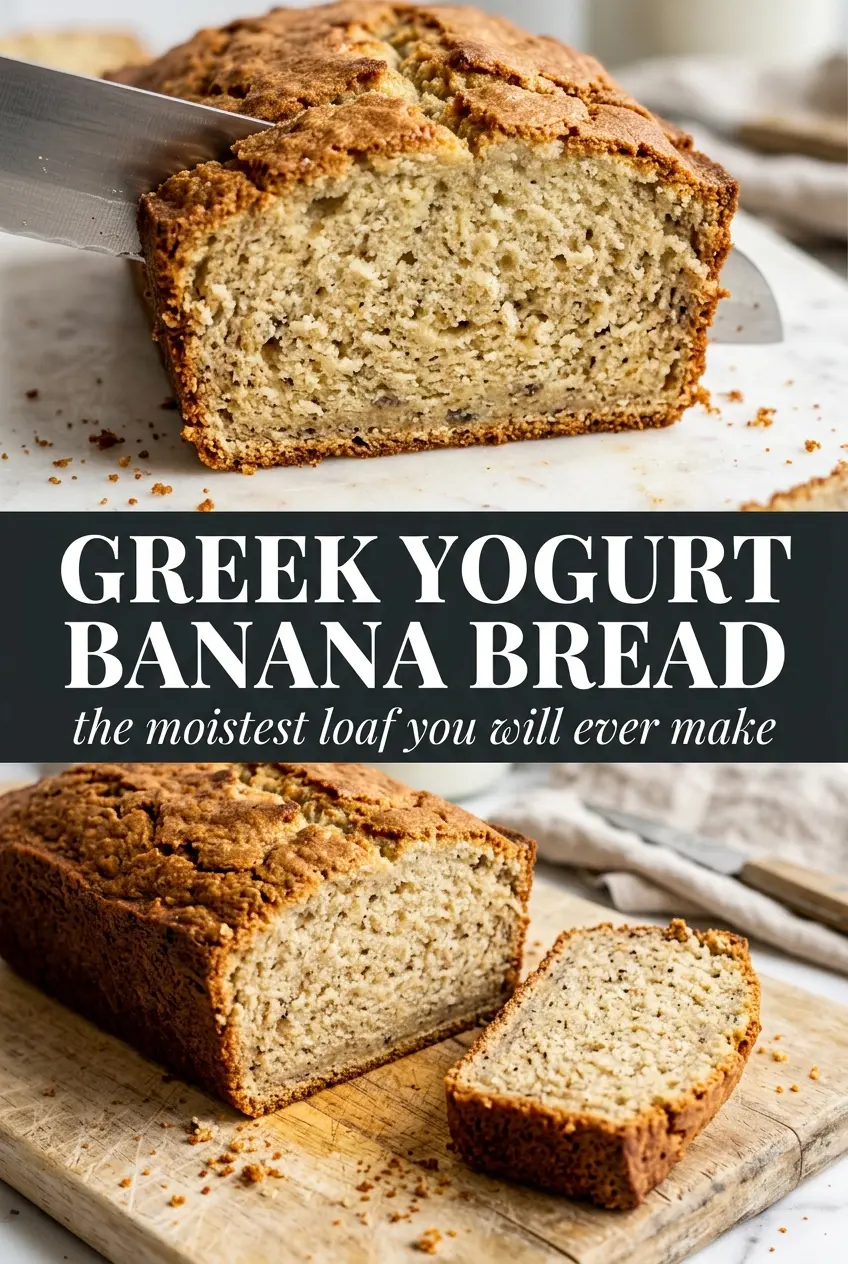
Greek yogurt banana bread bakes up with a tender crumb, a golden top, and just enough tang to keep each slice from tasting heavy. The bananas bring the sweetness and moisture, but the yogurt gives the loaf a little lift and a softer, more balanced finish than the usual all-butter version. It’s the kind of banana bread that disappears one slice at a time, whether you eat it warm from the pan or toasted the next day.
The trick here is keeping the batter relaxed. Once the flour goes in, it only needs a few folds; overmixing turns a quick bread dense and tough. Using very ripe bananas matters too, because they bring both flavor and moisture without needing extra fuss. The Greek yogurt should be plain and unsweetened so it adds richness without throwing off the balance of the loaf.
Below, you’ll find the small details that matter most: how to tell when the center is actually done, which yogurt works best, and a few smart swaps if you want to adjust the sweetness or make it a touch more wholesome.
The loaf came out incredibly moist and held together beautifully after cooling. I used full-fat Greek yogurt and the crumb stayed light without getting gummy, which is usually where banana bread goes wrong for me.
Love that soft, golden crumb? Save this Greek yogurt banana bread for an easy loaf that stays moist for days.
The Reason This Loaf Stays Moist Without Turning Heavy
Banana bread gets dense when the batter is overworked or when it’s loaded with too much flour. The Greek yogurt changes the texture in a good way, but it doesn’t forgive a rough hand. Once the dry ingredients go in, stop mixing as soon as the flour disappears and the batter still looks a little uneven. That’s what keeps the crumb light instead of tight.
The other thing that matters is the banana base. You want bananas with dark spots, soft spots, and a strong aroma, because underripe bananas bake up bland and leave the loaf tasting more like cake than banana bread. The loaf also needs time in the oven; if you pull it when the top looks done but the center is still soft, it can sink as it cools.
- Greek yogurt — This adds moisture, tang, and body. Full-fat gives the richest crumb, but 2% works well too. Nonfat yogurt can work in a pinch, though the loaf won’t taste quite as plush.
- Melted butter — Butter gives the bread flavor and keeps the texture tender. Oil will also make a moist loaf, but it changes the taste and removes that buttery depth.
- Very ripe bananas — These are doing most of the flavor work. If your bananas are still pale, the bread will be less sweet and less fragrant, even if the texture is fine.
- All-purpose flour — This gives the loaf structure without making it chewy. A 1:1 gluten-free flour blend usually works if it includes xanthan gum, but the crumb will be a little more delicate.
What Each Ingredient Is Actually Doing in This Recipe
- Primary ingredient (the star) — Quality matters most. Choose the best you can find.
- Cooking medium (oil, butter, or broth) — This carries flavors and prevents dryness.
- Seasonings (salt, pepper, spices, herbs) — Layer flavors so nothing overpowers. Build depth gradually.
- Aromatics (garlic, onion, herbs) — Cook with fat to bloom flavors. Become the foundation.
- Supporting ingredients — Complement the main ingredient without overpowering it.
- Sauce or liquid (if applicable) — Brings flavors together. Balance richness with acid.
- Acid (lemon, vinegar, wine, or other) — Brightens and prevents flat-tasting results.
- Final finish (garnish, glaze, or sauce) — Prevents one-dimensional taste and adds visual appeal.
Building the Batter So the Crumb Stays Soft
Mashing and Mixing the Wet Ingredients
Start with bananas that mash easily with a fork and leave a few small lumps. Those bits melt into the loaf as it bakes and help keep the texture from feeling uniform or dry. Whisk the melted butter, sugar, eggs, vanilla, and Greek yogurt into the bananas until the mixture looks smooth and glossy. If the butter is still hot, it can partially cook the eggs, so let it cool for a minute before mixing.
Folding in the Dry Ingredients
Add the flour, baking soda, baking powder, cinnamon, and salt all at once, then fold just until the flour streaks disappear. The batter should look thick and a little rough, not perfectly smooth. If you keep stirring at this point, the loaf can turn rubbery and lose the soft, tender bite that makes banana bread worth baking.
Baking to the Center, Not Just the Color
Scrape the batter into the prepared pan and smooth the top so it bakes evenly. The loaf is done when the top is deeply golden, the center springs back lightly, and a toothpick comes out clean or with just a few moist crumbs. If the top browns too fast before the middle sets, lay a loose piece of foil over it for the last 15 to 20 minutes. Let it cool in the pan for 10 minutes before moving it to a rack; if you turn it out too early, it can break while it’s still soft.
How to Adapt This Loaf for Different Kitchens and Different Moods
Use brown sugar for a deeper banana flavor
Swap part or all of the granulated sugar for light brown sugar if you want a loaf that tastes a little warmer and more caramel-like. The bread will bake up slightly softer and more fragrant, though the top may not look quite as pale and clean.
Make it dairy-free without losing the soft crumb
Use a thick unsweetened dairy-free yogurt and swap the butter for melted coconut oil or neutral oil. The loaf will still be moist, but it won’t have the same buttery finish, so vanilla and ripe bananas matter even more.
Turn it into banana bread muffins
Divide the batter among lined muffin cups and bake until the tops spring back and a tester comes out clean, usually much faster than the loaf. You’ll get more caramelized edges and a slightly lighter texture, which is handy if you want grab-and-go portions.
Storage and Reheating
- Refrigerator: Keep covered for up to 5 days. The loaf stays moist, though the crumb firms up a bit when chilled.
- Freezer: Freeze slices wrapped tightly and stored in a freezer bag for up to 3 months. Thaw at room temperature or toast straight from frozen.
- Reheating: Warm slices in a toaster oven or microwave just until heated through. Long reheating dries out the edges, so use short bursts and stop while the center still feels soft.
Answers to the Questions Worth Asking
Greek Yogurt Banana Bread
Ingredients
Equipment
Method
- Preheat the oven to 350°F and grease a 9x5 loaf pan.
- Preheat the oven to 350°F and grease a 9x5 loaf pan, making sure the pan is well coated for easy release.
- Whisk melted butter, sugar, eggs, vanilla, and Greek yogurt into the mashed bananas until smooth and well combined.
- Fold in flour, baking soda, baking powder, cinnamon, and salt until just combined, stopping as soon as no dry streaks remain.
- Pour the batter into the prepared pan and smooth the top so it bakes evenly.
- Bake for 60–70 minutes at 350°F until deeply golden on top and a toothpick inserted in the center comes out clean.
- Cool in pan 10 minutes before turning out onto a rack, letting the loaf set for clean slicing.