Gluten-free pumpkin bars need to be soft, tender, and sturdy enough to hold a thick layer of cream cheese frosting without crumbling when you cut them. This version gets that balance right. The bars bake up with a moist, cake-like crumb and a warm spice profile, and the frosting sets into a creamy layer that tastes like it belongs on a bakery-style pumpkin sheet cake.
The trick is in the batter. Pumpkin puree brings moisture, but it can also make gluten-free bakes feel dense if the flour blend is too heavy or the batter is overmixed. Using a blend with xanthan gum gives the bars enough structure, while the combination of baking powder and baking soda keeps them lifted and light. The frosting stays smooth because the cream cheese and butter are beaten first until completely lump-free before the sugar goes in.
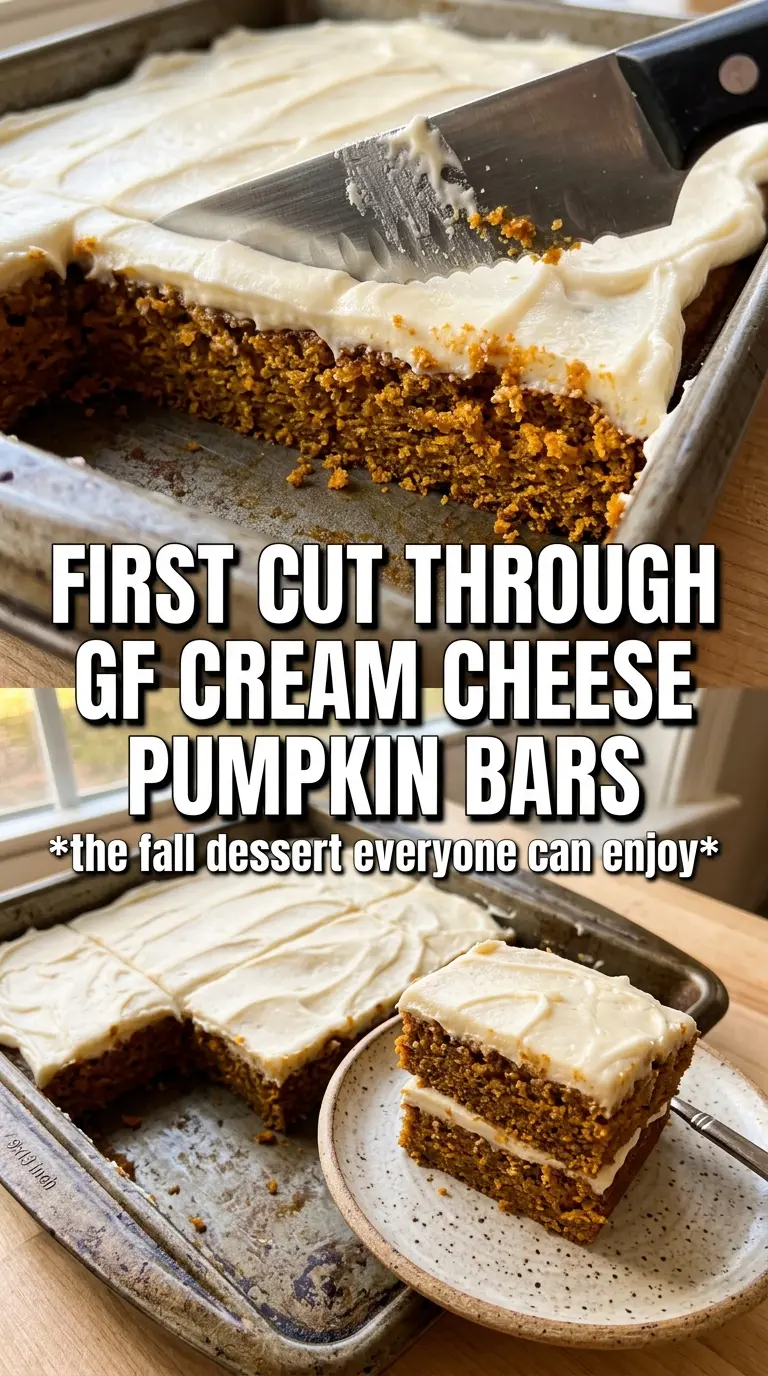
Below, I’m breaking down the ingredient choices that matter most, the visual cues I watch for in the oven, and the small chilling step that makes the bars cut cleanly instead of smearing under the knife.
The bars stayed unbelievably soft even after chilling, and the frosting spread on without tearing the top. I also loved that the pumpkin spice came through without tasting heavy.
Save these gluten-free pumpkin bars with cream cheese frosting for the kind of dessert that cuts neatly, tastes bakery-soft, and disappears fast.
The Mistake That Makes Gluten-Free Pumpkin Bars Heavy
The most common problem with pumpkin bars is density. Gluten-free batter can turn gummy fast if the flour blend is too starchy, the pan is overfilled, or the batter gets beaten after the flour goes in. Here, the structure comes from a balanced flour blend with xanthan gum and enough leavening to keep the crumb tender instead of squat.
Pumpkin puree adds moisture, but it also weighs the batter down, so the goal is a smooth, fully combined mixture without working it harder than needed. Once the dry ingredients go in, fold just until you stop seeing flour streaks. Overmixing tightens the crumb and makes the bars bake up with a rubbery top instead of a soft, cake-like slice.
- Gluten-free all-purpose flour blend with xanthan gum — This is doing the structural work that wheat flour would normally handle. If your blend doesn’t include xanthan gum, the bars are much more likely to crumble after cooling.
- Baking powder plus baking soda — The two leaveners lift the bars and help them brown properly. Baking soda also balances the acidity from the pumpkin and keeps the flavor from tasting flat.
- Pumpkin puree — Use plain pumpkin puree, not pumpkin pie filling. Pie filling is already sweetened and spiced, which throws off both texture and flavor.
- Eggs — Eggs give the bars their lift and keep the crumb cohesive. There isn’t a true swap here if you want the same soft, sliceable result.
What Each Ingredient Is Doing in the Frosting and the Bars
- Cinnamon and pumpkin pie spice — The pumpkin alone won’t give you that classic bar-cookie flavor. The spice blend is what makes the bars taste warm and finished instead of just sweet.
- Vegetable oil — Oil keeps gluten-free bakes softer than butter usually does. It coats the flour and helps the bars stay moist even after chilling.
- Cream cheese — This is non-negotiable for the frosting. It gives the topping the tang that cuts through the sweetness and sets up with a thick, spreadable body.
- Butter — Butter adds richness and makes the frosting less sharp than cream cheese alone. It must be softened so it blends smoothly instead of leaving little cold lumps behind.
- Powdered sugar — This sweetens and thickens the frosting at the same time. If you reduce it too much, the frosting turns loose and won’t hold clean edges on the bars.
- Milk — Add it a little at a time. You only need enough to loosen the frosting into something fluffy and spreadable, not runny.
Building the Batter and Frosting So They Stay Soft, Not Dense
Whisk the Dry Ingredients First
Start by whisking the flour blend, baking powder, baking soda, spices, and salt together until the color looks even throughout. This matters more than it sounds like it should, because gluten-free flour can clump and spice can settle in pockets if you rush it. A quick whisk now keeps the bars from baking with salty spots or uneven lift.
Mix the Wet Ingredients Until Smooth
Beat the eggs, sugar, oil, pumpkin puree, and vanilla until the mixture looks glossy and thickened. The batter should look smooth before the flour goes in, with no streaks of egg or obvious pockets of pumpkin. If the wet mixture looks broken or separated, keep mixing for another 20 to 30 seconds; it should come together into one cohesive base.
Fold, Don’t Beat, Once the Flour Goes In
Add the dry ingredients and fold just until the flour disappears. The batter will be thick and spreadable, not pourable, and that’s exactly what you want. If you keep stirring after the flour is incorporated, the bars lose tenderness and bake up tighter than they should.
Spread, Bake, and Cool Completely
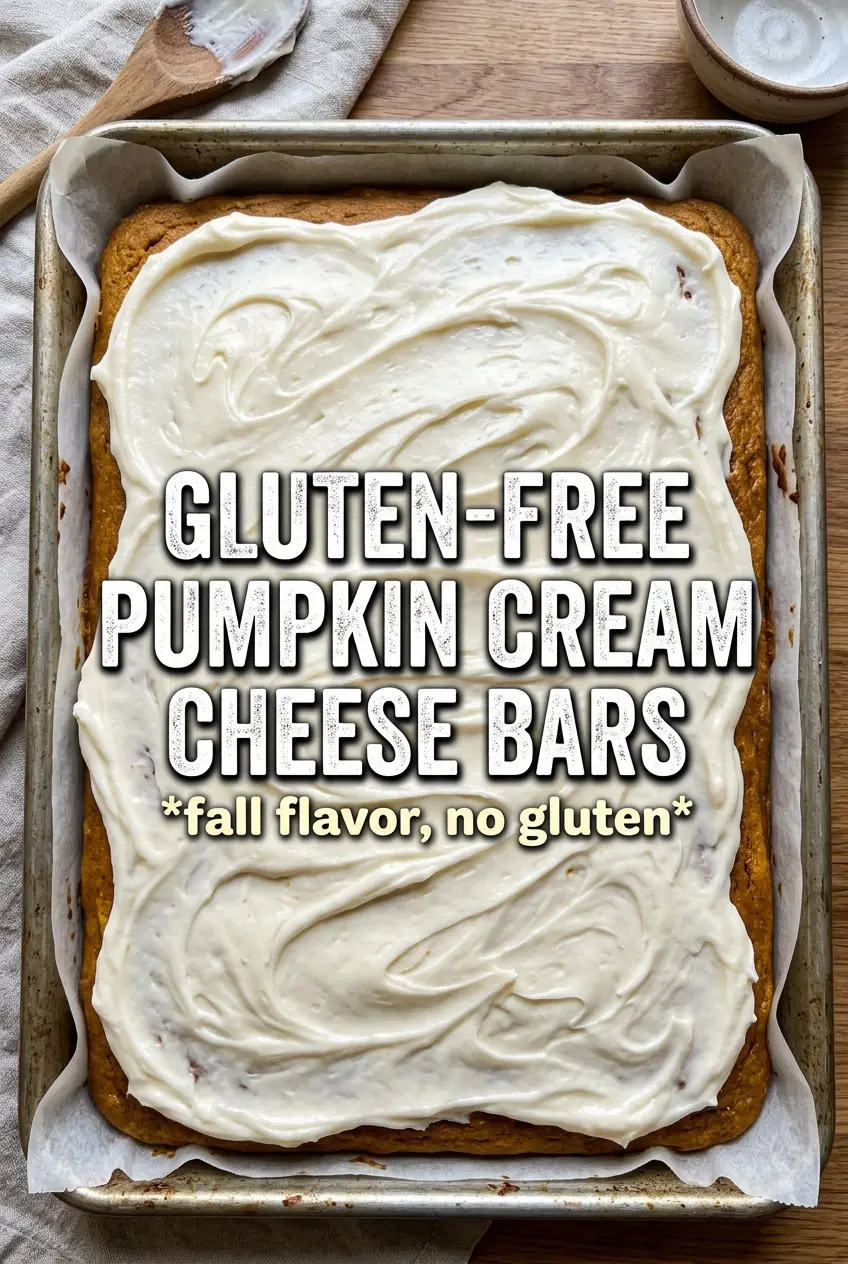
Use a greased 15×10 rimmed baking sheet and spread the batter into an even layer all the way to the corners. Bake until a toothpick comes out clean and the top springs back lightly when touched. Don’t frost warm bars; even a little heat will melt the cream cheese frosting and make the top slide. Let them cool all the way down before you start the frosting.
Beat the Frosting Until It Looks Light
Beat the softened cream cheese and butter until the mixture looks perfectly smooth before adding anything else. Then add the powdered sugar, vanilla, cinnamon, nutmeg, and just enough milk to make it fluffy and spreadable. If the frosting feels stiff, beat in a teaspoon of milk at a time; if it looks loose, it needs a little more powdered sugar before it can hold its shape.
Three Ways to Adjust These Pumpkin Bars Without Losing the Texture
Dairy-Free Frosting
Use plant-based cream cheese and vegan butter in equal amounts. The frosting will still be creamy and tangy, but it may soften faster at room temperature, so chill the bars before cutting and serving.
Lower-Sugar Version
You can reduce the frosting sweetness a little by starting with 2 1/2 cups powdered sugar, but don’t go much lower or the frosting turns soft and hard to spread. The bars themselves need the full sugar amount for the right moisture and structure.
Extra-Spiced Bars
Add a little more cinnamon or a pinch of cloves if you want a deeper spice note. Keep the total amount modest so the pumpkin still tastes like pumpkin instead of turning the bars into spice cake.
Storage and Reheating
- Refrigerator: Store covered for up to 5 days. The frosting stays neat, and the bars actually slice better after chilling.
- Freezer: These freeze well. Cut into bars, wrap individually, and freeze in an airtight container for up to 2 months. Thaw in the refrigerator so the frosting doesn’t weep.
- Reheating: These are best served chilled or at cool room temperature, not warmed. Heat softens the frosting and changes the texture of the bars, so let refrigerated bars sit out for 10 to 15 minutes before serving if you want them less cold.
Questions I Get Asked About This Recipe
Gluten-Free Pumpkin Bars With Cream Cheese Frosting
Ingredients
Equipment
Method
- Preheat the oven to 350°F and grease a 15x10 rimmed baking sheet.
- Whisk together the gluten-free flour blend, baking powder, baking soda, pumpkin pie spice, cinnamon, and salt.
- Beat the eggs, granulated sugar, vegetable oil, pumpkin puree, and vanilla until smooth, then fold in the flour mixture.
- Spread the batter evenly into the prepared pan and bake for 25-28 minutes, until a toothpick comes out clean.
- Cool the bars completely before frosting.
- Beat the cream cheese and butter until smooth, then add powdered sugar, vanilla, cinnamon, nutmeg, and milk.
- Beat the frosting until very fluffy, then spread it over the cooled bars.
- Dust the top with cinnamon and refrigerate for 30 minutes before cutting.