
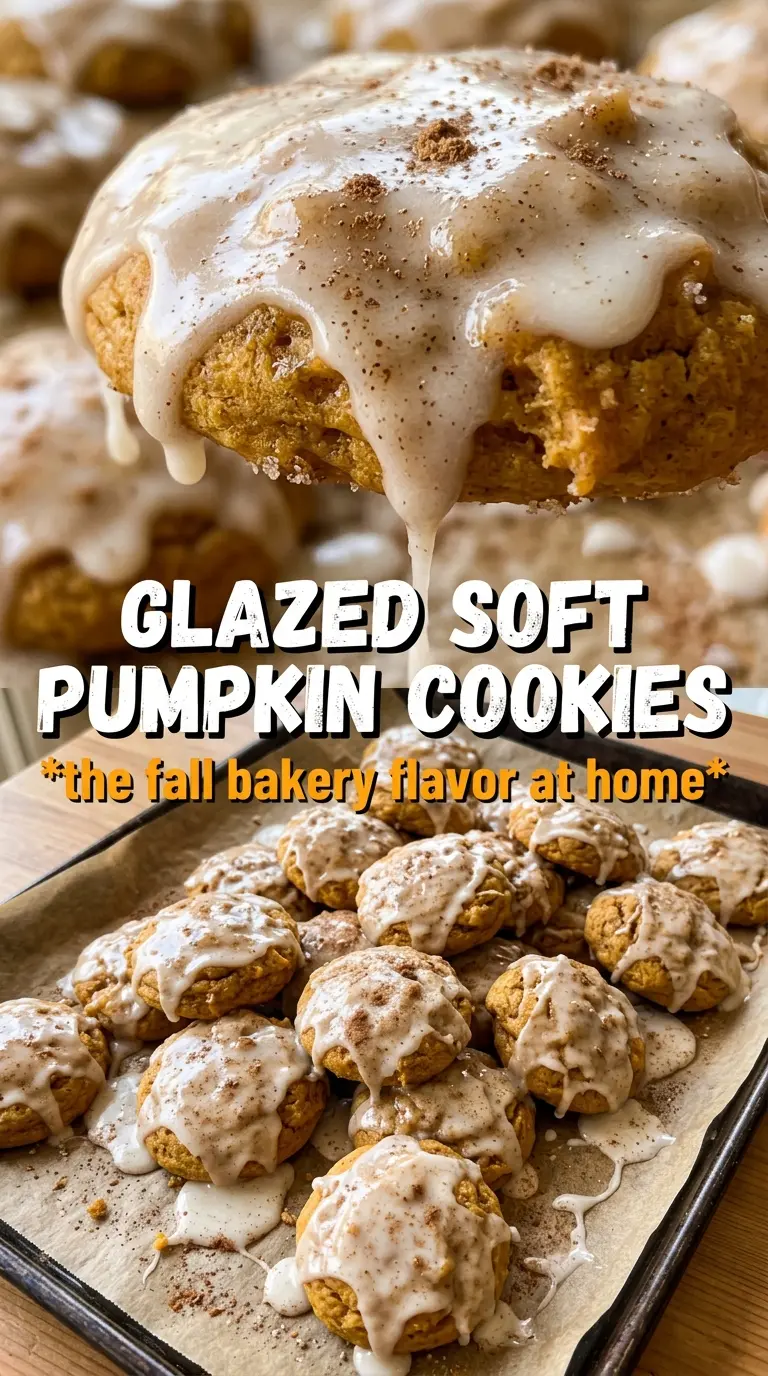
Glazed pumpkin cookies bake up soft, cakey, and tender with a glossy vanilla-cinnamon finish that sets into a thin crackly shell on top. They’re the kind of cookie that disappears fast because they taste like a cross between pumpkin cake and a frosted drop cookie, and that texture is exactly why they work so well for casual baking, lunchboxes, and fall dessert trays.
The trick is keeping the cookie dough thick enough to hold its shape while still baking into a pillowy center. Pumpkin adds moisture, so this version leans on the right balance of flour, butter, and spice instead of trying to force a crisp cookie texture that pumpkin just doesn’t want to give you. The glaze matters just as much: it should be thick, spoonable, and slow to drip so it stays on the cookie instead of sliding right off.
Below, I’m walking through the part that matters most — how to keep the cookies soft without turning them gummy, and how to glaze them so they set up cleanly instead of becoming sticky puddles.
The cookies stayed soft for days and the glaze set just enough that they stacked without sticking together. I used the thick glaze and it didn’t run off the edges at all.
Glazed pumpkin cookies with that soft cake-like crumb are perfect for stacking, gifting, and serving once the glaze has set.
The Soft-Cookie Mistake That Pumpkin Makes Easy to Miss
Pumpkin cookies fail when the dough gets treated like a standard drop cookie dough. Pumpkin brings a lot of moisture, and if you add too much flour trying to tame it, the cookies bake up dry and bready instead of soft and cakey. The goal here is a dough that still feels scoopable but holds its shape in thick rounds, because that is what gives you the tender center after baking.
The other place people go wrong is the glaze. A thin glaze disappears into the cookie and never sets properly, which leaves you with a sticky top instead of a clean finish. Thicker is better here. It should spread slowly and settle in place, then set enough that the cookies can be stacked or plated without smearing.
What Each Ingredient Is Actually Doing in These Cookies
- Pumpkin puree — This is what gives the cookies their moist, cakey texture and that familiar pumpkin flavor. Use plain pumpkin puree, not pumpkin pie filling, or the cookies will end up overly sweet and spiced before you ever add the glaze.
- Butter — Butter gives the cookies richness and helps the dough cream properly with the sugar so the texture stays tender. For the glaze, melted butter adds a little body and helps it set with a smooth finish.
- Powdered sugar — This is what makes the glaze thick enough to cling to the cookies instead of running off. If your glaze looks too loose, add more powdered sugar a spoonful at a time until it mounds on the spoon before slowly settling.
- Pumpkin pie spice and cinnamon — The spice blend gives the cookies warmth, while the extra cinnamon in the dough and glaze keeps the flavor from tasting flat. If you only have pumpkin pie spice, use it in the dough and still add the cinnamon if you can; that extra note shows up clearly under the glaze.
- Flour — All-purpose flour gives the cookies enough structure to hold a domed shape while staying soft inside. The dough should be thick, not pourable; if it looks more like batter, the cookies will spread and bake up too thin.
Mixing the Dough and Glaze So They Set Up Right
Build the Base First
Start by beating the butter and sugar until the mixture looks pale and fluffy, then add the pumpkin, egg, and vanilla. The batter will look a little looser than a classic cookie dough at this stage, and that’s normal. If you rush this and dump in the dry ingredients too soon, the butter won’t be evenly distributed and the cookies can bake unevenly.
Fold in the Dry Ingredients Gently
Add the flour, baking soda, baking powder, spices, and salt just until the dough comes together. Stop as soon as you stop seeing dry streaks. Overmixing here is what makes pumpkin cookies tough instead of soft, especially because the dough starts out so moist. Scoop the dough in 2-tablespoon rounds so the cookies bake evenly and stay thick enough for the glaze.
Bake Until the Centers Look Set, Not Dry
Bake at 350°F for 10 to 12 minutes, and watch for the edges to look set while the tops still look slightly soft. These cookies finish setting as they cool, so pulling them when they still look a little underdone is the right move. If you wait until they look completely firm in the oven, they’ll dry out by the time they cool.
Glaze Only After the Cookies Cool
Let the cookies cool completely before glazing them, or the glaze will melt and soak in instead of sitting on top. Whisk the glaze until it’s smooth and glossy, then spoon it onto each cookie and nudge it outward just a little. You want enough thickness that it lands with some body. Give it 20 to 30 minutes to set before stacking or serving.
How to Adapt These Cookies for Different Kitchens and Different Cravings
Dairy-Free Pumpkin Cookies
Swap the butter in the cookies and glaze for a plant-based butter that’s firm, not whipped. The cookies still bake up soft, but the flavor will be a touch less rich and the glaze may set a little more firmly. Keep the glaze thick so it still sits on top instead of soaking in.
Spice It Up for Stronger Pumpkin Flavor
Add an extra 1/2 teaspoon of cinnamon or a pinch of ginger to make the spice notes louder. This doesn’t change the texture, but it makes the cookies taste more autumn-spiced and helps the glaze pop against the soft crumb.
Thicker, More Bakery-Style Cookies
Chill the dough for 20 to 30 minutes before scooping if you want a taller cookie with less spread. The flavor stays the same, but the texture gets a little more substantial and the tops stay puffier under the glaze.
Maple Glaze Instead of Vanilla
Replace the vanilla in the glaze with pure maple syrup, using a little less milk if needed to keep the consistency thick. The result is deeper and warmer, with a richer fall flavor that pairs especially well with the cinnamon in the cookie.
Storage and Reheating
- Refrigerator: Store in an airtight container for 4 to 5 days. The glaze stays set, but the cookies soften a little more over time.
- Freezer: Freeze the unglazed cookies for up to 2 months, then thaw and glaze after they come to room temperature. Glazed cookies can freeze, but the glaze may lose its smooth finish.
- Reheating: If you want them warm, heat unglazed cookies for a few seconds in the microwave or in a low oven. Don’t reheat glazed cookies too long or the topping will melt and turn sticky again.