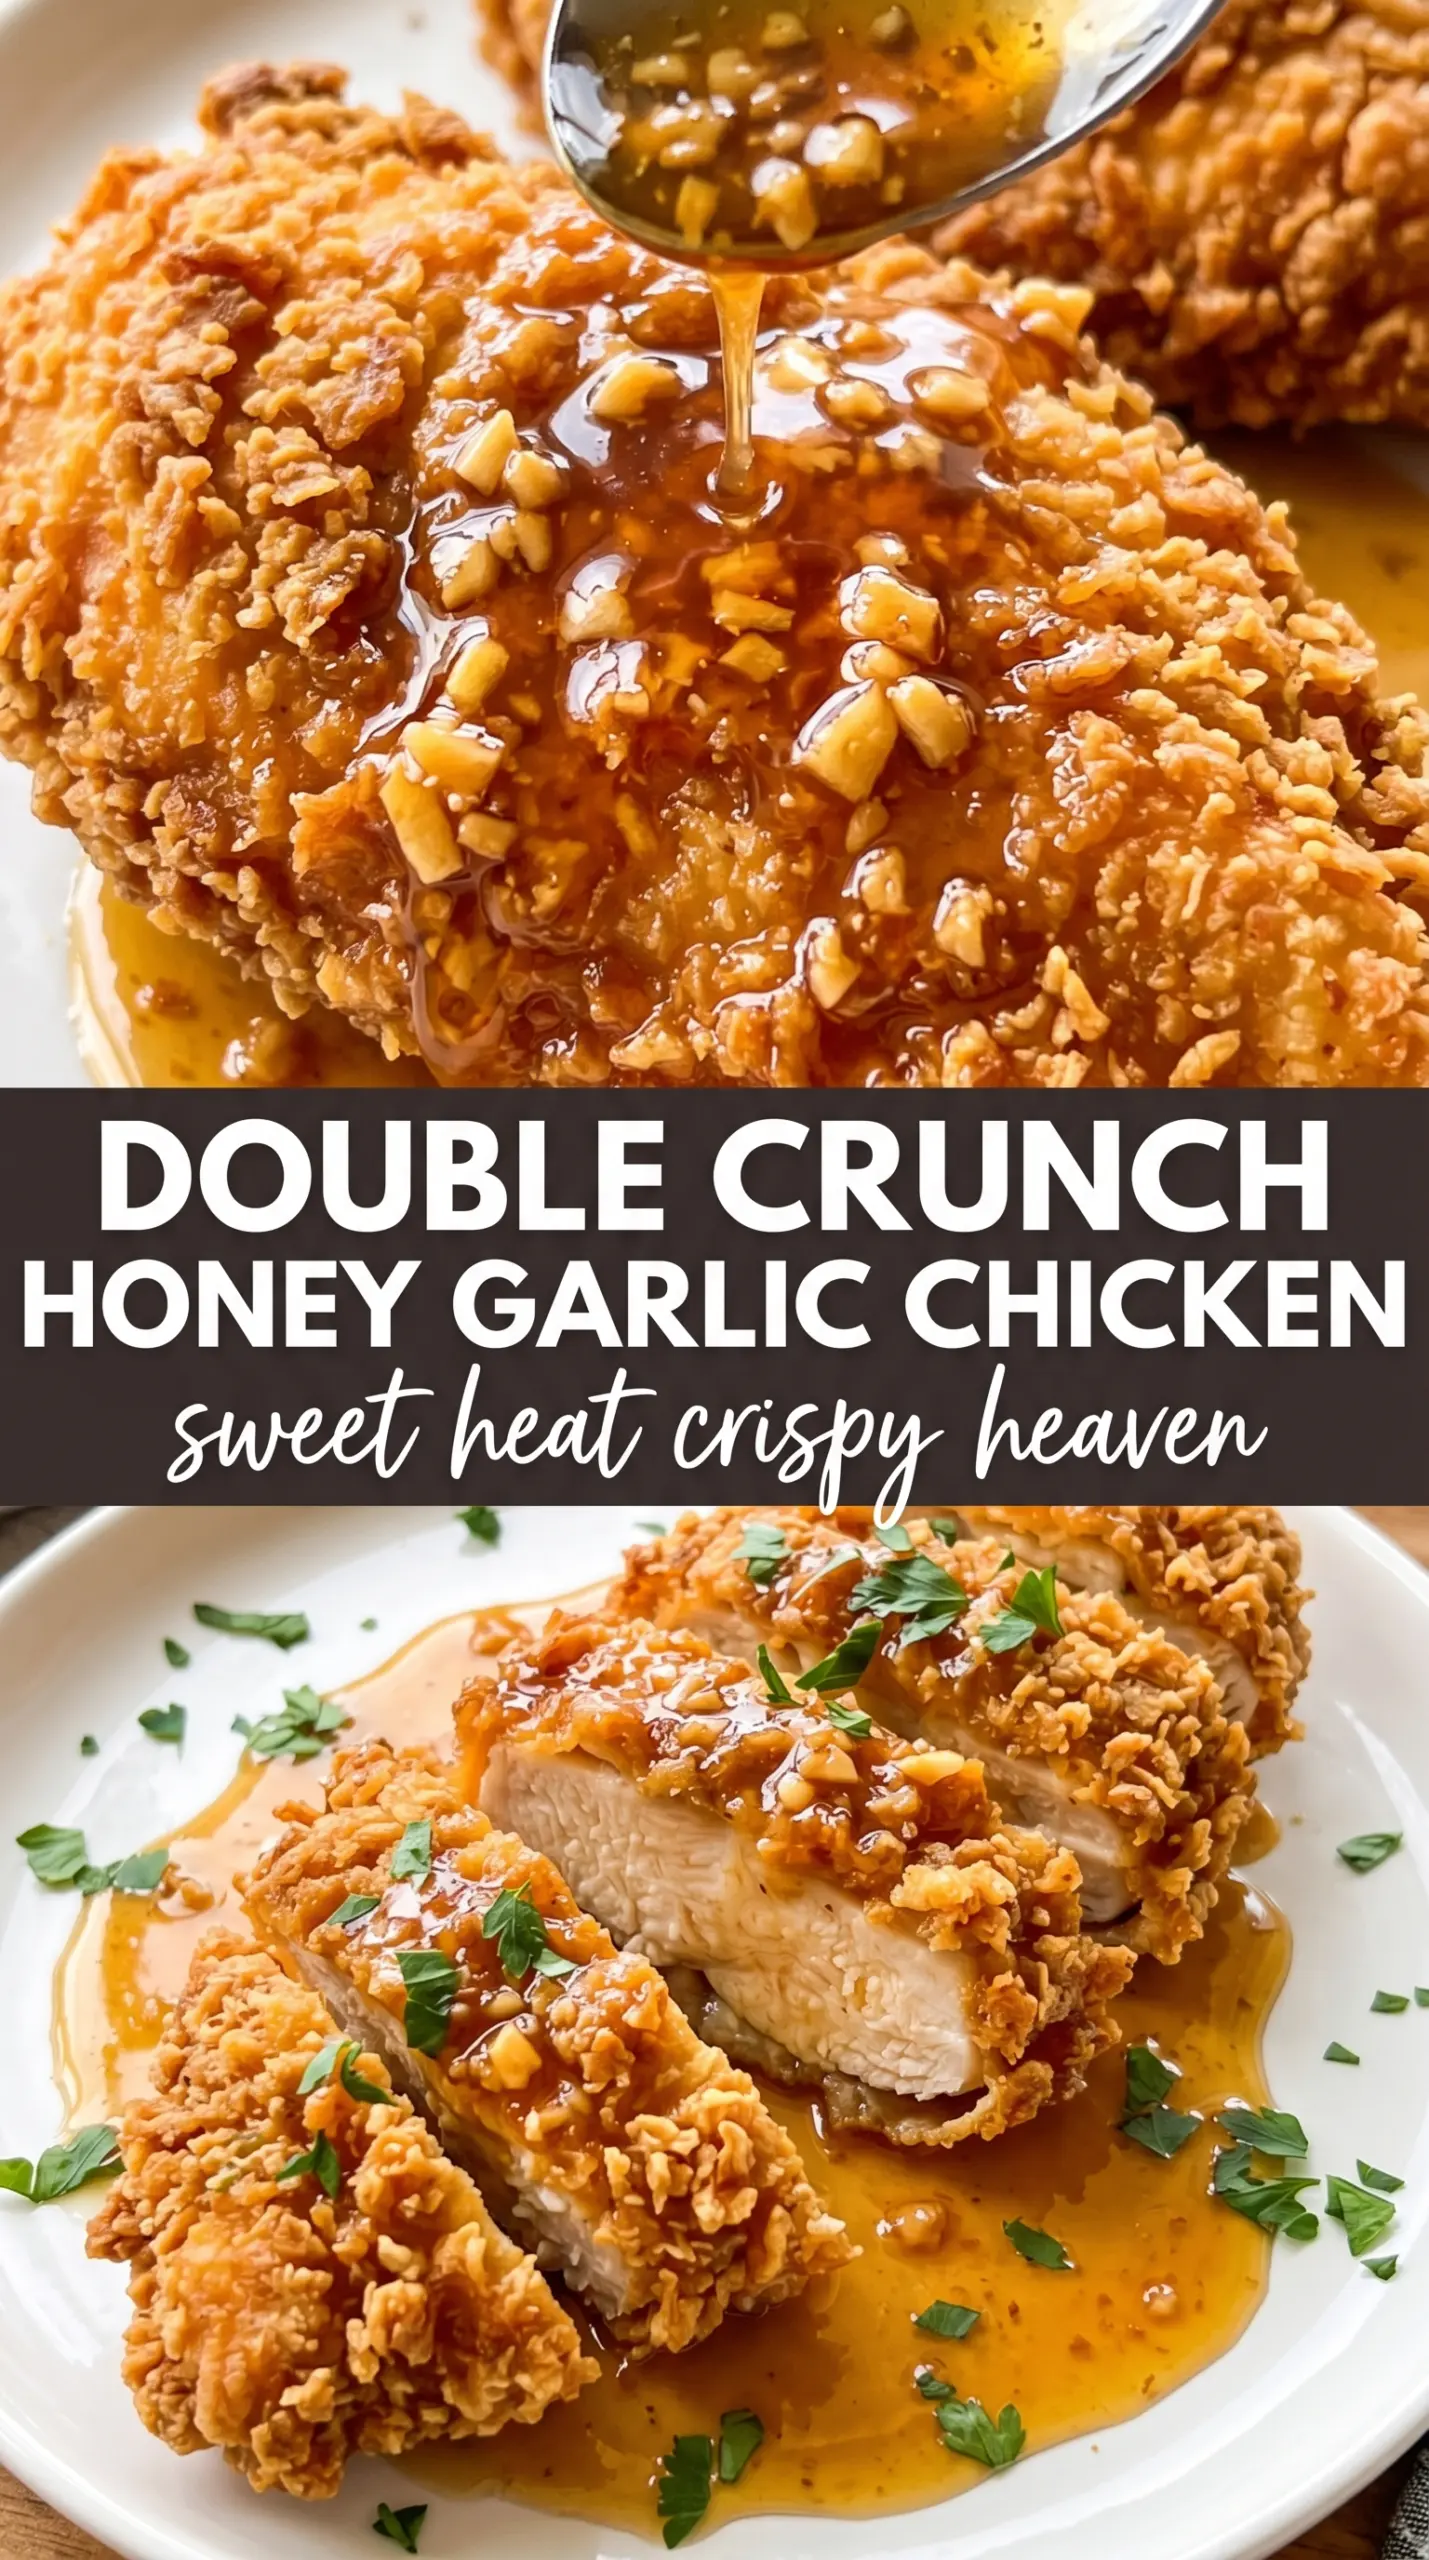
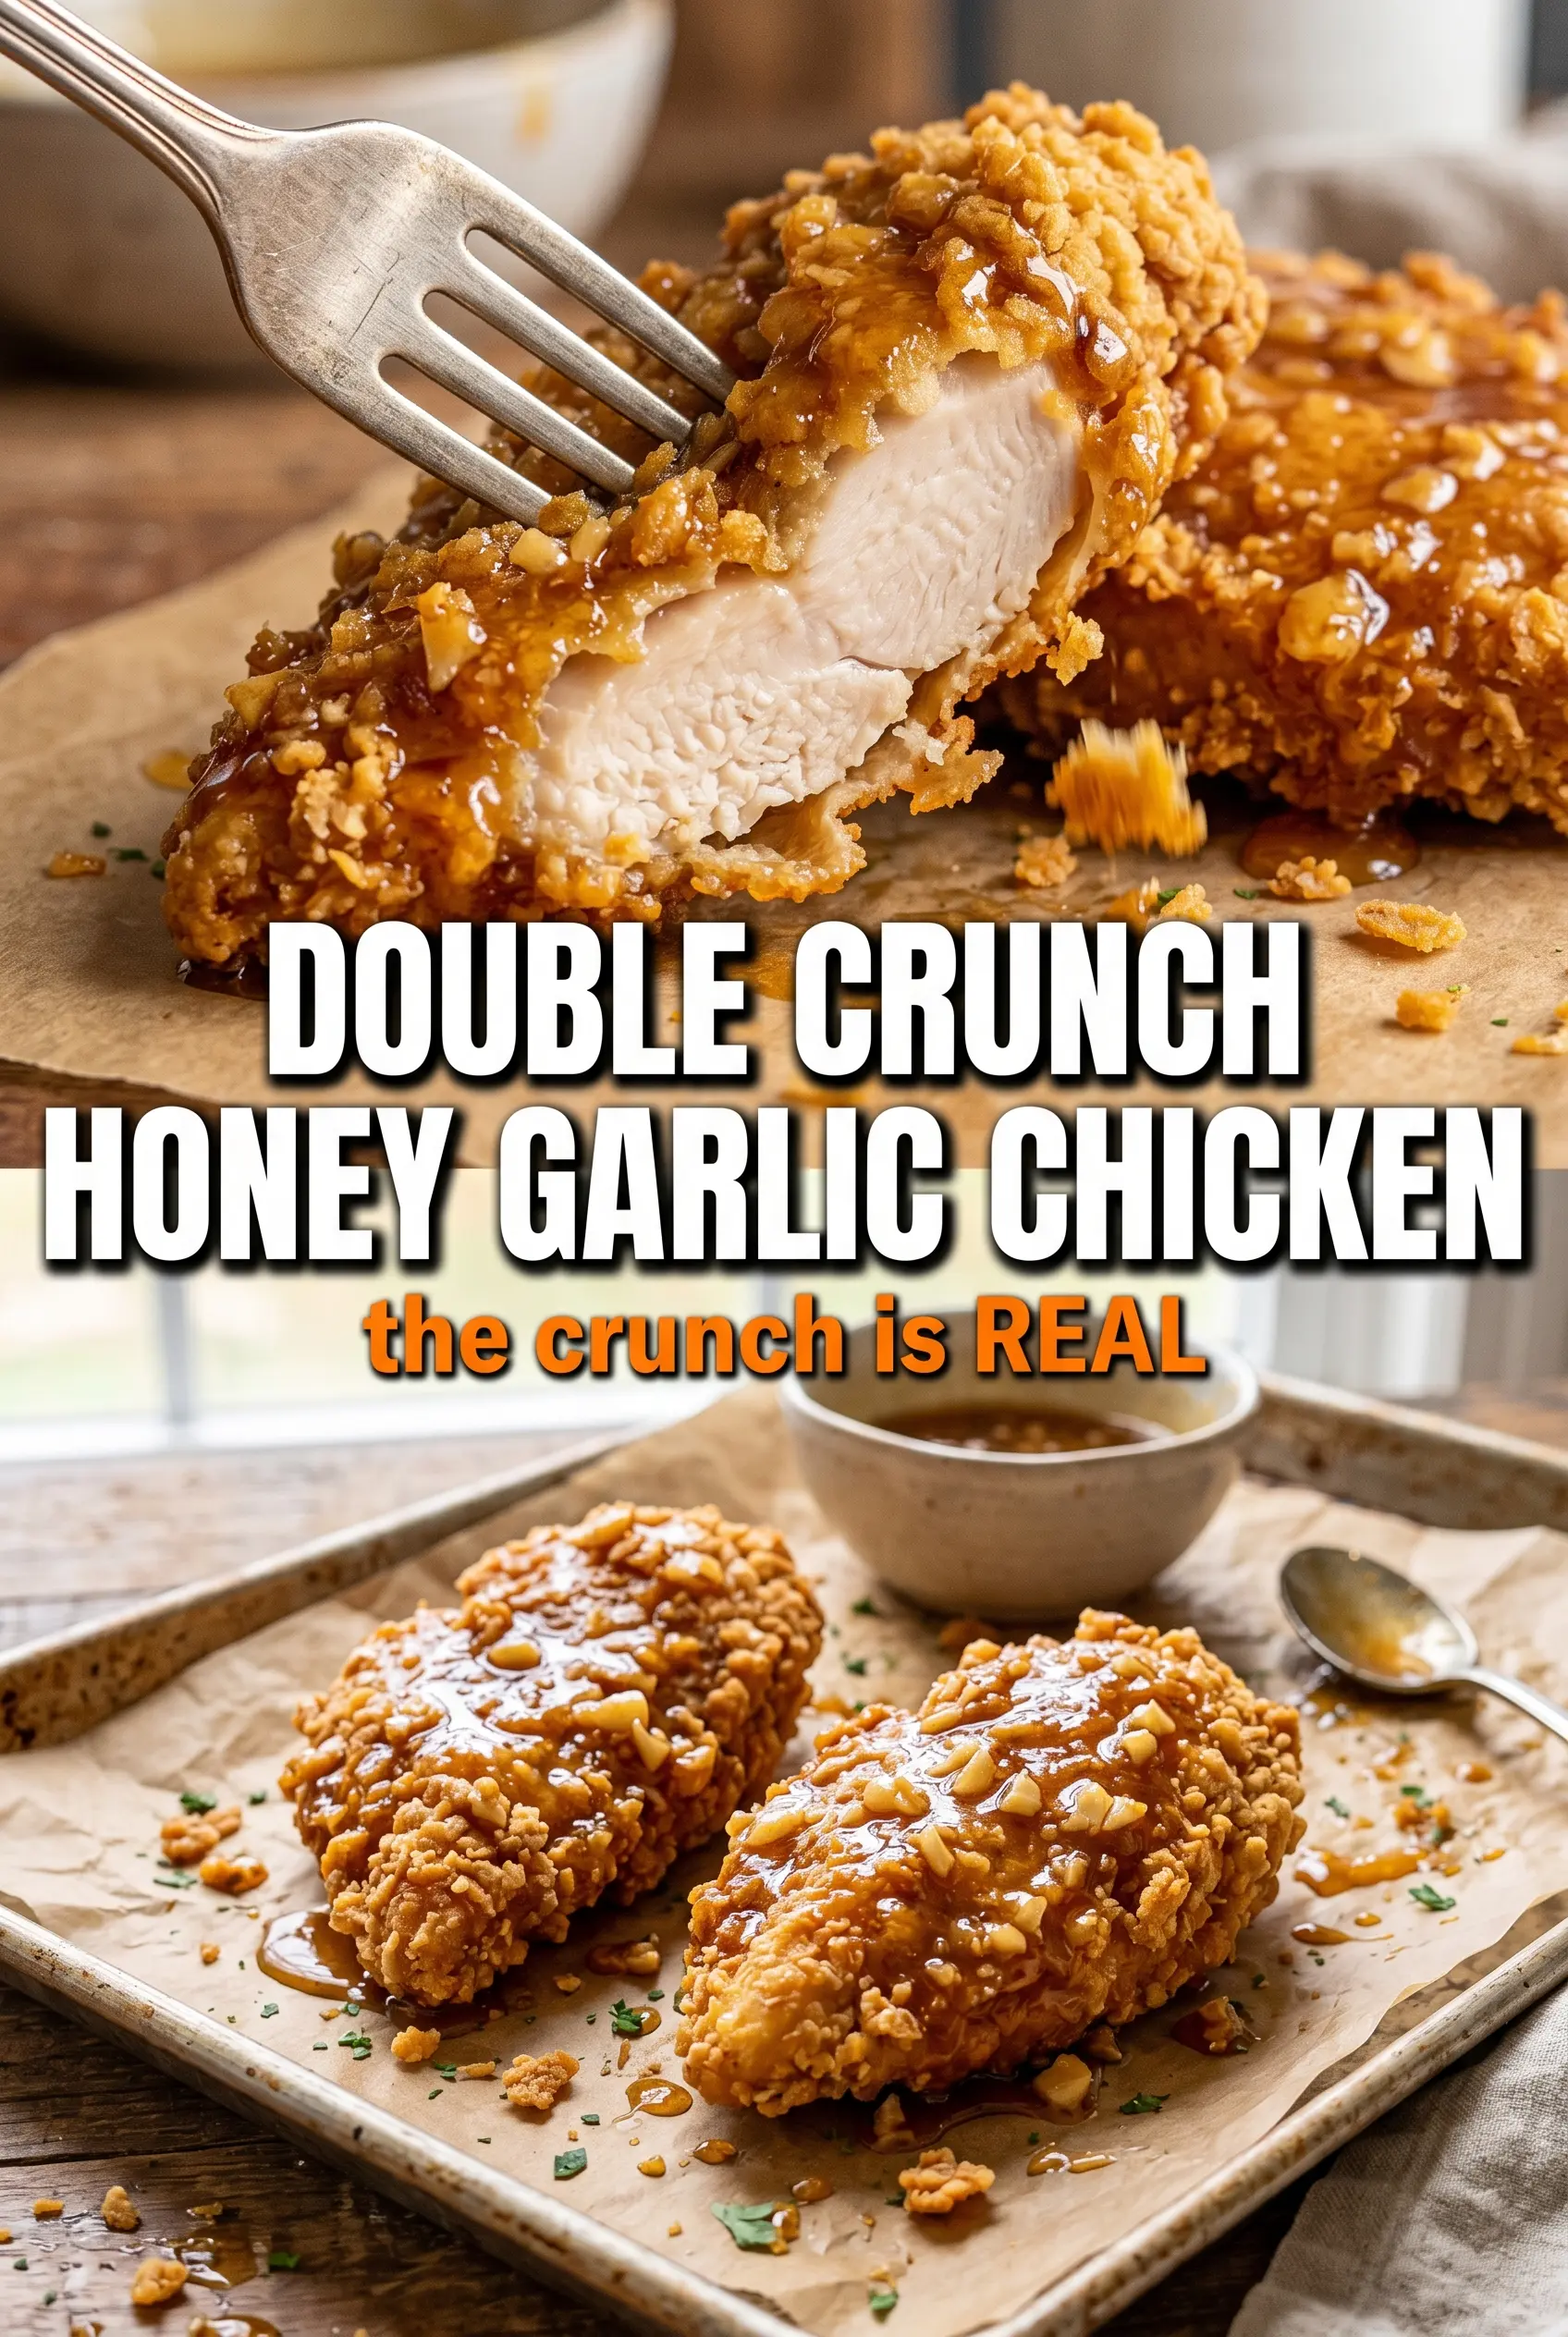
Extra-thick chicken breasts with a double-dipped crust have a way of staying crisp longer than you’d expect, and that’s what makes this version worth keeping in rotation. The first bite gives you a shattering, seasoned coating, then the honey garlic sauce lands on top with a sticky gloss that clings without washing the crunch away. It eats like takeout in the best possible way, only fresher and a lot more satisfying.
The trick is in the dredge. The first flour coat gives the egg something to grab onto, and the second flour coat builds those rough little ridges that fry up into a heavier, crunchier shell. I also keep the sauce simple: honey for body, soy sauce for salt and depth, butter for shine, and a little vinegar to keep it from turning one-note sweet. The sauce should be slightly thickened, not reduced into syrup, because it will tighten more as it hits the hot chicken.
Below, I’ll walk through the part that matters most: how to get the crust deeply golden before the sauce goes on, plus the small timing details that keep the chicken juicy instead of dry.
The double dredge gave me an actual craggy crust, and the sauce thickened just enough to coat the chicken without making it soggy. My kids picked off every crispy edge and asked for it again the next night.
Save this double crunch honey garlic chicken for the night you want a shattering crust and sticky garlic glaze in one pan-fried dinner.
The Dredge Is the Difference Between Crisp and Clumpy
A lot of fried chicken goes soft because the coating is too smooth or the pan is too crowded. The double dredge fixes both problems at once. The first pass creates a base layer, the egg gives you adhesion, and the second flour coating builds that rough, craggy exterior that catches the oil and browns with more texture.
Don’t press the flour on like you’re packing snow. Lightly pat it on, then lift the chicken and let the excess fall away before the egg dip. If the coating looks thick in a few spots, that’s a good thing here; those uneven patches are what turn into the crunchy ridges people notice first.
- All-purpose flour — This gives the crust its structure. A fine, even flour works better than a heavier breading because it fries into a thinner, cracklier shell.
- Smoked paprika — It doesn’t make the chicken smoky in a barbecue way; it deepens the color and gives the crust a warmer, more savory finish.
- Eggs — The egg is the glue between the first and second flour layers. Without it, the second coat slides off in the oil.
- Chicken breasts — Pound them to an even thickness so they finish at the same time. Thick spots stay pale while thinner edges overcook, and that’s where dry chicken starts.
What Each Ingredient Is Actually Doing in This Recipe
- Primary ingredient (the star) — Quality matters most. Choose the best you can find.
- Cooking medium (oil, butter, or broth) — This carries flavors and prevents dryness.
- Seasonings (salt, pepper, spices, herbs) — Layer flavors so nothing overpowers. Build depth gradually.
- Aromatics (garlic, onion, herbs) — Cook with fat to bloom flavors. Become the foundation.
- Supporting ingredients — Complement the main ingredient without overpowering it.
- Sauce or liquid (if applicable) — Brings flavors together. Balance richness with acid.
- Acid (lemon, vinegar, wine, or other) — Brightens and prevents flat-tasting results.
- Final finish (garnish, glaze, or sauce) — Prevents one-dimensional taste and adds visual appeal.
What the Honey Garlic Sauce Is Doing While the Chicken Fries
The sauce looks simple, but each ingredient has a job. Honey gives the glaze its stick and shine, while soy sauce keeps it from tasting flatly sweet. Butter rounds out the edges and helps the sauce cling, and vinegar cuts through the richness so the finished chicken still tastes bright after frying.
Use fresh garlic here, not garlic powder. You want the little sharp bits that soften in the pan and perfume the sauce. If the garlic starts browning hard before the honey goes in, the sauce will taste bitter, so keep the heat at medium and stir often.
- Honey — Use regular honey, not a strongly flavored specialty honey unless you want that flavor to lead. It thickens as it simmers and gives the final glaze its lacquered look.
- Soy sauce — This is the salt and depth in one ingredient. Low-sodium works if that’s what you have, but the sauce may need a touch more reduction to taste balanced.
- Butter — It softens the sharpness of the garlic and gives the glaze a smoother finish. Don’t skip it unless you need a dairy-free version.
- Apple cider vinegar — Just a small amount keeps the sauce from turning syrupy. If you only have rice vinegar, use it in the same amount.
Getting the Crust Crispy Before the Sauce Goes On
Seasoning the Flour
Mix the flour with the garlic powder, onion powder, smoked paprika, salt, and pepper before the chicken goes anywhere near it. That way the seasoning is built into the crust instead of sitting on the surface in uneven patches. The flour should look evenly speckled, not dusty white.
The Double Dredge
Work one piece of chicken at a time through flour, egg, and flour again. After the second coating, lift each breast and tap off the loose flour so the crust fries up rough instead of pasty. If you see wet egg peeking through, dust that spot with a little more flour before it hits the oil.
Frying to a Deep Golden Finish
Heat the oil to 350°F and keep the pan at medium-high, not blazing hot. If the oil is too cool, the crust drinks it in and turns heavy; if it’s too hot, the outside burns before the chicken cooks through. Fry until the coating is a deep golden brown and the chicken reaches 165°F in the thickest part, then drain it on a rack or paper towels so the steam doesn’t soften the bottom.
Glazing at the Last Second
Stir the sauce just until it looks slightly thickened and glossy, then pour it over the chicken while everything is hot. The heat from the chicken finishes the glaze and helps it cling to the crust. If you wait too long, the sauce cools and slides off instead of settling into the ridges.
How to Adapt This for Different Pans, Diets, and Leftovers
Gluten-Free Version
Swap the all-purpose flour for a good 1:1 gluten-free flour blend. You’ll still get a crisp crust, though it may be a little less shattery than wheat flour. Keep the coating light, because some gluten-free blends get pasty if they’re packed on too thick.
Dairy-Free Option
Use a plant-based butter or skip the butter and add an extra teaspoon of oil to the sauce. The glaze will still be sticky and shiny, but it will taste a little sharper and less rounded, so don’t over-reduce it.
Oven Finish for a Bigger Batch
If you’re cooking for more people, fry the chicken until the crust is set and golden, then finish it on a rack in a 400°F oven for 8 to 10 minutes. This keeps the coating crisp while the center cooks through without crowding the pan. The tradeoff is a slightly less aggressive fry crust, but it’s the best way to cook more pieces evenly.
Storage and Reheating
- Refrigerator: Store leftovers for up to 3 days. The crust will soften, but it still tastes good.
- Freezer: The fried chicken freezes better before saucing. Freeze the cooled chicken in a single layer, then reheat from frozen in the oven and add fresh sauce after warming.
- Reheating: Use a 375°F oven or air fryer until the coating crisps back up. The common mistake is microwaving it, which turns the breading limp and steamy.
Answers to the Questions Worth Asking
Double Crunch Honey Garlic Chicken Breasts
Ingredients
Equipment
Method
- Mix all-purpose flour, garlic powder, onion powder, smoked paprika, salt, and pepper until evenly combined for a seasoned coating.
- Dredge each chicken breast in the seasoned flour, pressing lightly so it adheres.
- Dip the floured chicken into the beaten eggs, letting excess drip off.
- Dredge again in the seasoned flour to form the double-crunch coating.
- Heat vegetable oil in a large cast iron skillet over medium-high heat until it reaches about 350°F.
- Pan-fry the chicken for 5-6 minutes per side, turning once, until deep golden, crunchy, and the internal temperature reaches 165°F; drain on a rack or paper towels.
- Simmer honey, minced garlic, soy sauce, butter, and apple cider vinegar in a saucepan over medium heat for 3-4 minutes until slightly thickened and glossy.
- Pour the honey garlic sauce over the hot crispy chicken so it glazes and clings immediately.
- Garnish with sesame seeds and sliced green onions, then serve immediately.