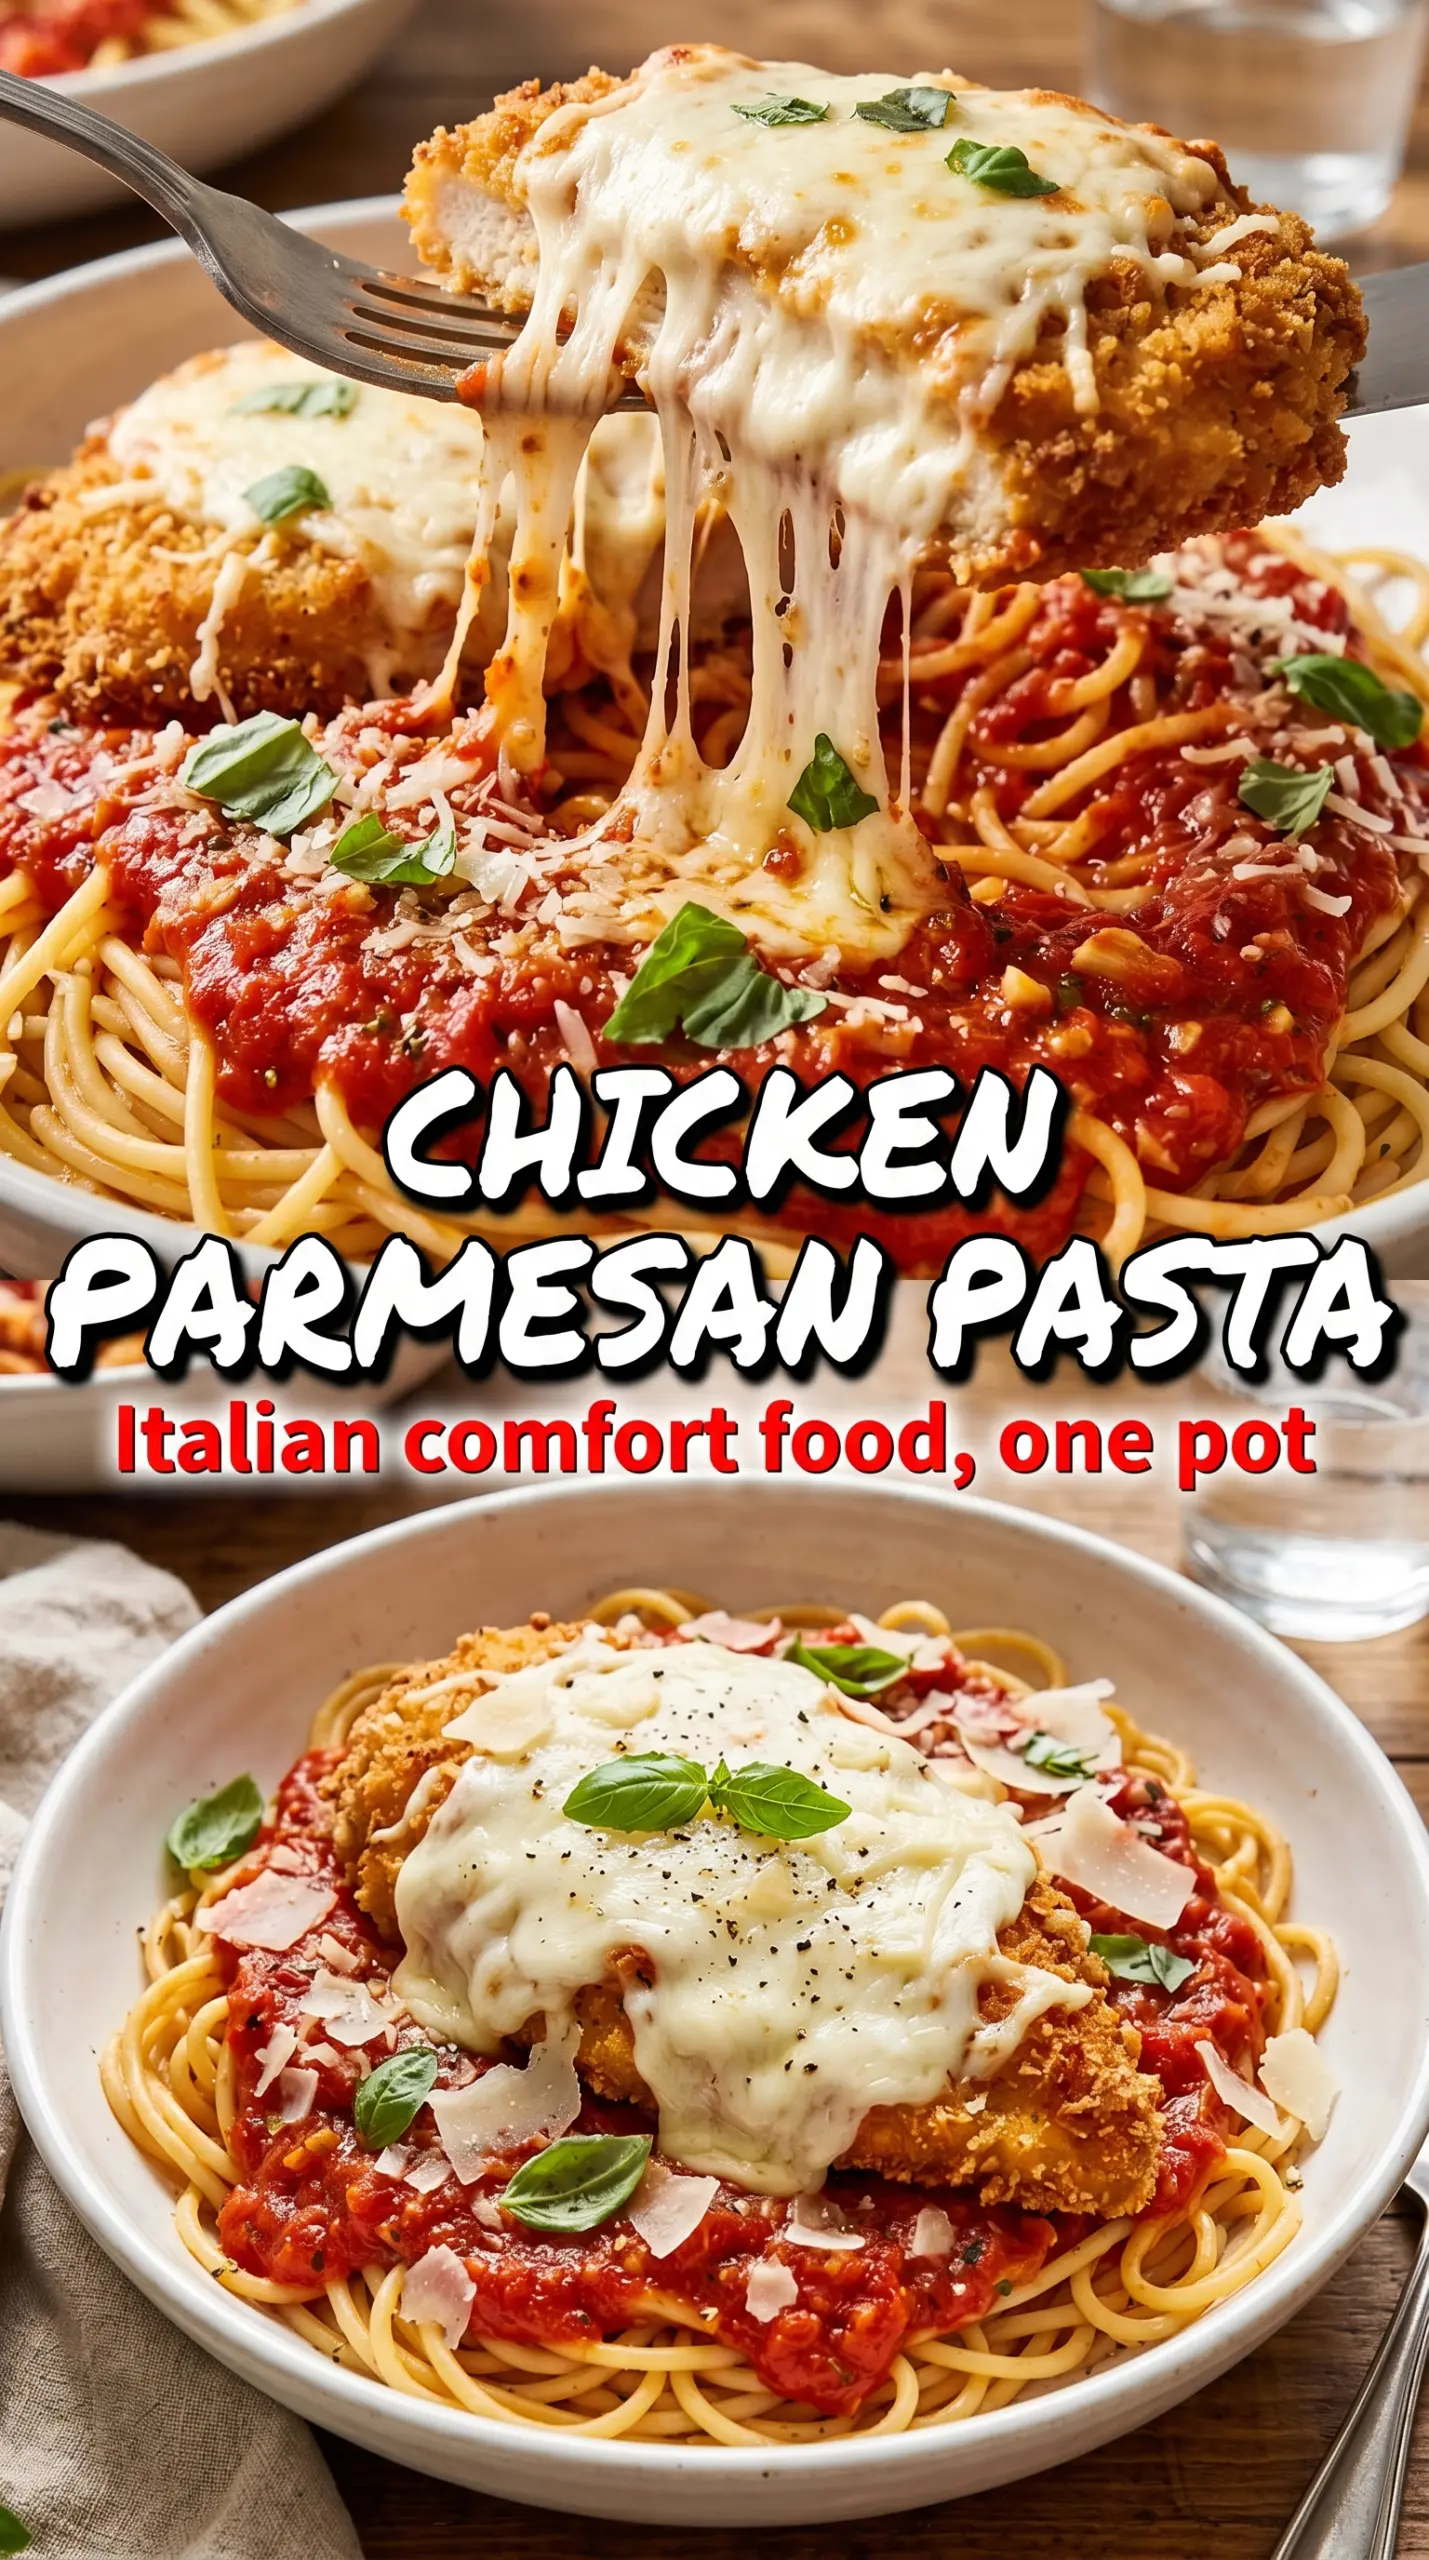
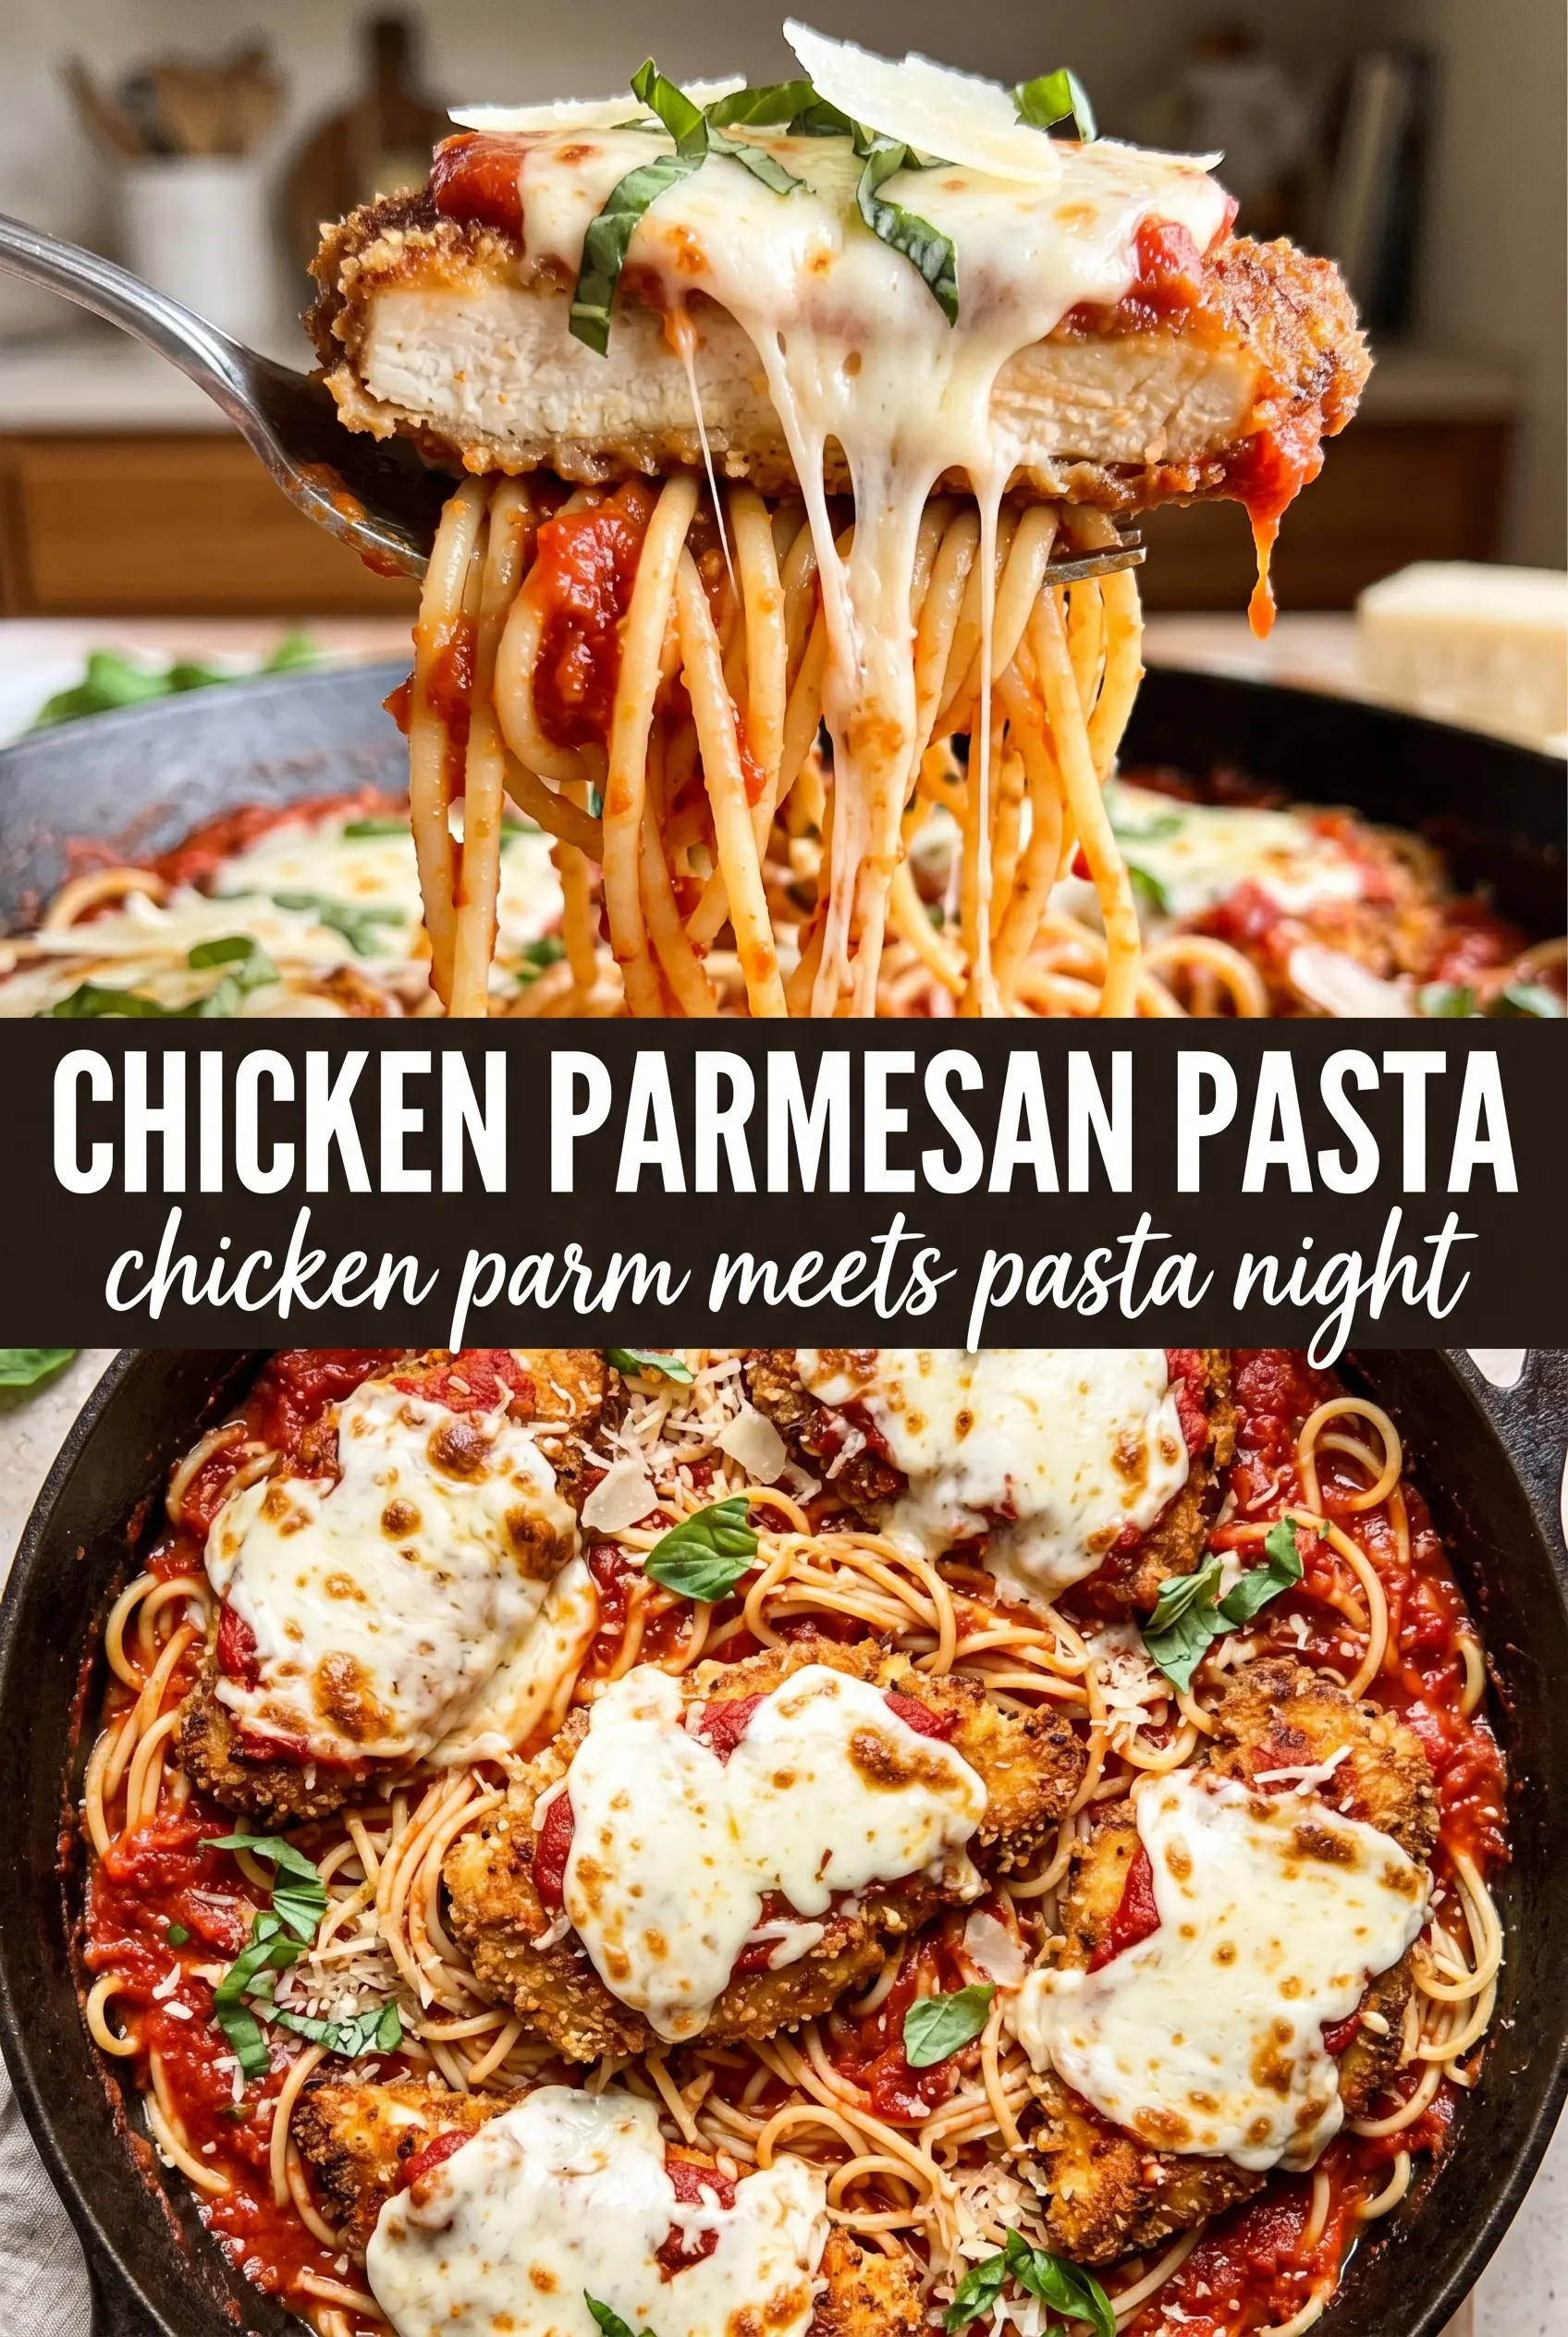
Chicken Parmesan pasta lands in that sweet spot between comfort food and weeknight practicality: crispy breaded chicken, plenty of marinara, and a blanket of melted mozzarella over pasta that actually gets coated instead of buried. The best bites have a little crunch from the chicken, a little bite from the penne, and enough saucy cheese to pull into strings when you serve it.
What makes this version work is the sequence. The chicken gets browned before it goes into the baking dish, which keeps the breading from turning soft in the oven. The pasta is tossed with sauce before baking too, so every piece picks up flavor instead of relying on the topping alone. That simple move keeps the whole pan cohesive and prevents the bottom from drying out.
Below, I’ve included the small details that matter most: how to keep the coating crisp, when the chicken is cooked through, and what to do if you want to stretch this into a bigger meal without losing the texture that makes it worth making.
The chicken stayed crisp even after baking, and the pasta soaked up the marinara without getting mushy. My husband went back for seconds and said it tasted like chicken parm from our favorite Italian place.
Save this chicken Parmesan pasta for the nights when you want crispy chicken, saucy penne, and a bubbling mozzarella top in one pan.
The Trick to Keeping Chicken Parm Pasta Crispy in the Oven
The problem with chicken Parmesan pasta is that the very thing everyone wants from it — the sauce and cheese — can work against the coating. If the chicken goes into the pan under a heavy layer of sauce, it steams. If it sits in the oven too long, the crust softens before the cheese finishes melting. The fix is to brown the chicken first, then let the pasta and sauce do the backing while the chicken stays perched on top.
That layout keeps the breading exposed long enough to stay crisp around the edges, especially if you use a wide baking dish instead of a deep casserole. A 9×13 pan gives the pasta room to spread out, which helps the sauce reduce a little around the edges instead of pooling underneath. You’re aiming for hot, bubbling sauce and cheese that’s melted with a few golden spots, not a pan of soggy crumbs under a cheese blanket.
What the Chicken, Cheese, and Sauce Are Each Doing Here
- Chicken breasts — Cutting them into bite-sized pieces helps them cook fast and evenly, and it gives you more crisp edges per serving. Thighs work too if that’s what you have, but they’ll be a little richer and less lean.
- Italian breadcrumbs — These bring the seasoned crust that makes this taste like chicken parm, not plain breaded chicken. If you only have plain breadcrumbs, add extra Italian seasoning and a pinch of garlic powder.
- Parmesan — A little goes into the coating for nuttiness, and more on top adds a salty, browned finish. Freshly grated Parmesan melts and clings better than the shelf-stable kind.
- Marinara sauce — Use a sauce you like on its own, because it carries the whole dish. A thinner sauce is fine here since the pasta will absorb some of it, but if it tastes flat straight from the jar, the finished pan will too.
- Mozzarella — Shredded mozzarella gives you the melt and stretch. Low-moisture mozzarella works best; fresh mozzarella releases too much water and can make the top slippery instead of bubbly.
Building the Pan So Nothing Turns Soft
Coating the Chicken Evenly
Work the chicken through the flour, egg, and breadcrumb mixture in that order so the crust has something to grip. If the pieces look patchy, press the crumbs on with your fingertips instead of shaking them off; thin spots turn pale and soggy in the oven. Keep the chicken in a single layer in the pan so the coating stays intact during browning.
Getting the First Crisp in the Skillet
Use medium-high heat and enough olive oil to coat the pan. The chicken should sizzle as soon as it hits the surface, and you want a deep golden crust before you flip it. If the pan is too crowded, the pieces will steam and the breading will slide off, so cook in batches if you need to.
Layering the Pasta and Cheese
Toss the cooked penne with the marinara before it goes into the baking dish. That step matters because dry pasta under cheese bakes up unevenly and leaves bland spots underneath the topping. Once the chicken is arranged over the pasta, spread the mozzarella all the way to the edges so the top browns in patches and seals in the heat.
Baking Until the Cheese Blisters
Put the dish in the oven just long enough for the cheese to melt fully and start showing little golden spots. If you bake it too long, the chicken coating loses its edge and the pasta starts to tighten up. Fresh basil goes on at the end, after the pan comes out of the oven, so it stays bright and doesn’t blacken.
How to Adapt Chicken Parmesan Pasta Without Losing What Makes It Good
Gluten-Free Version
Swap in gluten-free flour and gluten-free breadcrumbs, then keep the rest of the method the same. The coating will still crisp, though it may brown a little faster, so watch the skillet closely and don’t let the oil run too hot.
Make It With Chicken Thighs
Boneless thighs give you juicier chicken and a slightly richer flavor. They’ll take a minute or two longer in the skillet, so cook until the centers are no longer pink and the coating is a deep golden brown.
Dairy-Free Direction
Use a dairy-free Parmesan-style substitute in the coating and topping, and pick a mozzarella-style shred that melts well. You’ll lose some of the salty nuttiness from real Parmesan, so choose a marinara with good body and enough seasoning to carry the dish.
Stretch It for a Bigger Crowd
Add another half pound of pasta and a little extra marinara if you need to feed more people, but don’t skimp on the cheese layer. The dish should still look generously covered at the top, or the baked pasta underneath can seem dry by the time it reaches the table.
Storage and Reheating
- Refrigerator: Store covered for up to 4 days. The chicken coating softens a bit, but the flavor holds.
- Freezer: It freezes best without the basil. Cool completely, wrap tightly, and freeze for up to 2 months. The texture of the chicken crust will be softer after thawing, but it still works.
- Reheating: Reheat in a 350°F oven, covered for the first 10 minutes, then uncovered until hot. The biggest mistake is microwaving it too long, which makes the breading rubbery and the pasta unevenly hot.
Questions I Get Asked About This Recipe
Chicken Parmesan Pasta
Ingredients
Equipment
Method
- Dredge the bite-sized chicken pieces in all-purpose flour, then dip them into beaten large eggs.
- Coat the egg-dipped chicken in Italian breadcrumbs mixed with 1/2 cup grated Parmesan, pressing lightly so crumbs adhere.
- Heat olive oil in a pan over medium-high heat and pan-fry the chicken for 3-4 minutes per side until golden and cooked through, then drain on paper towels.
- Toss the cooked penne pasta with marinara sauce and pour into a greased 9x13 baking dish.
- Arrange the crispy breaded chicken pieces over the pasta in an even layer.
- Top with shredded mozzarella cheese and 1/2 cup grated Parmesan cheese so the surface is covered.
- Bake at 375°F for 20-22 minutes until the cheese is melted and golden, then garnish with fresh basil.