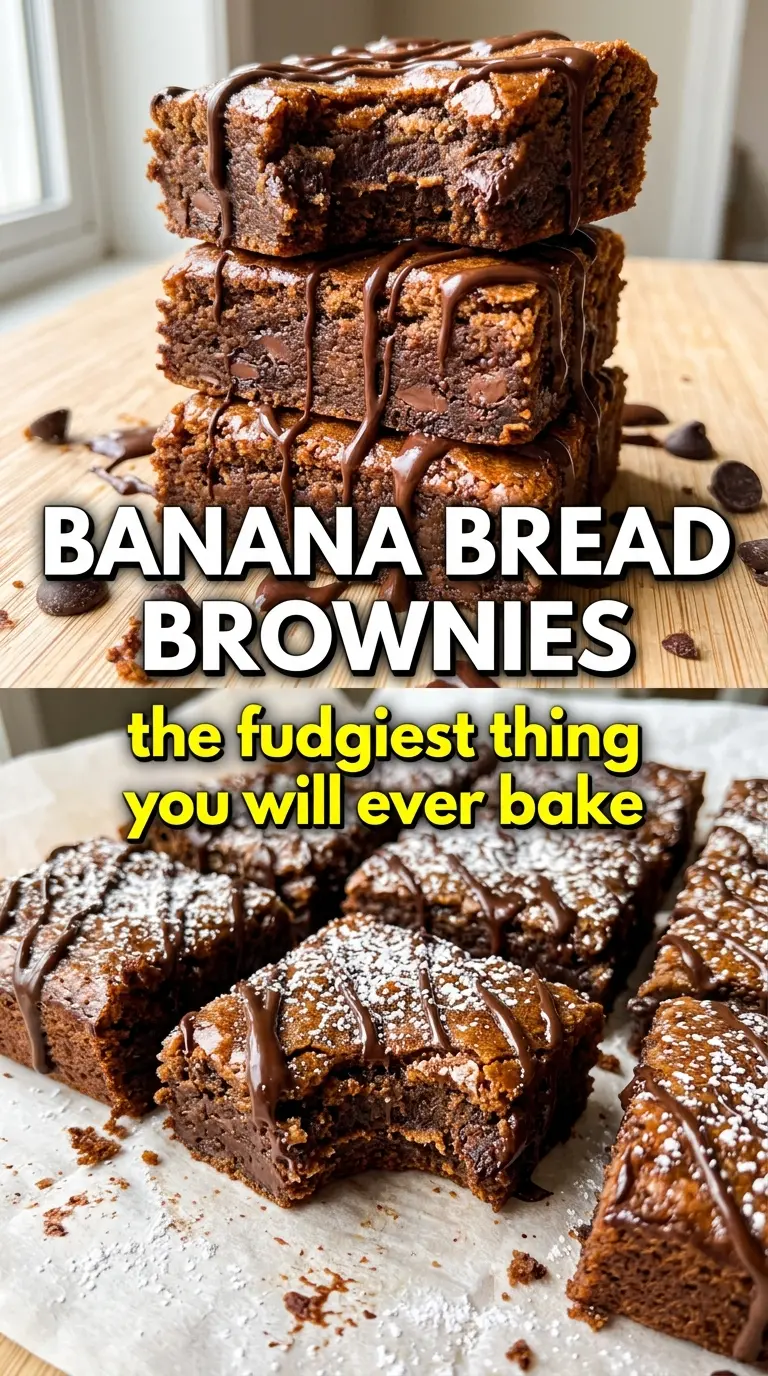
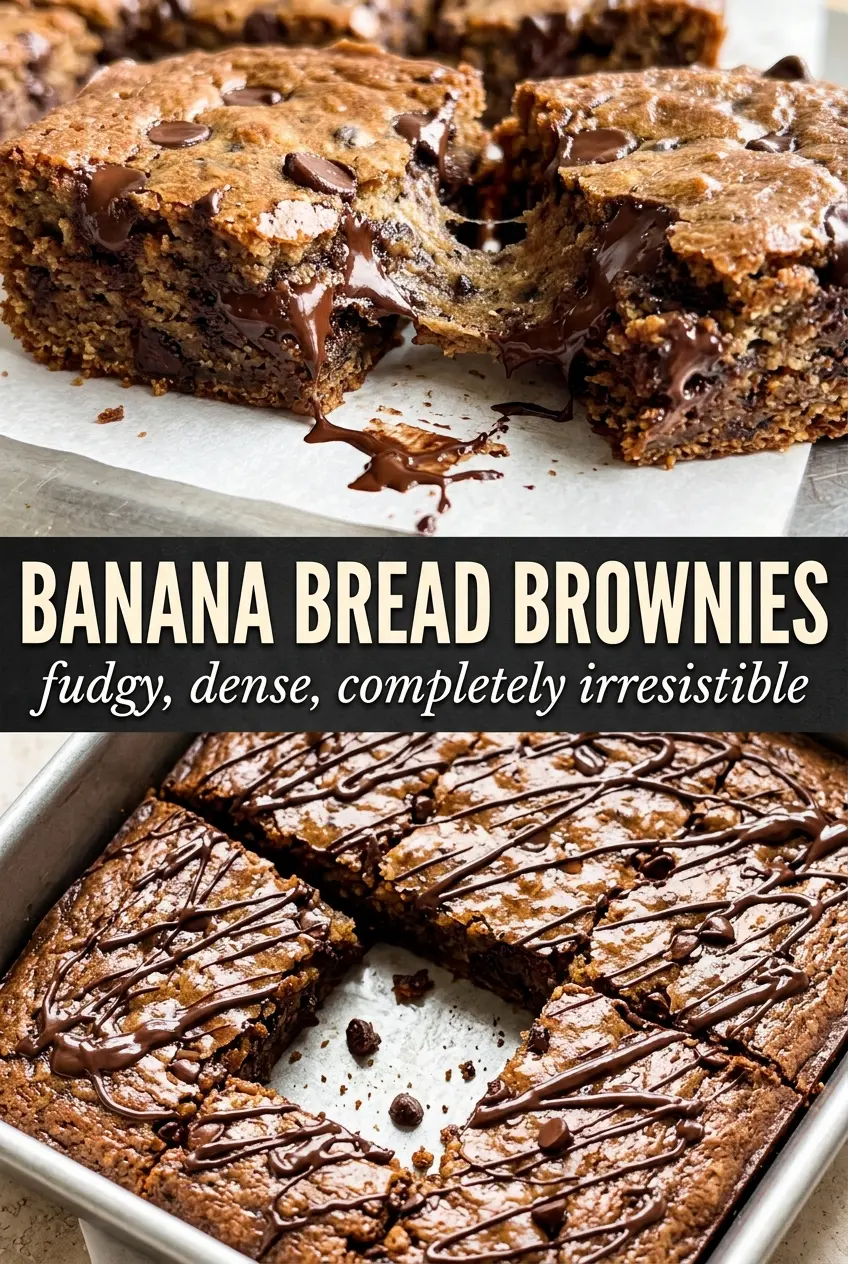
Banana Bread Brownies bake up with the kind of dense, fudgy crumb that sits somewhere between a banana bar and a blondie, but the brown butter takes them in a deeper, nuttier direction. The top sets into a thin crinkled crust while the center stays moist and rich, and the warm glaze seeps into the surface just enough to make every bite taste finished, not merely sweet.
What makes this version work is the way the browned butter carries the banana flavor instead of burying it. Browning the butter before it goes into the batter adds a toasted note that plays well with the brown sugar and cinnamon, and cooling it slightly keeps the eggs from scrambling when everything gets whisked together. The batter should be mixed just until the flour disappears; overmixing turns these from plush bars into something tighter and bready.
Below, I’ll walk through the part that matters most: how to get that fudgy middle without underbaking the pan, plus the small glaze trick that makes these feel bakery-style without adding any extra work.
The glaze soaked into the warm bars just enough to keep the tops soft without making them soggy, and the chocolate chips stayed melty in the best way.
Love the fudgy crumb and brown butter glaze? Save these Banana Bread Brownies for the next time those ripe bananas need a better plan.
The Part That Keeps These Fudgy Instead of Bready
The biggest mistake with banana bars is treating them like quick bread. Once the flour goes in, the batter only needs a few turns of the spoon. The moment the dry streaks disappear, stop. That’s how you keep the crumb dense and soft instead of tough and cakey.
Bananas do a lot of the heavy lifting here, but they also add moisture that can hide an underbaked center. A toothpick should come out with a few moist crumbs, not wet batter. If the middle looks set but still feels a little soft when you tap the pan, that’s the right place to pull it. The bars finish setting as they cool.
- Browned butter — This gives the bars a toasted, caramel edge that plain melted butter can’t match. Cool it for a few minutes before mixing so it doesn’t cook the eggs.
- Very ripe bananas — Brown-speckled bananas mash smoothly and bring the strongest banana flavor. If yours aren’t ripe enough, the bars will taste flatter and less moist.
- Chocolate chips — They’re optional in theory, but they break up the sweetness and add little pockets of melt. Mini chips distribute more evenly if that’s what you have.
What Each Ingredient Is Doing in the Pan
The brown sugar does more than sweeten. It helps the bars stay soft and gives them that slightly chewy edge around the pan. Granulated sugar would bake up drier here, and the bars would lose some of that blondie-like texture.
The glaze is worth doing because it turns a good banana bar into one that tastes finished. Brown the butter for it too, even though it takes only a minute longer. That extra step keeps the topping from tasting flat, and the warm glaze melts just enough into the top layer to anchor the whole dessert.
- All-purpose flour — This gives the bars their structure without turning them cakey. Don’t swap in cake flour unless you want a softer, more delicate result.
- Baking soda — It reacts with the bananas and helps the bars rise just enough for a crinkled top. Old baking soda can leave you with a dense, heavy pan.
- Powdered sugar in the glaze — It dissolves smoothly, which keeps the topping glossy instead of grainy. Sifting it first helps if yours is lumpy.
How to Get the Pan-Baked Texture Right
Brown the butter first
Set the butter in a light-colored saucepan so you can watch the color change. It will foam, then quiet down, and after that the milk solids will turn amber and smell nutty. Pull it off the heat as soon as you see those brown flecks, because it can go from browned to burnt fast. Let it cool for a few minutes before it hits the bananas and eggs.
Build the batter without beating it
Whisk the bananas, browned butter, brown sugar, eggs, and vanilla until smooth, then fold in the dry ingredients just until combined. A few streaks of flour are better than overmixing. Once the chips go in, use only enough mixing to distribute them. If you keep stirring, the bars bake up tight instead of tender.
Bake until the center still has some give
Spread the batter evenly into the greased 9×13 pan so the edges don’t finish too far ahead of the center. Bake at 350°F until the top is set and a toothpick comes out with moist crumbs. If it comes out completely clean, the bars are already on the dry side. Let them cool in the pan long enough for the middle to set before glazing.
Pour the glaze while the bars are warm
Stir the glaze until it’s smooth and pourable, then spread or drizzle it over the bars while they’re still warm. That warmth helps the glaze sink slightly into the surface instead of sitting on top like frosting. If the glaze seems too thick, add a teaspoon of milk at a time until it loosens. Slice after it sets so the cuts stay clean.
How to Adapt These Banana Bread Brownies for Different Kitchens
Dairy-Free Version
Use a good dairy-free butter substitute in both the bars and the glaze. You’ll lose a little of the nutty depth from real browned butter, but you can make up some ground by toasting the dairy-free butter until it just starts to deepen in color. Keep the milk in the glaze unsweetened so the topping doesn’t get cloying.
Gluten-Free Swap
A good 1:1 gluten-free baking blend works here because the bars already have plenty of moisture from the bananas and butter. Don’t use almond flour alone; it won’t give you the same sliceable structure. Bake just until the center is set, since some blends dry out faster in a thin bar.
Skip the Chocolate Chips
Leave them out if you want a cleaner banana-butter-cinnamon flavor. The bars will still be rich and soft, but they’ll lean more like banana blondies than dessert bars with pockets of melt. If you want something to replace the chips, chopped toasted walnuts work well.
Storage and Reheating
- Refrigerator: Store in an airtight container for up to 5 days. The glaze softens the top a little after day one, but the bars stay moist.
- Freezer: These freeze well. Wrap individual squares tightly and freeze for up to 2 months; thaw at room temperature so the glaze doesn’t get sticky.
- Reheating: Warm a square for 10 to 15 seconds in the microwave if you want the chips soft again. Don’t overheat it or the glaze will melt off and the crumb will dry out.
Answers to the Questions Worth Asking
Banana Bread Brownies
Ingredients
Equipment
Method
- Preheat oven to 350°F and grease a 9x13 pan.
- Brown the butter in a saucepan until golden and nutty smelling, then remove from heat and cool slightly.
- Whisk the browned butter, brown sugar, eggs, and vanilla into mashed bananas until smooth and glossy.
- Fold in the flour, baking soda, cinnamon, and salt until just combined, then stir in chocolate chips.
- Spread the batter evenly in the pan.
- Bake for 25–30 minutes until a toothpick comes out with just a few moist crumbs, then set the pan on a rack.
- Brown the glaze butter in a saucepan, then brown and cool just enough to whisk smoothly.
- Whisk the browned glaze butter with powdered sugar, milk, and vanilla until smooth and pourable.
- Pour the glaze over the warm bars so it soaks in, then slice when set.