Juicy baked chicken breasts earn a permanent spot in the dinner rotation when they come out with a golden, fragrant crust and an interior that stays tender instead of turning chalky and dry. The trick is treating them like something that needs even thickness and a real finish, not just a quick trip through the oven. That little bit of care is what turns plain chicken into the kind of main dish you can slice cleanly and serve without a sauce rescue mission.
This version leans on a hot oven, a light coat of olive oil, and a dry spice blend that clings well enough to form color without burning. Pounding the thicker ends down to the same thickness as the thinner parts matters more than almost anything else here, because chicken breasts cook unevenly by nature. Once they’re level, they cook faster and more predictably, which is the difference between juicy and stringy.
Below, I’ve included the small details that keep the crust from going pale and the meat from overshooting its temperature. If baked chicken breasts have ever come out bland, dry, or suspiciously rubbery, the fixes are all in here.
The chicken stayed incredibly juicy, and the spice coating browned up instead of just drying out. I rested it for the full 5 minutes, and the juices actually stayed in the meat when I sliced it.
Save these baked chicken breasts for the nights when you want juicy chicken with a golden herb crust in under 30 minutes.
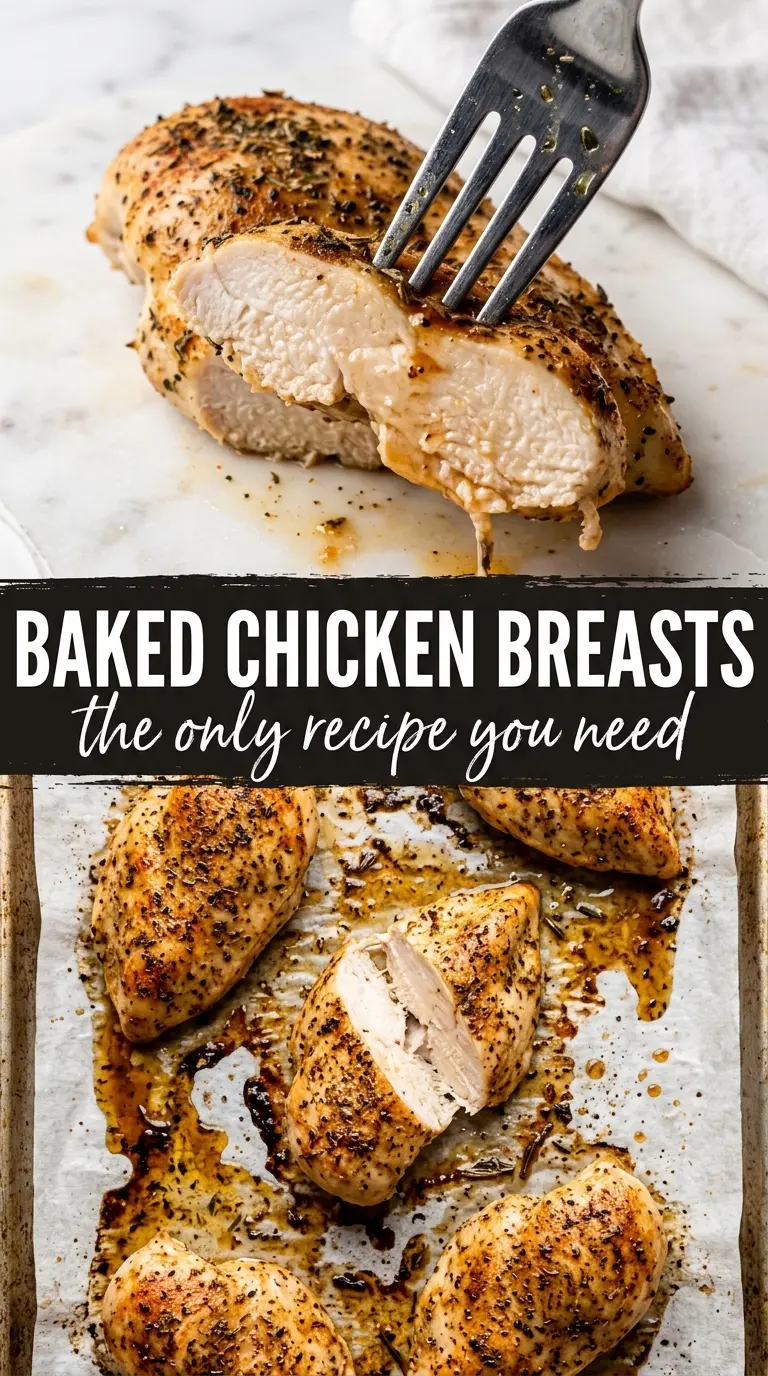
The Part That Keeps Baked Chicken Breasts from Turning Dry
The biggest mistake with baked chicken breasts is assuming the oven will cook them evenly on its own. It won’t. The thin end is usually done long before the thick end catches up, which is why one bite tastes perfect and the next feels like cardboard. Flattening the breasts to an even thickness gives you a wide window where everything finishes at the same time.
425°F is hot enough to get color on the surface before the meat has time to dry out. That matters because pale chicken usually means it spent too long in the oven waiting for the center to catch up. Pull it when the thickest part reaches 165°F, then let it rest. If you slice too early, the juices run straight onto the cutting board instead of staying where they belong.
What Each Ingredient Is Actually Doing in This Dish
- Chicken breasts — Boneless, skinless breasts give you a lean base that cooks fast, but they dry out quickly if you leave them uneven. If one side is much thicker, pound it down first; that one step changes the final texture more than any seasoning ever will.
- Olive oil — This helps the spices stick and encourages browning on the surface. A neutral oil works in a pinch, but olive oil gives the crust a better finish and a little more flavor.
- Garlic powder, onion powder, smoked paprika, and Italian seasoning — These build the savory crust without adding moisture that would steam the chicken. If you only have regular paprika, use it, but you’ll lose the deeper color and that light smoky edge.
- Salt and black pepper — The salt seasons the meat all the way through, not just the outside. If you cut the salt too far, the chicken tastes flat even when the crust looks good.
- Fresh parsley and lemon wedges — These are not decoration. The parsley keeps the plate bright, and the lemon wakes up the seasoning right at the table.
The 22 Minutes That Matter Most
Setting Up for Even Cooking
Preheat the oven fully before the chicken goes in. A hot oven gives you immediate browning instead of a slow warm-up that dries the meat before the surface ever colors. Lightly grease the baking dish so the underside doesn’t stick when the juices thicken at the bottom. If the chicken breasts vary in size, pound them to about 3/4-inch thickness so the thinner ends don’t overcook while the thicker parts finish.
Coating the Chicken So the Crust Stays Put
Brush both sides with olive oil before adding the seasoning mix. Dry spice blends cling better to oiled chicken, and that thin sheen is what helps the surface take on that deep golden color. Rub the spices on evenly, then press them lightly so they adhere. If the seasoning looks dusty or patchy, it’ll bake off unevenly and leave you with pale spots.
Baking Until the Center Is Just Done
Slide the dish into the oven and start checking at the lower end of the time range. You want the tops golden and the thickest part at 165°F, but the chicken should still feel springy when pressed with a finger. If it looks dry on the outside before it reaches temp, the oven is too hot or the breasts were too thin. Pull it as soon as it’s done; every extra minute works against juiciness.
Resting Before You Slice
Let the chicken sit for 5 minutes before cutting. That short rest gives the juices time to settle back into the meat instead of flooding out on first slice. Slice against the grain if you want the most tender bite. If the chicken seems to steam heavily on the plate, it was cut too soon.
How to Adapt These Baked Chicken Breasts Without Losing the Juicy Texture
Dairy-Free and Naturally Gluten-Free
The base recipe already fits both needs without any changes. Keep the seasoning blend the same and use olive oil, not butter, so the crust stays clean and the chicken still browns properly. This is one of those recipes where the simple version is already the right version.
Swap the Italian Seasoning for a Different Herb Profile
If you want a different direction, swap the Italian seasoning for dried thyme, rosemary, or a poultry blend. That changes the aroma more than the cooking method, so the texture stays the same, but the finished chicken will taste more woodsy and less tomato-pasta adjacent.
Make It Lighter on the Salt
You can reduce the salt slightly if you’re serving with a salty sauce or sides, but don’t cut it out completely. Salt helps the chicken taste seasoned all the way through, not just on the surface, and without enough of it the meat comes across as bland even when the spices are visible.
Storage and Reheating
- Refrigerator: Store in an airtight container for up to 4 days. The coating softens a little, but the chicken stays usable for lunches and quick dinners.
- Freezer: Freeze sliced or whole chicken breasts for up to 2 months. Wrap tightly and thaw in the refrigerator so they don’t release too much liquid when reheated.
- Reheating: Reheat gently in a covered skillet with a splash of water or in a low oven until just warmed through. High heat dries the lean meat out fast, so don’t blast it in the microwave unless you’re okay with a tougher texture.
Questions I Get Asked About This Recipe

Baked Chicken Breasts
Ingredients
Equipment
Method
- Preheat oven to 425°F and lightly grease a baking dish. Keep the oven fully preheated before baking so the tops brown quickly.
- Pound chicken breasts to an even 3/4-inch thickness if they vary in size. Aim for uniform thickness so everything finishes at the same time.
- Brush both sides of each chicken breast with olive oil. The oil helps the herb crust caramelize in the oven.
- Mix together garlic powder, onion powder, smoked paprika, Italian seasoning, salt, and pepper. Rub the seasoning evenly over both sides so no area is bare.
- Bake at 425°F for 18-22 minutes until internal temperature reaches 165°F and the tops are golden. Do not overbake.
- Rest for 5 minutes before slicing. This brief rest helps the juices settle for a moist interior.
- Slice and garnish with fresh parsley and lemon wedges. Serve while the herb crust is still fragrant.