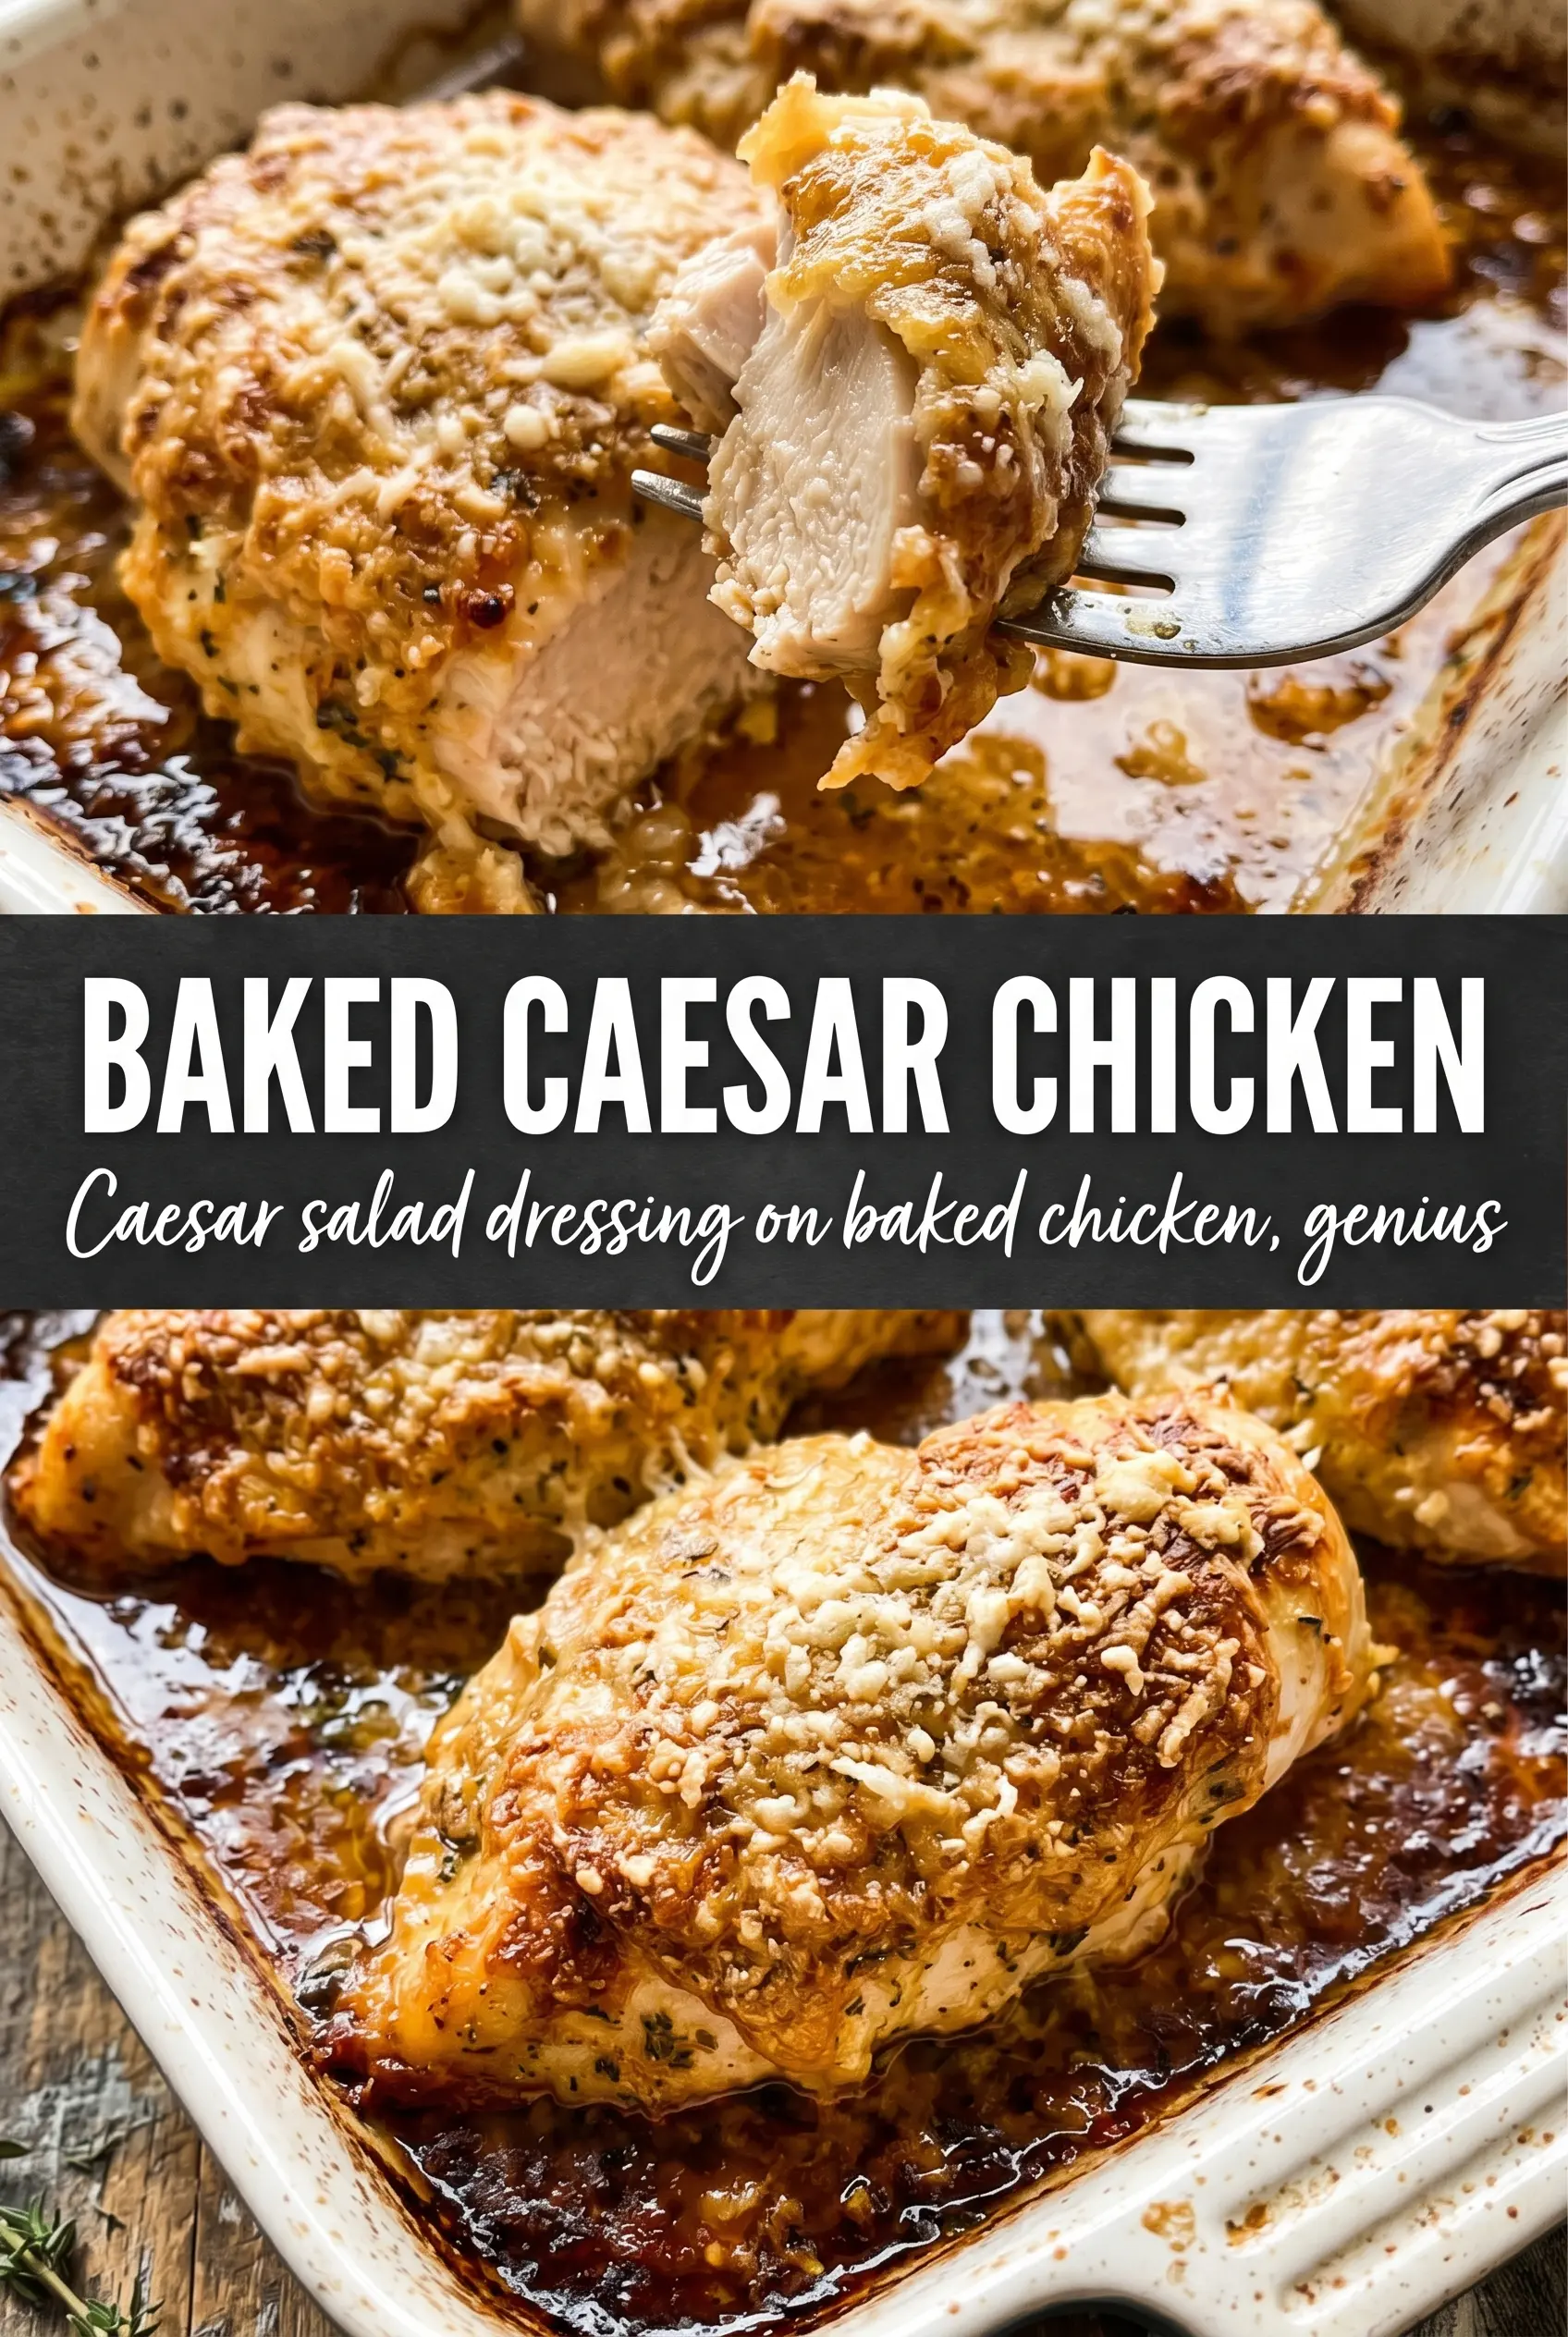
Golden, crackled Caesar chicken is the kind of dinner that gets attention the second it comes out of the oven. The top turns deeply savory and crisp from Parmesan and panko, while the chicken underneath stays juicy and coated with that familiar creamy, garlicky Caesar flavor. It lands somewhere between a breaded cutlet and a casserole, which is exactly why it keeps earning a place on the weeknight rotation.
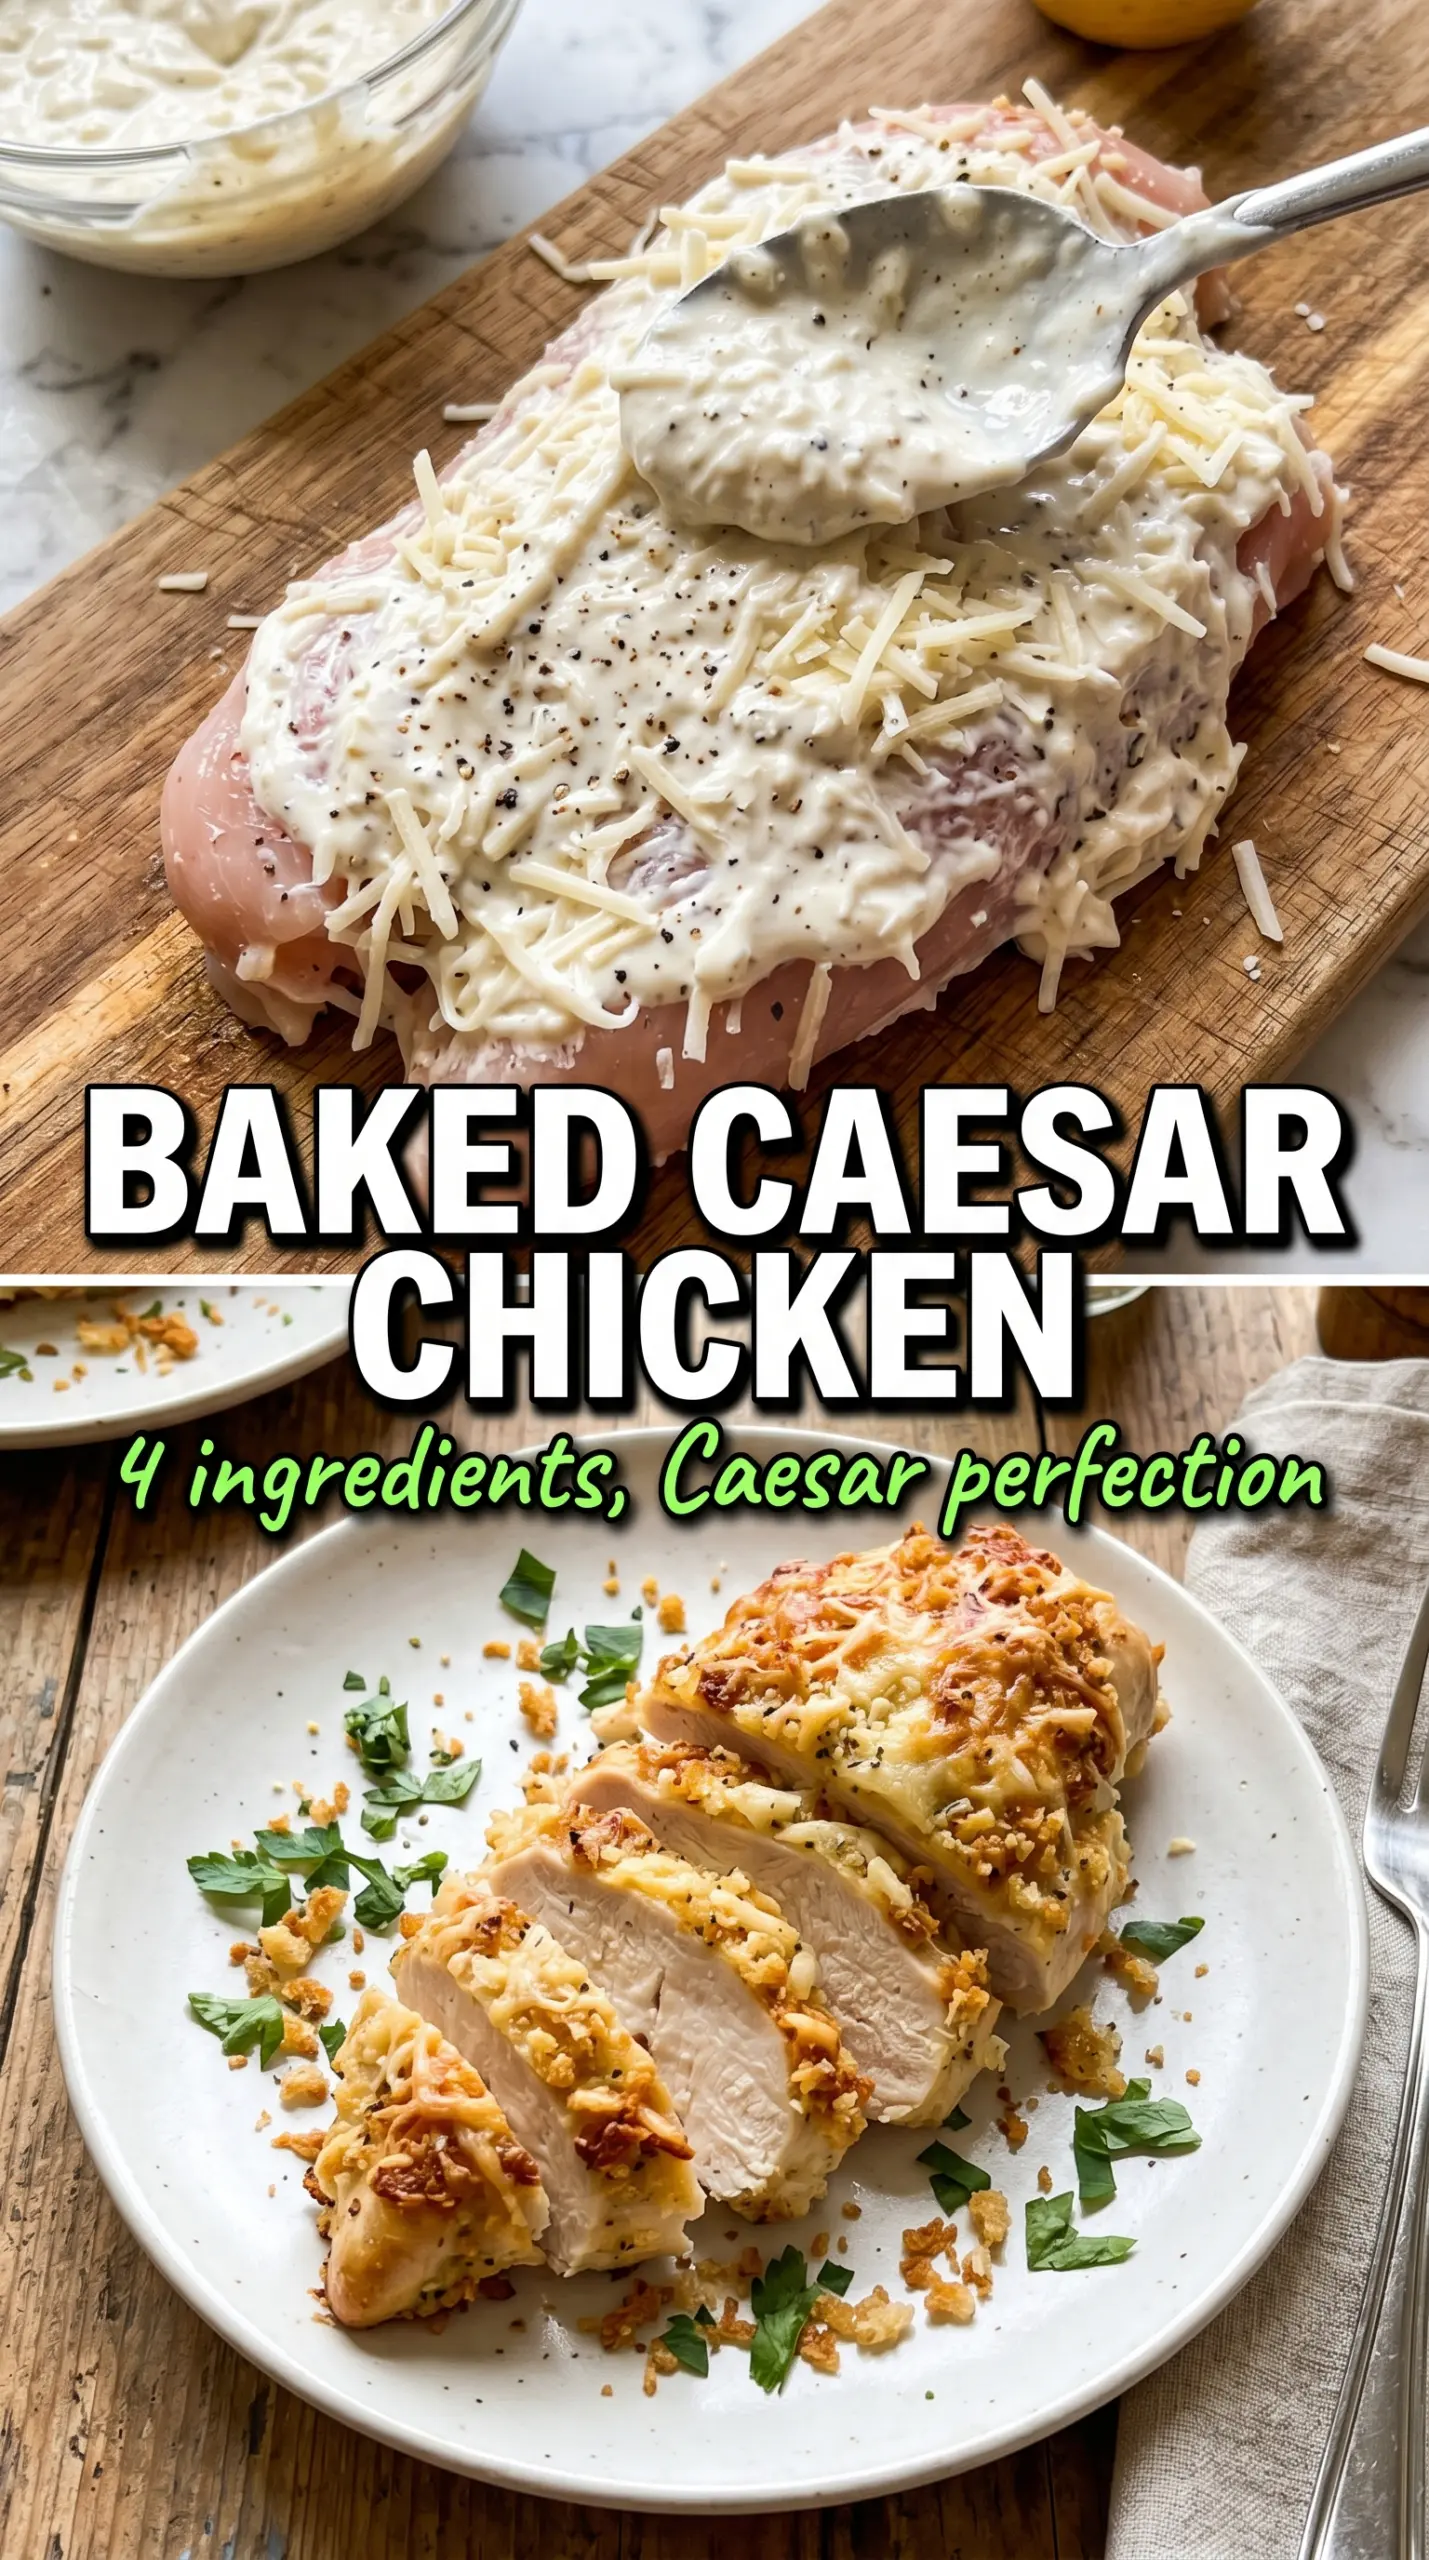
The trick is in the layering. A short marinate with Caesar dressing, Parmesan, garlic powder, and lemon zest seasons the chicken all the way through before it bakes, then the breadcrumb-Parmesan topping gives you that browned crust you’d normally only get from frying. Freshly grated Parmesan matters here because it melts and browns better than the shelf-stable kind, and the lemon zest keeps the whole dish from tasting heavy.
Below, you’ll find the small details that keep the coating crisp, plus a few ways to adapt this bake if you need a gluten-free version or want to change up the serving style.
The panko-Parmesan top got crisp without drying out the chicken, and the lemon zest kept the Caesar flavor from feeling too heavy. I served it with romaine and croutons and there wasn’t a bite left.
Love the golden Parmesan crust on this Baked Caesar Chicken? Save it to Pinterest for an easy chicken dinner that bakes up savory, crisp, and ready for romaine and croutons.
The Part That Keeps the Chicken Juicy Under a Crisp Caesar Crust
The biggest mistake with baked chicken is treating the topping like it’s the whole story. It isn’t. The short marinate in Caesar dressing does two jobs at once: it seasons the meat and gives the surface enough moisture for the Parmesan-Panko layer to adhere. If you skip that rest, the crust tends to slide or bake up patchy instead of forming one even layer.
The other piece that matters is heat. Four hundred degrees is hot enough to brown the cheese and breadcrumbs before the chicken dries out. If your breasts are very thick, pound them to an even thickness so the centers finish when the crust is already deep golden. Uneven chicken is the main reason this kind of bake goes from crisp to overdone.
What Each Ingredient Is Actually Doing in This Bake
- Caesar dressing — This is the marinade and the flavor base. A good store-bought version works fine here because it brings fat, salt, garlic, and tang in one step. If yours is very thick, loosen it with a teaspoon or two of lemon juice so it coats the chicken more evenly.
- Freshly grated Parmesan — This is what gives you the sharp, salty crust and the toasted edges. Pre-grated cheese can work in a pinch, but it doesn’t melt and brown as cleanly because of the anti-caking agents. Grate it finely so half goes into the marinade and the rest blends with the panko.
- Panko breadcrumbs — Panko gives the top its crisp, crackly finish. Regular breadcrumbs will work, but they bake up denser and less airy. If you need gluten-free, use gluten-free panko and keep the same pressing technique.
- Lemon zest — This keeps the dish bright. It doesn’t make the chicken taste lemony; it just cuts through the richness of the Caesar dressing and Parmesan. Fresh zest matters more than bottled lemon juice here.
- Romaine and croutons — These turn the chicken into a full Caesar-style plate instead of just a baked entrée. Add them after baking so the salad stays cool and the croutons stay crunchy.
How to Build the Crust So It Browns Instead of Burning
Mix the Marinade First
Stir the Caesar dressing, half the Parmesan, garlic powder, and lemon zest together before adding the chicken. That keeps the seasoning evenly distributed, so every bite tastes like Caesar instead of landing in salty pockets. Coat the chicken fully and let it sit for 20 minutes. Any longer and the dressing can start to soften the surface too much, which makes the topping less crisp.
Press the Topping on With a Light Hand
Combine the remaining Parmesan with the panko, then press it onto the chicken instead of scattering it over the top. You want contact, not a snowdrift. A gentle press helps the crumbs cling and brown as one sheet. If the chicken looks wet on top, the coating will still stick; if it seems dry, spoon a little of the marinade over the surface before adding the crumbs.
Bake Until the Edges Turn Deep Gold
Put the chicken in a greased dish with a little space between pieces so steam can escape. Bake until the crust is golden and the thickest part of the chicken hits 165°F. If the topping browns before the chicken is cooked through, lay a loose piece of foil over the top for the last few minutes. Don’t seal it tightly or you’ll trap steam and lose that crisp finish.
Finish Like a Caesar Salad Plate
Let the chicken rest for a few minutes before serving. That keeps the juices inside instead of spilling out the second you cut it. Top with romaine, croutons, shaved Parmesan, and a small drizzle of extra dressing. The contrast of hot chicken and cool salad is what makes this feel complete.
Three Ways to Make This Baked Caesar Chicken Work for Your Table
Gluten-Free Caesar Chicken
Swap the panko for gluten-free panko and keep the rest of the method the same. The crust will still brown and crisp, though it may be a touch more delicate. Press it on firmly so it doesn’t slide off when the dressing starts to bubble in the oven.
Dairy-Free Version
Use a dairy-free Caesar dressing and skip the Parmesan, then mix the topping with seasoned breadcrumbs and a little nutritional yeast if you want some of that savory edge back. You’ll lose the salty, nutty cheese crust, but the chicken still bakes up crisp and Caesar-like.
Use Chicken Thighs Instead
Boneless, skinless thighs work if you want richer meat and a little more forgiveness on the timing. They usually need a few extra minutes, and the crust may not sit as neatly because of the shape, but the flavor is excellent. Check that the center reaches 165°F and bake until the topping is deeply browned.
Make It a Caesar Cutlet Dinner
Slice the breasts in half horizontally before marinating if you want thinner pieces that cook faster. You’ll get more crust per bite and a better chicken-to-salad ratio, but the bake time drops, so start checking early. This is the version I make when I want a lighter plate that still feels complete.
Storage and Reheating
- Refrigerator: Store leftovers for up to 3 days. The crust softens, but the flavor holds up well.
- Freezer: It freezes, though the topping won’t stay crisp. Wrap portions tightly and freeze for up to 2 months, then thaw in the fridge before reheating.
- Reheating: Warm in a 350°F oven until heated through. The oven brings the crust back better than the microwave, which turns the topping soggy and can overcook the chicken edges.
Answers to the Questions Worth Asking
Baked Caesar Chicken
Ingredients
Equipment
Method
- Mix Caesar dressing, 1/2 cup Parmesan, garlic powder, and lemon zest in a bowl, until evenly combined.
- Season the chicken breasts with salt and pepper, then marinate in the Caesar mixture for 20 minutes.
- Preheat the oven to 400°F and grease a baking dish.
- Remove the chicken from the marinade and place it in the dish.
- Combine the remaining 1/4 cup Parmesan with the panko breadcrumbs, then press the mixture over the top of each breast.
- Bake for 22-25 minutes at 400°F, until the crust is golden and the internal temperature reaches 165°F.
- Top the baked chicken with chopped romaine and croutons.
- Drizzle with extra Caesar dressing, then finish with shaved Parmesan.