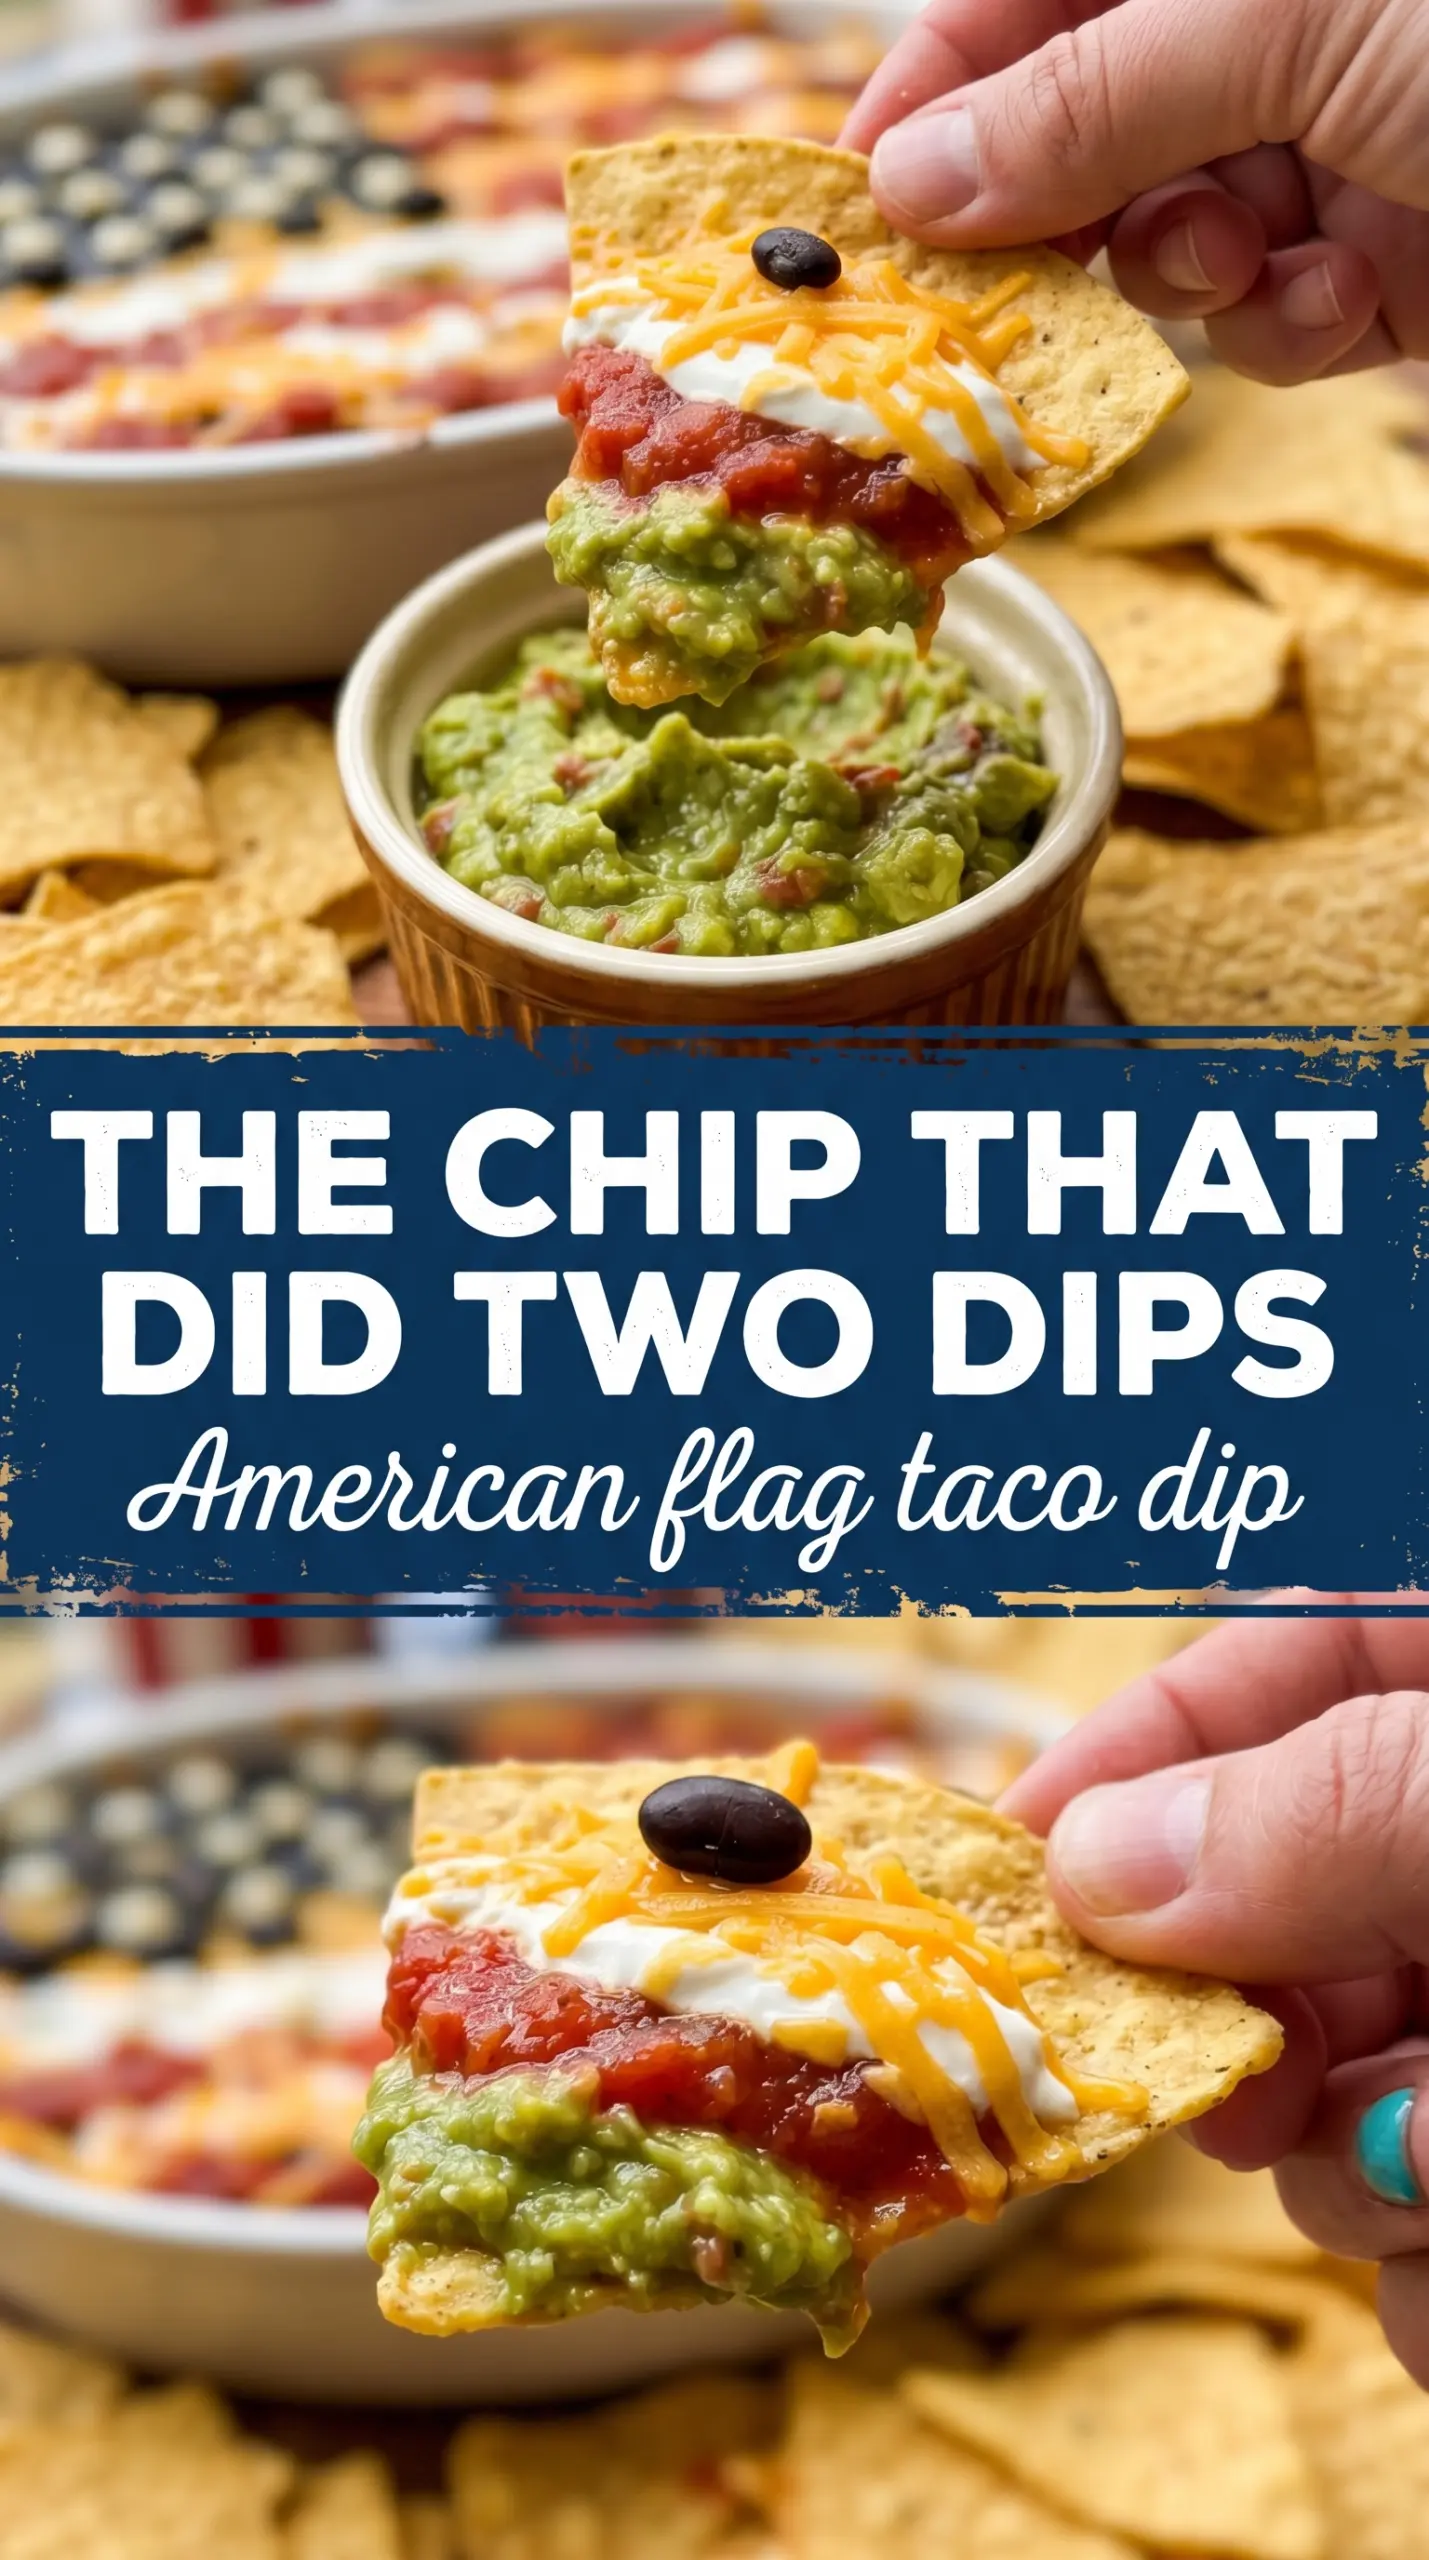
American Flag Taco Dip is the kind of party appetizer that gets people hovering around the table before dinner is even called. It’s creamy, salty, cool, and packed with the taco flavor everyone expects from a layered dip, but the flag design gives it the kind of pull that makes it disappear fast. The best part is that it still eats like a proper dip, not a decoration that happens to be edible.
This version works because the layers are built to stay distinct. The bean layer gives the base some grip, the cream cheese and taco seasoning make a thick middle that doesn’t collapse, and the guacamole adds a smooth layer that helps the toppings sit on top instead of sinking in. Chilling it before serving matters, too. That short rest firms up the layers just enough so the flag pattern holds when the chips start diving in.
Below, I’ve included the little details that make the design easier to pull off, plus the swaps that still keep the dip sturdy and party-ready. If you’ve ever had a layered dip blur into one soft scoop, this version fixes that.
The layers stayed neat even after sitting out for a while, and the sour cream stripes held their shape better than I expected. My kids thought the olive corner was the coolest part.
Save this American Flag Taco Dip for the next cookout, with its sturdy layers, sour cream stripes, and easy red, white, and blue design.
The Layer Order That Keeps the Flag From Smearing
The biggest mistake with a decorated taco dip is putting the wettest ingredients too low or too early. Once salsa or sour cream gets mixed into the top layers, the pattern turns muddy fast. This version keeps the beans and seasoned cream cheese underneath, where they act like a base that can handle the moisture from the guacamole and toppings above.
The other thing that matters is texture. Softened cream cheese beats cold cream cheese every time here, because it blends with the taco seasoning into a spreadable layer instead of leaving little lumps that tear up the beans below. Chilling the finished dip also helps the design hold, especially if you’re piping the sour cream stripes instead of spooning them on.
- Refried beans — These anchor the dip. A thicker brand gives the cleanest base, and if yours looks loose, stir it well before spreading so the layer doesn’t slide around.
- Cream cheese — This is what keeps the middle layer sturdy. Let it soften fully, or it will drag the bean layer up as you spread it.
- Sour cream — It makes the white stripes, so thick sour cream works better than a thin substitute. If you use Greek yogurt, choose plain full-fat for the closest texture, though it will taste tangier.
What Each Topping Is Doing in the Flag Design
- Guacamole — This gives the dip a creamy middle and helps separate the cheese from the base. Use a thick guacamole, not a loose one, or the flag topping will slide.
- Shredded Mexican cheese blend — This adds body and a little salt. Pre-shredded is fine here because the cheese is going on top, not melting into a sauce.
- Chunky salsa or pico de gallo — Chunky works better than smooth because it looks like red stripe detail instead of soaking into the sour cream. If your salsa is watery, drain it first or the top will bleed.
- Black olives — These create the blue canton. Slice them thin and pack them tightly so the corner reads as a solid block from above.
- Cherry tomatoes or red bell pepper — These give the red stripes their color and a fresh bite. Dice them small so they sit neatly between the sour cream lines.
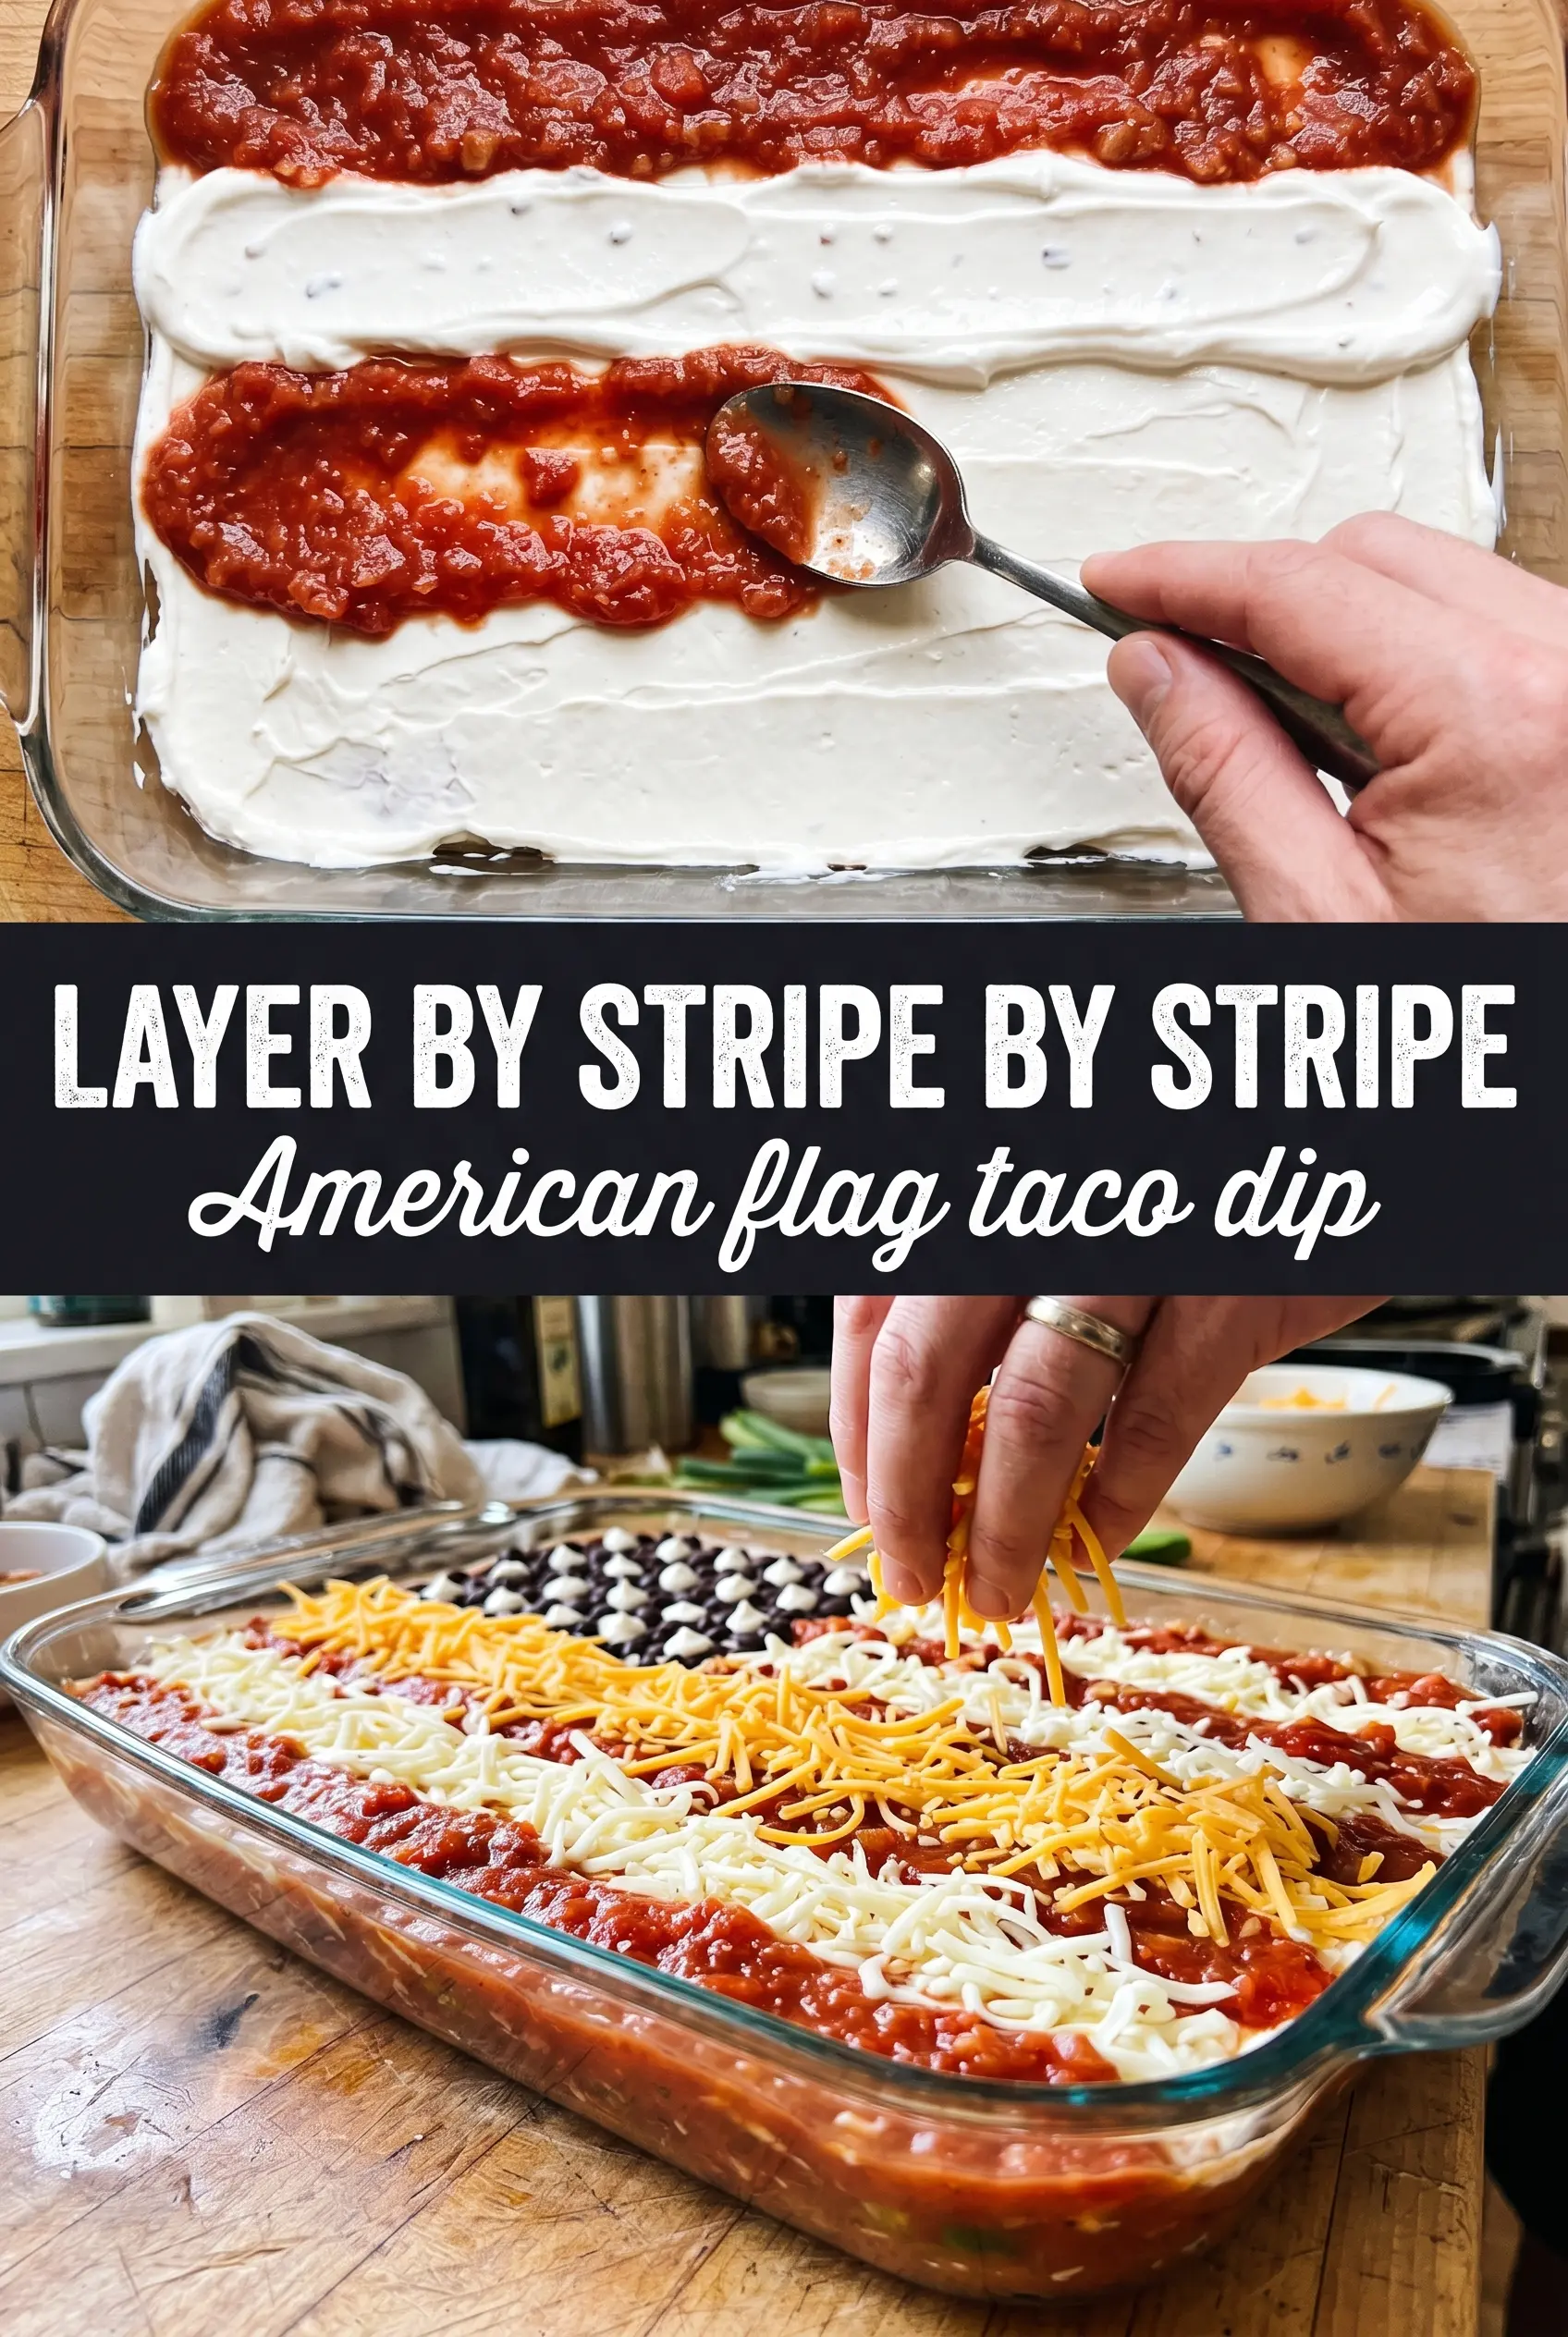
Building the Flag So the Lines Stay Clean
Starting With the Base
Spread the refried beans in an even layer first, all the way to the corners of your rectangular dish. Then blend the softened cream cheese with the taco seasoning until it’s smooth and spread that on top in a thin, even layer. If the cream cheese is still cold, it will tear the beans and leave gaps, which shows up fast once you start decorating.
Layering the Middle
Spread the guacamole gently over the cream cheese, then add the shredded cheese on top. Use the back of a spoon or an offset spatula so you’re laying it down instead of pressing hard. The goal is a flat surface, not a compressed one; if you mash the layers, the toppings sink and the stripes lose definition.
Creating the Stripes and Canton
Pipe the sour cream in horizontal stripes across the top using a piping bag or a zip-top bag with the corner snipped off. Spoon the salsa or diced red tomato between those lines so the colors stay separated. For the blue corner, pack the sliced olives tightly into the upper left area rather than scattering them, because a loose arrangement won’t read like a flag from overhead.
Chilling Before Serving
Let the finished dip rest in the fridge for about 30 minutes. That short chill firms the cream cheese layer and keeps the sour cream from sliding when the chips go in. If you’re taking it to a party, cover it loosely so the design doesn’t get smudged by plastic wrap touching the top.
How to Adapt This Dip for a Bigger Crowd or a Different Diet
Dairy-Free Version That Still Holds Its Shape
Use dairy-free cream cheese and dairy-free sour cream, but choose thicker styles made for spreading, not the pourable kind. The texture won’t be quite as rich, but the layers will still stay neat if both substitutes are firm.
Gluten-Free Party Dip
The dip itself is naturally gluten-free as long as your taco seasoning packet is certified gluten-free. Some seasoning blends use fillers, so that’s the label worth checking before you mix it in.
How to Stretch It for a Larger Crowd
Double everything and move to a larger sheet-pan style tray if you need more servings. Keep the layers thin and even so the top still reads like a flag instead of a thick mound of toppings.
Storage and Reheating
- Refrigerator: Cover and refrigerate for up to 3 days. The flag design softens a bit, but the flavor stays good.
- Freezer: I don’t recommend freezing this dip. The sour cream, guacamole, and cream cheese change texture after thawing and the layers turn watery.
- Reheating: This dip is meant to be served chilled or at cool room temperature, not reheated. If it’s been in the fridge a while, let it sit out for 10 to 15 minutes before serving so the layers loosen slightly without sliding.
Answers to the Questions Worth Asking
American Flag Taco Dip
Ingredients
Equipment
Method
- Spread the refried beans in an even layer across the bottom of a large rectangular baking dish or serving tray.
- Mix the softened cream cheese with the taco seasoning until smooth, then spread evenly over the bean layer.
- Spread the guacamole over the cream cheese layer, then top with the shredded Mexican cheese blend.
- Spoon the sour cream into a piping bag or zip-lock bag with a corner snipped and pipe horizontal white stripes across the top of the dip.
- Add rows of salsa or diced red tomato between the sour cream stripes to create the red stripe effect.
- In the upper left corner, arrange the sliced black olives tightly to form the blue canton rectangle.
- Scatter the green onions across the top.
- Chill the dip for 30 minutes to help the layers set, then serve with tortilla chips.