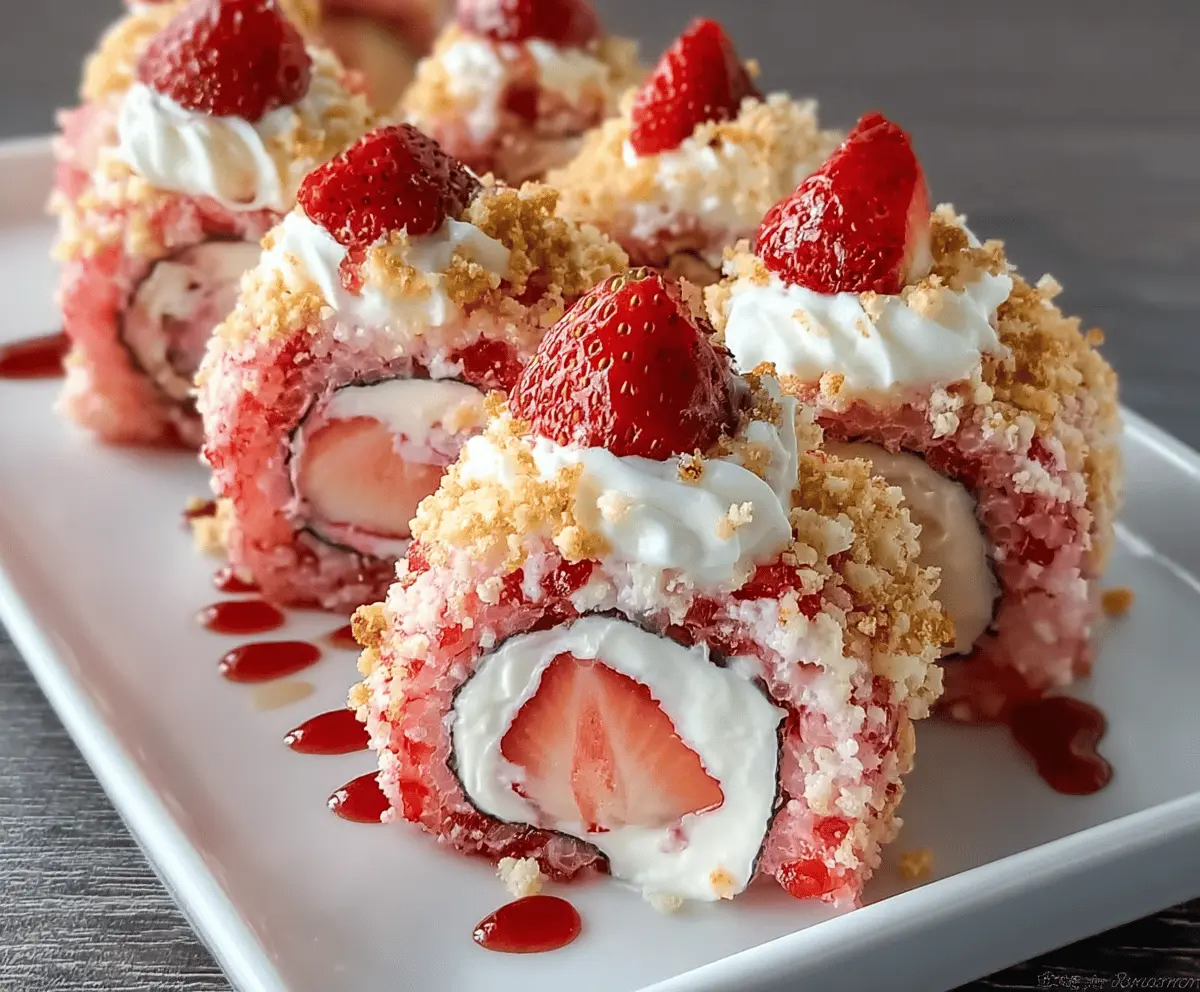
Sweet Strawberry Shortcake Sushi Rolls bring the fun of sushi-night to dessert—with all the flavors you love from a classic American strawberry shortcake. Instead of rice and nori, you’ll roll a soft, buttery cake around a billowy vanilla–mascarpone cream and juicy macerated strawberries, then slice it into adorable, bite-size “maki.” Each piece looks fancy but tastes like a backyard cookout favorite: bright berries, lightly sweet cream, and that unmistakable shortcake richness.
This playful twist is perfect for spring and summer gatherings, baby showers, birthdays, or anytime you want a no-fuss showstopper. The technique is simple: flatten thin slices of pound cake into a single sheet, spread on cream, add a neat line of berries, roll, chill, and slice. The result is tidy, hand-held portions with clean pinwheel swirls—no fork required, just smiles.
If you’re craving the comfort of shortcake without turning on the oven for long, these chilled dessert rolls are a dream. They prep ahead beautifully, travel well, and make plating effortless. Serve them as-is, or pair with a quick strawberry “dip” made from jam loosened with a splash of lemon—like dessert soy sauce for sushi night.
Key Ingredients & Substitutions
These rolls keep pantry-friendly ingredients front and center. Choose ripe strawberries and a good-quality cake for the best flavor and structure. Here’s what matters and how to swap if needed.
Strawberries: Fresh, ripe berries deliver the brightest flavor and color. If out of season, use high-quality frozen sliced strawberries (thawed and well-drained) or substitute raspberries for a tangier profile.
Pound Cake: A store-bought vanilla pound cake gives you “shortcake” richness and a flexible crumb that presses and rolls cleanly. Substitute sponge cake or angel food cake for a lighter bite; gluten-free pound cake works well too.
Mascarpone: Adds luxurious body to the cream so the roll holds its shape. Swap with full-fat cream cheese for a tangier note; soften it well and beat smooth before folding into the whipped cream.
Heavy Cream: Whips into a stable cushion for the filling. If you prefer dairy-free, use a chilled coconut whipping cream and pair it with vegan cream cheese to keep structure.
Vanilla & Lemon Zest: Vanilla warms the cream, while lemon zest lifts the berries. Use almond extract for a bakery-like aroma, or orange zest for a softer citrus touch.
Sugar: A little granulated sugar macerates the berries; powdered sugar sweetens the cream without graininess. Adjust to taste or swap with honey or maple syrup for subtle complexity.
Strawberry Jam (Optional): A quick glaze/dip and a thin brush on the cake help anchor the filling. Raspberry or mixed-berry jam are excellent substitutes.
Equipment You’ll Need
- Cutting board or large flat work surface
- Plastic wrap or parchment for rolling and chilling
- Rolling pin (or a clean bottle) to flatten cake slices
- Medium mixing bowl and whisk (or hand mixer)
- Microplane or zester for citrus
- Long serrated knife for clean slicing
- Small spatula or offset spatula for spreading
Flavor Variations & Add-Ins
- Chocolate-Drizzled: Finish slices with a thin drizzle of melted chocolate or roll the chilled log in finely shaved chocolate before slicing.
- Lemon–Blueberry: Swap berries for blueberries and add extra lemon zest to the cream; serve with lemon-curd “dip.”
- Strawberry–Basil: Add finely chopped fresh basil to the berries for a bright, herbaceous twist.
- Strawberry–Almond: Replace vanilla with almond extract and sprinkle sliced almonds across the cream.
- Matcha Sugar Rim: Roll the chilled log in a light dusting of matcha–powdered sugar for color and tea aroma.
- Cookies & Cream: Fold crushed vanilla sandwich cookies into the cream for a crunchy contrast.
- Dairy-Free Delight: Use vegan pound cake, coconut whip, and plant-based cream cheese; sweeten with maple syrup.
How to Make Sweet Strawberry Shortcake Sushi Rolls
Ingredients You’ll Need:
- 1 pound cake loaf (about 12–14 ounces), sliced into 8–10 thin slices
- 2 cups fresh strawberries, hulled and finely diced (plus a few sliced for garnish, optional)
- 2 tablespoons granulated sugar
- 1 teaspoon fresh lemon zest, plus 2 teaspoons lemon juice (divided)
- 4 ounces mascarpone (or softened cream cheese)
- 1 cup cold heavy whipping cream
- 1/3 cup powdered sugar (to taste)
- 1 teaspoon pure vanilla extract (or 1/4 teaspoon almond extract)
- 3 tablespoons strawberry jam, warmed (optional, for brushing and dipping)
- Pinch of fine sea salt
How Much Time Will You Need?
Plan for about 25 minutes of hands-on prep and at least 30–45 minutes of chilling before slicing. The rolls can be made up to 24 hours ahead, making them ideal for entertaining.
Step-by-Step Instructions:
1. Macerate the Strawberries
Add the diced strawberries, granulated sugar, and 1 teaspoon lemon juice to a bowl. Toss to combine and let stand 10–15 minutes, stirring once or twice, until the berries release a light syrup. Drain excess liquid to keep the roll tidy, then fold in the lemon zest. Set aside.
2. Whip the Vanilla–Mascarpone Cream
In a medium bowl, whisk the mascarpone until smooth. In a separate bowl, whip the cold heavy cream, powdered sugar, vanilla, and a pinch of salt to medium peaks. Fold the whipped cream into the mascarpone in two additions until silky and spreadable. Taste and adjust sweetness if needed.
3. Build the Cake “Sheet”
Lay a large sheet of plastic wrap or parchment on your work surface. Arrange the pound cake slices in a tight rectangle (two rows), slightly overlapping edges so there are no gaps. Cover with another sheet of plastic and gently roll with a rolling pin to compress into a cohesive sheet about 1/4 inch thick. Remove the top plastic. If using, brush a very thin layer of warmed strawberry jam to help the filling adhere.
4. Spread and Roll
Evenly spread the mascarpone cream over the flattened cake, leaving a 1-inch border on one short side. Spoon a compact line of macerated strawberries along the opposite edge. Using the plastic or parchment to help guide, roll the cake tightly over the filling, ending seam-side down. Wrap the log securely and refrigerate at least 30 minutes to firm.
5. Slice and Serve
Unwrap and trim the ends of the chilled roll. Slice into 1-inch pieces with a sharp serrated knife, wiping clean between cuts. Arrange on a platter and, if desired, serve with a small bowl of strawberry jam mixed with a splash of lemon juice as a “dipping sauce.”
Pro Tips for Best Texture & Taste
Keeping the balance between soft cake, creamy filling, and juicy fruit is key to perfect shortcake sushi rolls. A few tricks make the process smoother and the results more impressive.
- Use cold equipment when whipping cream—it helps build stable peaks fast.
- Don’t overfill the roll; a modest line of strawberries prevents bursting or sliding.
- Chill before slicing for clean, bakery-worthy swirls.
- Press cake slices firmly before rolling to create a smooth, unified layer.
- Serve slightly chilled, not ice-cold, for the best flavor release.
Frequently Asked Questions
Can I make these rolls ahead of time?
Yes! Assemble and roll up to 24 hours in advance. Keep the log tightly wrapped in plastic and slice just before serving for the freshest presentation.
Can I make them vegan or dairy-free?
Absolutely. Use vegan pound cake or sponge cake, coconut whip instead of heavy cream, and plant-based cream cheese for the filling. The flavor stays rich and creamy with a tropical hint.
How do I store leftovers?
Refrigerate leftover rolls in an airtight container for up to 3 days. The cake may absorb some moisture, but the flavor remains delightful. Avoid freezing—they lose texture when thawed.
Can I use other fruits?
Yes! Try mixed berries, mango, peaches, or kiwi. Softer fruits like raspberries and peaches benefit from gentle blotting before use to reduce moisture.